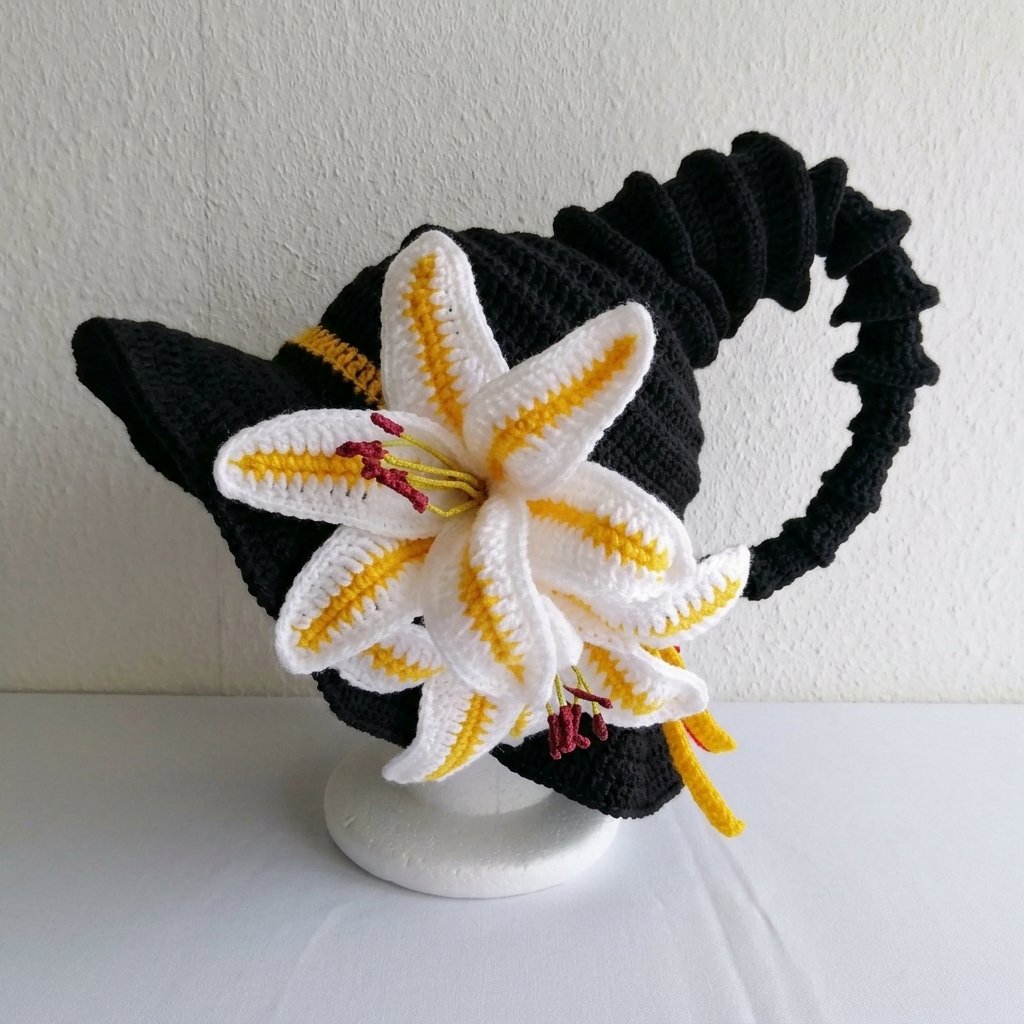
If you are looking for an enchanting, storybook Halloween costume piece, this fantasy crochet spiral witch hat is an absolute showstopper. Designed with a curved horn tip, tiered sculptural ridges along the cone, a wide flared brim, and finished with a striking handmade tiger lily and hatband, this hat brings fairy-tale magic to life. Below you will find the complete written pattern and step-by-step video tutorial.
Worked seamlessly in double crochet from the tip of the curved horn down to the outer brim, this adult-sized pattern offers a comfortable, structured fit. The signature textured ridges are added directly onto the cone with surface crochet, giving the hat its segmented, twisted horn silhouette without requiring complicated seams. Grab your hook, choose your yarn, and let’s bring this whimsical project to your hook.
Table of Contents
What Will I Learn?
Following this detailed tutorial will guide you through several essential millinery and garment crochet techniques:
- Crocheting a slender spiral tube in rounds of double crochet for the curved horn tip
- Working structured increase tiers to expand from a 12-stitch point to a 90-stitch adult crown
- Maintaining even stitch counts across cylindrical crown rows for a secure, comfortable fit
- Calculating mathematical brim increases from 90 double crochets up to 195 stitches
- Stabilizing a wide crochet brim using a firm slip-stitch perimeter
- Adding raised surface ruffles (Tiers A, B, and C) to create segmented spiral horn flanges
- Crafting and assembling a decorative multi-petal crochet tiger lily with stamens and a contrasting hatband
Materials and Tools
Below is everything needed to crochet this spiral witch hat:
- Main Yarn: Approximately 250 g of worsted weight or DK acrylic yarn in Apple Green.
- Accent Yarns: Small amounts (approx 30 to 50 g each) of worsted or sport weight yarn in:
- Golden-Yellow (for the hatband and lily center)
- White (for the lily petals)
- Brown or Rust (for the flower stamens)
- Crochet Hook: 3.0 mm crochet hook (a smaller hook relative to worsted yarn ensures stiff, dense fabric that holds its conical shape).
- Craft Wire / Floral Wire: (Optional) 18 to 22 gauge craft wire inserted along the tip of the cone or brim edge to maintain the dramatic curve.
- Notions: Tapestry / yarn needle, sharp scissors, measuring tape, stitch markers.
Please note on yarn choice: A structured, smooth 100% acrylic or wool-blend yarn is ideal for this hat. Stiffer yarns provide the natural body needed for the curved horn and wide brim to stay aloft without flopping.
Finished Size and Gauge
- Size: Adult (fits head circumferences measuring 21 to 23 inches / 53 to 58 cm).
- Crown Height: Approximately 18 to 20 inches (45 to 50 cm) from the tip of the curved horn to the base of the crown.
- Brim Width: Approximately 4 to 5 inches (10 to 12.5 cm) around the entire brim perimeter.
- Gauge: Approximately 16 dc x 8 rows = 4 inches (10 cm) using a 3.0 mm hook.
Pattern Notes and Abbreviations
This pattern is written in standard US crochet terms.
| Abbreviation | Meaning |
|---|---|
| ch | chain |
| sl st | slip stitch |
| sc | single crochet |
| hdc | half double crochet |
| dc | double crochet |
| st(s) | stitch(es) |
| MC | magic circle (or magic ring) |
| rep | repeat |
Important Working Guidelines:
- Turning Chains: Ch 2 at the beginning of each round does not count as a stitch.
- Joining Rounds: Always slip stitch into the first true double crochet of the round to join; do not slip stitch into the beginning ch-2, as this will distort your stitch count.
- Increases (Inc): Work 2 double crochet stitches directly into the same designated stitch.
- Numbers in Brackets: (XX sts) indicates the total number of working stitches upon completing that round.
The Written Pattern: Hat Body & Brim (Rounds 1 to 59)
Section 1: Slender Horn Tip (Rounds 1 to 16)
Round 1: Into a magic circle (or ch-3 ring), work 12 dc. Join with a sl st to the first dc. (12 sts)
Rounds 2-16: Ch 2, work 1 dc into each stitch around. Sl st into the first dc to join. (12 sts per round)
(After Round 16, you will have a long, slender tube forming the curved tip of the horn).
Section 2: First Cone Expansion (Rounds 17 to 27)
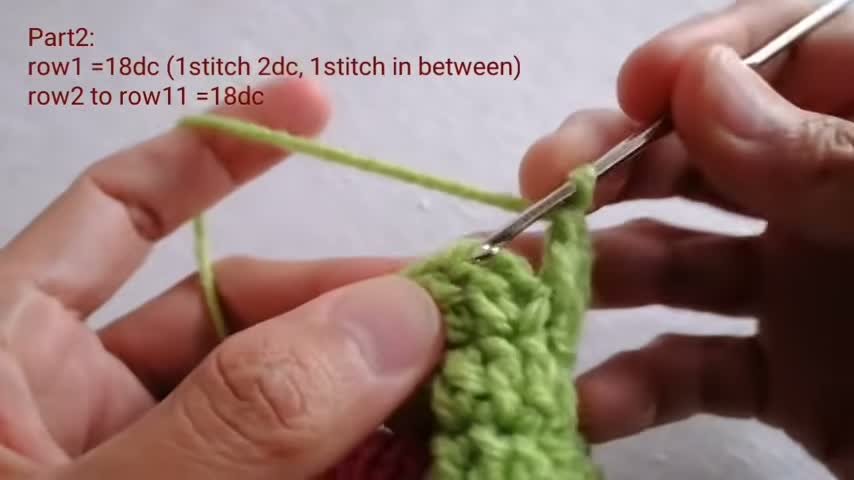
Round 17: Ch 2, *1 dc in the first stitch, 2 dc in the next stitch (increase)*; repeat from * around to the end of the round. Sl st to the first dc. (18 sts)
Rounds 18-27: Ch 2, work 1 dc into each stitch around. Join with a sl st to the first dc. (18 sts per round)
Section 3: Mid-Cone Expansion (Rounds 28 to 38)
Round 28: Ch 2, work 2 dc in every stitch around (increase in each stitch). Join with a sl st to the first dc. (36 sts)
Rounds 29-38: Ch 2, work 1 dc into each stitch around. Join with a sl st to the first dc. (36 sts per round)
Section 4: Crown Slope Increases (Rounds 39 to 44)
(In this section, we increase by 9 stitches per round to create a tapering cone leading into the head).
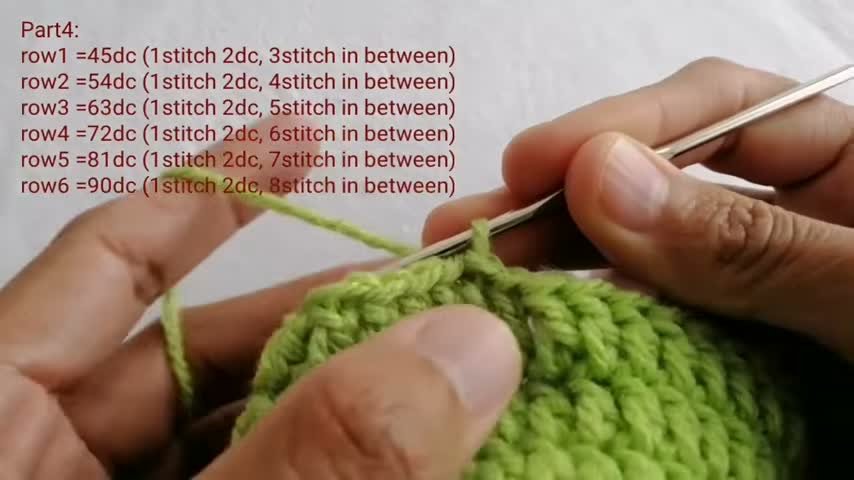
Round 39: Ch 2, *1 dc in each of the next 3 stitches, 2 dc in the next stitch*; repeat from * around. Join with a sl st. (45 sts)
Round 40: Ch 2, *1 dc in each of the next 4 stitches, 2 dc in the next stitch*; repeat from * around. Join with a sl st. (54 sts)
Round 41: Ch 2, *1 dc in each of the next 5 stitches, 2 dc in the next stitch*; repeat from * around. Join with a sl st. (63 sts)
Round 42: Ch 2, *1 dc in each of the next 6 stitches, 2 dc in the next stitch*; repeat from * around. Join with a sl st. (72 sts)
Round 43: Ch 2, *1 dc in each of the next 7 stitches, 2 dc in the next stitch*; repeat from * around. Join with a sl st. (81 sts)
Round 44: Ch 2, *1 dc in each of the next 8 stitches, 2 dc in the next stitch*; repeat from * around. Join with a sl st. (90 sts)
Section 5: Adult Crown Body (Rounds 45 to 51)
(These 7 straight rounds form the cylindrical crown that fits an adult head measuring 21 to 23 inches).
Rounds 45-51: Ch 2, work 1 dc into each stitch around. Join with a sl st to the first dc. (90 sts per round)
Section 6: Wide Flared Brim (Rounds 52 to 58)
(We now expand the brim by 15 stitches on every round to create a dramatic circular flare).
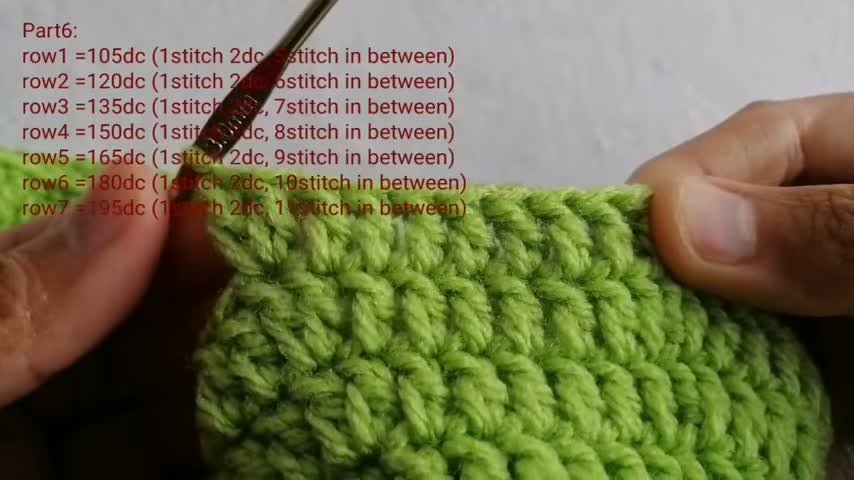
Round 52: Ch 2, *1 dc in each of the next 5 stitches, 2 dc in the next stitch*; repeat from * around. Join with a sl st. (105 sts)
Round 53: Ch 2, *1 dc in each of the next 6 stitches, 2 dc in the next stitch*; repeat from * around. Join with a sl st. (120 sts)
Round 54: Ch 2, *1 dc in each of the next 7 stitches, 2 dc in the next stitch*; repeat from * around. Join with a sl st. (135 sts)
Round 55: Ch 2, *1 dc in each of the next 8 stitches, 2 dc in the next stitch*; repeat from * around. Join with a sl st. (150 sts)
Round 56: Ch 2, *1 dc in each of the next 9 stitches, 2 dc in the next stitch*; repeat from * around. Join with a sl st. (165 sts)
Round 57: Ch 2, *1 dc in each of the next 10 stitches, 2 dc in the next stitch*; repeat from * around. Join with a sl st. (180 sts)
Round 58: Ch 2, *1 dc in each of the next 11 stitches, 2 dc in the next stitch*; repeat from * around. Join with a sl st. (195 sts)
Section 7: Brim Edge Finishing (Round 59)
Round 59: Work 1 slip stitch into every stitch around the entire brim perimeter. Sl st into the first sl st to join. Fasten off and weave in all yarn ends. (195 sts)
(This slip-stitch border firms up the outer edge, preventing waviness and helping the wide brim hold its circular shape).
Surface Sculptural Ridges (Tiers A, B, & C)
(These raised circular ruffles are worked directly around the exterior posts of the cone to create the iconic segmented spiral horn ridges).
Tier A: Slender Tip Ridges (Worked 4 times)
- Starting 5 rounds down from the tip (around Round 5): attach Apple Green yarn around the post of any stitch in that round.
- Row 1: Work 1 single crochet around each stitch post around the circumference. Sl st to join, fasten off, and weave in ends.
- Repeat this single-row ridge 4 times in total, leaving 5 rounds of plain dc between each ridge (worked approximately at Rounds 5, 10, 15, and 20).
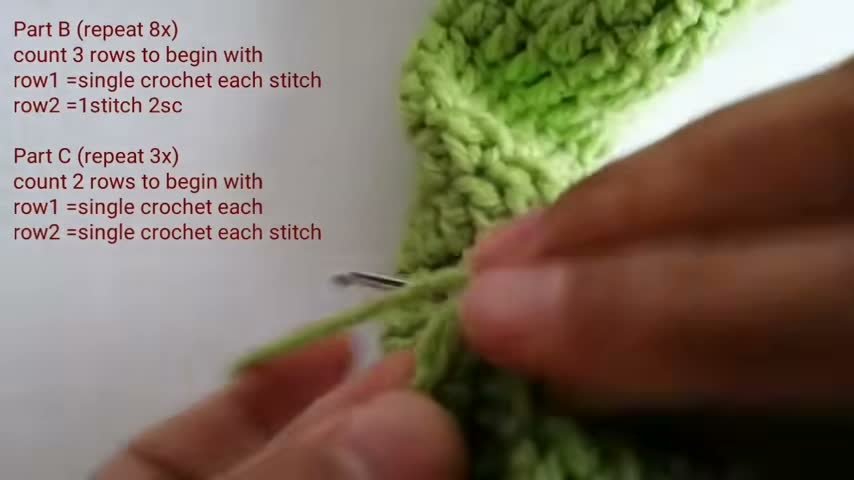
Tier B: Flared Ruffle Ridges (Worked 8 times)
- Count 3 rounds down from the previous ridge:
- Row 1: Work 1 single crochet around each stitch post around the cone. Join with a sl st.
- Row 2: Ch 1, work 2 single crochets in each stitch around. Join with a sl st, fasten off. (This increase round forces the ridge to fan outward into a flared accordion ruffle).
- Repeat this 2-round flared ruffle 8 times in total, spacing each ridge 3 rounds apart down the middle cone.
Tier C: Lower Cone Structured Ridges (Worked 3 times)
- Count 2 rounds down from the previous ruffle:
- Row 1: Work 1 single crochet around each stitch post around the circumference. Join with a sl st.
- Row 2: Ch 1, work 1 single crochet in each stitch around. Join with a sl st, fasten off.
- Repeat this 2-round structured ridge 3 times in total, spacing each ridge 2 rounds apart as the cone transitions into the crown.
Tiger Lily Flower & Hatband
1. Contrasting Yellow Hatband
- Using Golden-Yellow yarn, chain 95 to 105 chains (or until the chain cord measures approx 28 to 30 inches).
- Work 1 row of single crochet back along the chain. Fasten off.
- Wrap the band snugly around the junction where the crown meets the brim (between Rounds 51 and 52) and tie with hanging tails on the side.
2. Crocheted Tiger Lily Petals (Make 6)
- Center Petal Strip: With Golden-Yellow yarn, chain 22.
- In 2nd ch from hook, work: 1 sc, 1 hdc in each of next 2 ch, 1 dc in each of next 14 ch, 1 hdc in each of next 2 ch, 3 sc in the final chain to turn around the point.
- Working back down the opposite edge: 1 hdc in each of next 2 ch, 1 dc in each of next 14 ch, 1 hdc in each of next 2 ch. Join with a sl st to the first sc.
- Outer Wired Border: Drop yellow and join White yarn. Lay a thin strand of craft/floral wire along the outer edge of the petal, crocheting over it:
- Sc in each stitch up the petal side, work [1 sc, ch 1, 1 sc] into the tip point, and sc in each stitch down the other side. Fasten off leaving a wire and yarn tail.
3. Stamens & Pistil
- Cut 6 lengths of floral wire (approx 4 inches each).
- Wrap 5 wire tips with rust or brown thread to form realistic anthers, and wrap the remaining wire with pale green yarn for the pistil.
4. Flower Assembly & Attachment
- Bundle the stamens around the pistil in the center.
- Arrange 3 petals as an inner layer, and 3 petals overlapping as an outer layer.
- Twist the wire stems together at the base, and use the yarn tails to stitch the lily firmly onto the front brim directly over the yellow hatband tie.
- Gently bend and curl the wired petals outward to mimic a blooming lily, and curve the tip of the horn over to complete your fantasy silhouette.
Video Tutorial
If you prefer to follow along with every stitch count, ridge tier, and assembling step visually, watch the complete video tutorial below: https://www.youtube.com/embed/IW4h97jiAEM
Tips and Common Mistakes
- Use a Tight Tension: Using a 3.0 mm hook with worsted yarn creates a stiff, dense weave that naturally resists slouching. Keep your yarn tension firm throughout the cone and brim.
- Insert Wire for the Horn Tip: If your curly tip needs extra help holding its arch, slide a 12-inch piece of covered craft wire into the hollow tip of Part 1 before working Part 3.
- Count Stitches on the Slope: Part 4 increases by exactly 9 stitches on every row (Row 1 has 45, Row 2 has 54, etc.). Place a stitch marker at the beginning of each round to avoid skipping increases.
- Surface Ruffle Alignment: When working surface ruffles, follow the horizontal line between rows carefully so each circular ruffle sits straight and parallel around the cone.
FAQ
What size head does this hat fit?
This pattern is sized for an adult, fitting head circumferences between 21 and 23 inches (53 to 58 cm). The 7 straight rows of 90 dc in Rounds 45 to 51 ensure a comfortable, standard adult crown fit.
Can I make the brim wider or narrower?
Yes! To make a narrower brim, stop after Round 56 or Round 57. To make a wider, dramatic brim, simply continue adding increase rows following the established formula (e.g. Round 59 with 1 st 2 dc and 12 sts in between for 210 dc).
Does the hat require starch or stiffening spray?
Because it is worked tightly with a 3.0 mm hook, the hat holds its shape on its own. However, if your yarn has a softer drape, spraying the brim lightly with fabric stiffener or diluted PVA glue will give it a crisp, theatrical finish.
Can I customize the flower colors?
Definitely! While this tutorial features a striking white and golden-yellow tiger lily, you can craft black roses, deep purple dahlias, or fiery autumn marigolds to match your personal costume palette.
I would love to see your magical creations and unique color pairings, so please share your finished witch hats in the comments below. Happy crocheting, Meryem.