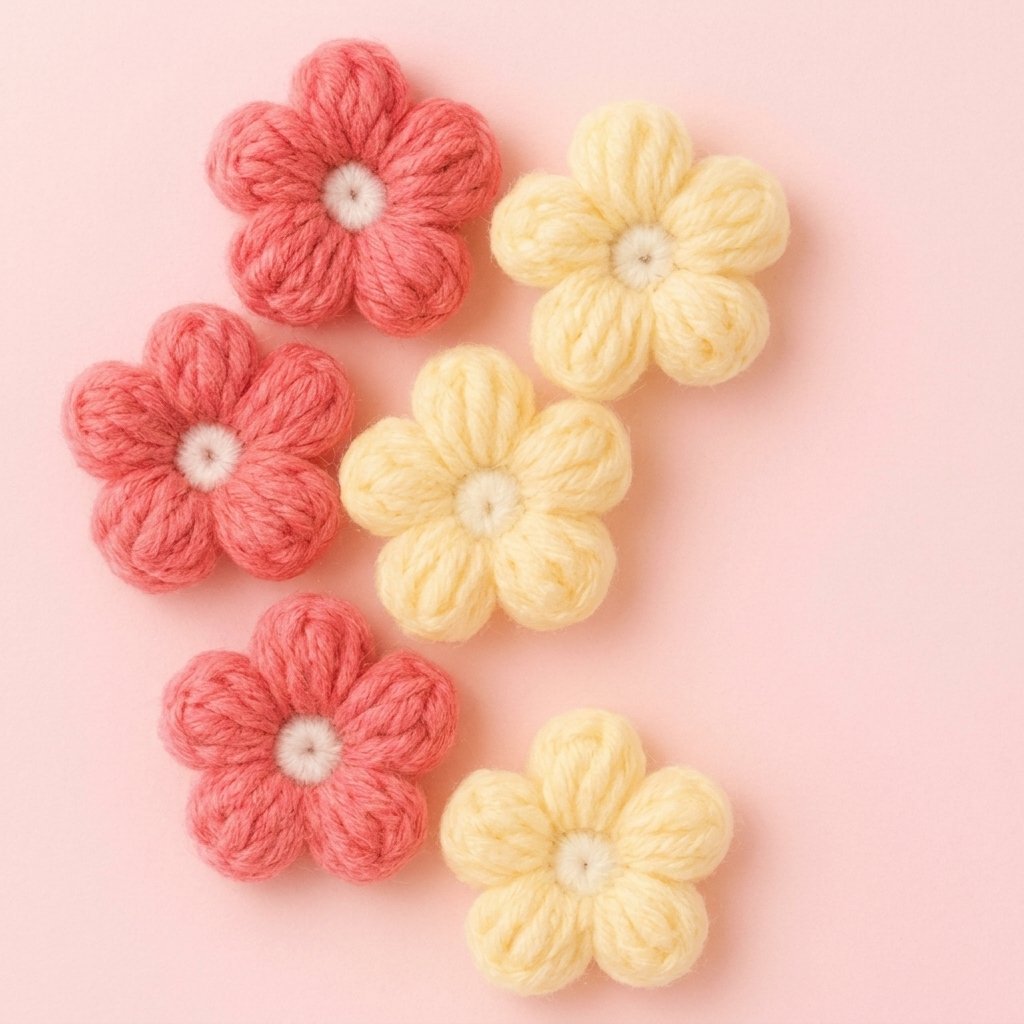
If you are looking for a charming, quick crochet project that brightens up any make, you will love learning how to make this crochet puff flower. These delightful, textured flowers have plump three-dimensional petals that look gorgeous on beanies, cardigans, baby blankets, bags, and hair clips. You can make a single flower as a sweet accent in just ten minutes, or join a bunch together to build a stunning floral project. Below you will find both the full step-by-step written pattern and the complete video tutorial, so you can choose the format that suits your learning style best.
Although the puffy, cloud-like petals look intricate, this is a beginner-friendly pattern using simple foundation stitches combined with basic yarn overs. I have broken down every movement slowly, from starting your center ring to pulling through your final loops, so you can crochet along with confidence. Grab your hook, pick out two coordinating yarn colours, and let us get started!
Table of Contents
What Will I Learn?
Crocheting small decorative motifs is a wonderful way to build your muscle memory and master new stitch mechanics without committing to a massive blanket. In this tutorial, you will practise several core crochet skills:
- How to start an adjustable magic ring and crochet smoothly into the circle
- How to work basic single crochet stitches to form a neat, circular flower center
- How to change colours cleanly by joining a second yarn shade with a slip stitch
- How to draw up elongated loops to create thick, volumetric puff stitches across two base stitches
- How to control tension on your hook when drawing a final loop through multiple stacked loops
- How to shape and pop three-dimensional petals so they hold their plump rounded form
- How to cinch the center ring tightly and weave in your loose ends securely
Materials and Tools
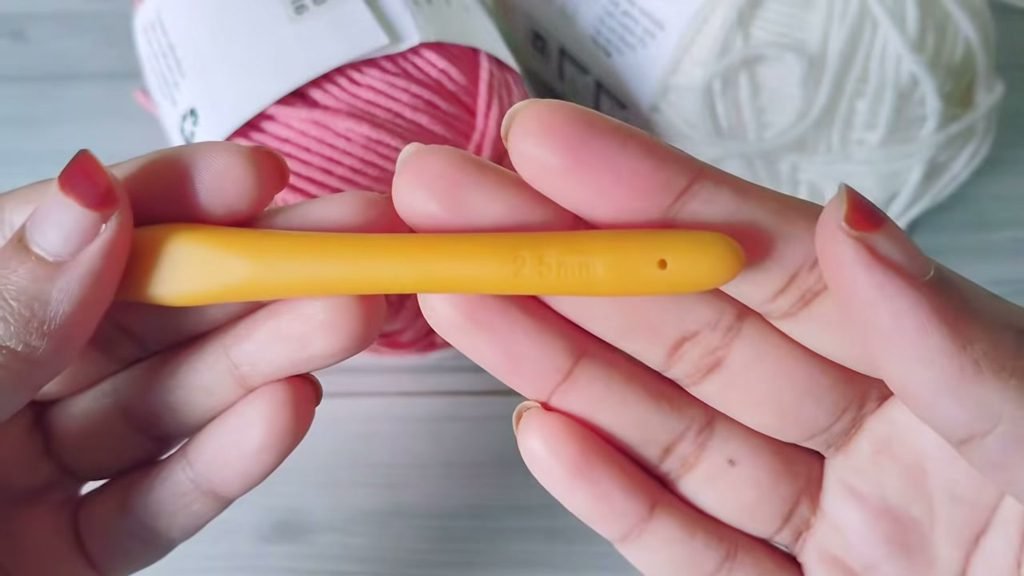
All the supplies you need to crochet your puff flower.
- Yarn: Medium weight 5-ply yarn in two colours (I used white for the center base and a soft peach colour for the outer petals). You can also use 4-ply yarn if you prefer a slightly lighter, delicate texture.
- Crochet Hook: 2.5 mm crochet hook (or the hook size recommended for your chosen yarn weight).
- Yarn Needle: A blunt tapestry needle for weaving in tails cleanly.
- Scissors: A sharp pair of craft scissors for cutting yarn.
Please note that you can substitute virtually any yarn weight from your stash for these flowers, from fine sport weight cotton up to chunky chenille blanket yarn. Simply choose a hook that matches your yarn gauge, keeping in mind that a slightly smaller hook creates denser, firmer petals that hold their puff shape beautifully.
Pattern Notes and Abbreviations
This pattern is written using standard US crochet terminology.
Abbreviations
- ch: chain
- sc: single crochet
- sl st: slip stitch
- st / sts: stitch / stitches
- yo: yarn over
- Rnd: round
Pattern Notes:
- The flower consists of two quick rounds: a flat 12-stitch circular center worked in white, followed by 6 puffy petals worked in peach.
- Each petal spans two single crochet stitches from the center ring, using a sequence of partial double crochet pull-ups to pack rich texture into every petal.
- When drawing up loops for the puff stitch, keep your hook level and gently pull the loops upward to about the height of your beginning chain-3. This prevents the flower from curling inwards.
- After completing each petal, use your finger from the back of the work to gently push the center of the puff outward towards the front so the petals remain rounded and puffy.
The Written Pattern
Follow these step-by-step instructions to create your crochet puff flower. Work slowly through your first petal, and once you establish the rhythm, the remaining five petals will fly off your hook.
Round 1: Center Base (White Yarn)
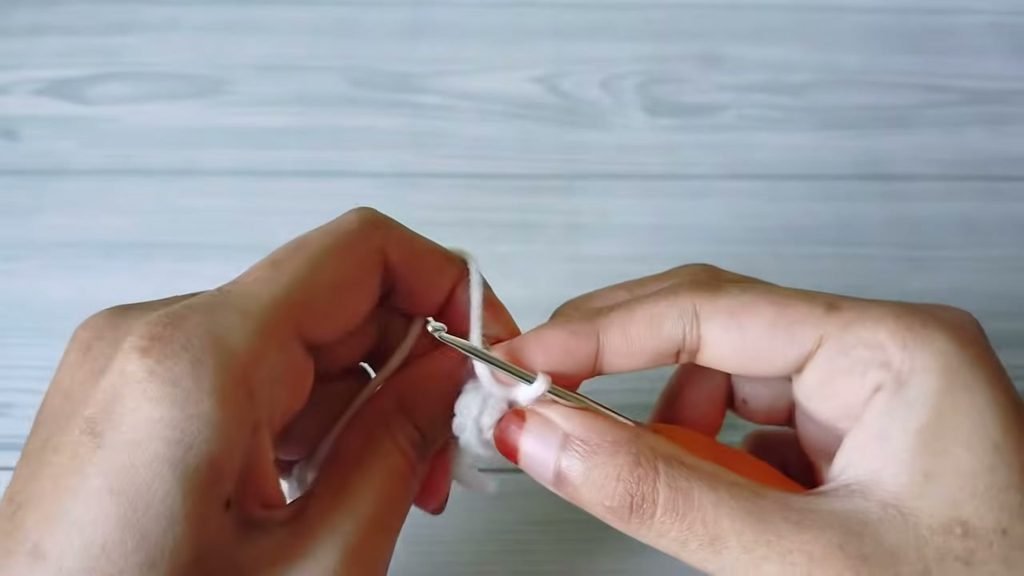
- Take your white yarn and create a magic ring by wrapping the yarn around two fingers to form a loop. Insert your hook into the loop, grab the working yarn, pull it through, and chain 1 to secure the ring.
- Work 12 single crochet (sc) stitches directly into the center of the magic ring.
- Pull the initial tail firmly to close the magic ring into a neat, tight circle. Do not join with a slip stitch here. Cut your white yarn, leaving a tail of about 3 to 4 inches. (12 sc)
Round 2: Petal 1 (Peach Yarn)
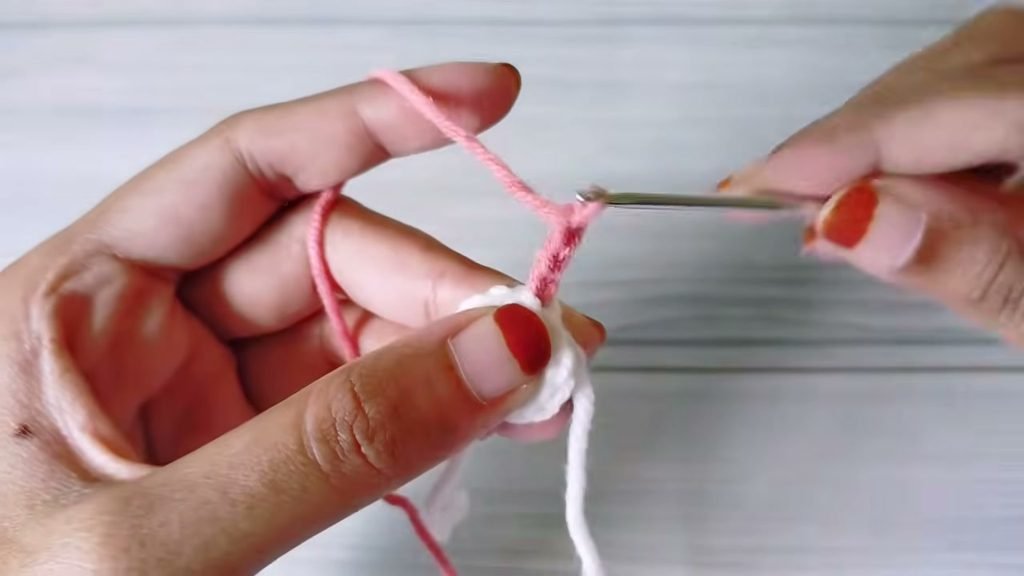
- Find the very first single crochet stitch you worked in Round 1. Insert your hook under both loops of that stitch. Pull the peach yarn through the stitch and through the active loop on your hook to join the new color smoothly.
- Chain 3 to establish the working height for the puff stitch.
- Now work into the same stitch: yo, insert hook into the stitch, pull up a loop, extending it slightly longer to match the height of your chain-3. Yo again, and pull through only the first 2 loops on your hook, leaving the remaining loop on the hook. Repeat this sequence 2 more times in the exact same stitch. You will now have 4 loops on your hook.
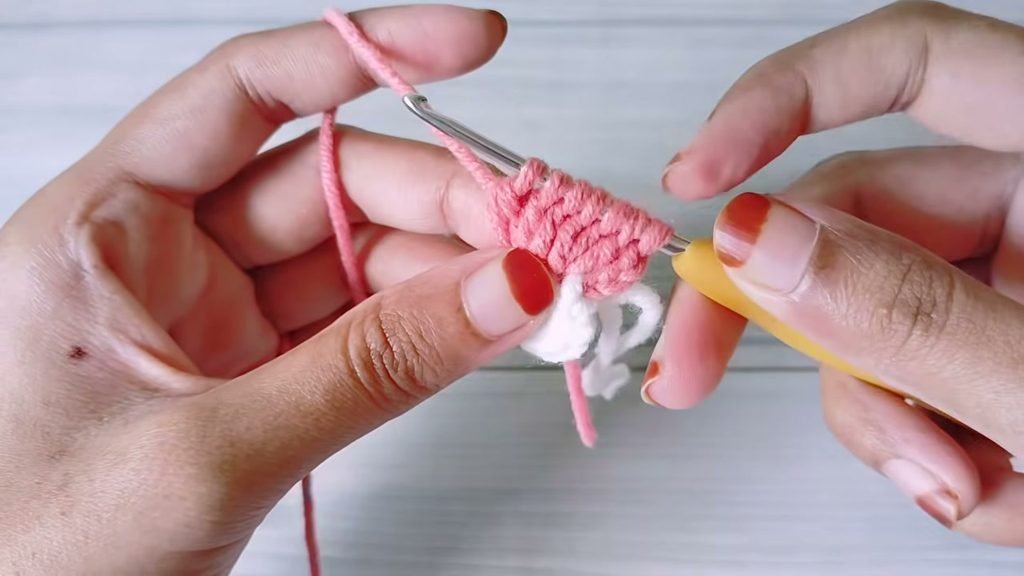
Seven loops gathered on your hook across the two base stitches.
- Move directly to the next stitch: yo, insert hook into the next stitch, pull up a loop to match the height, yo, and pull through only the first 2 loops. Repeat this sequence 2 more times in that same second stitch. You will now have 7 loops on your hook.
- Yo one final time, and carefully glide your hook through all 7 loops in a single smooth motion.
- Chain 3, then slip stitch into that same second stitch to anchor the petal down to the base circle.
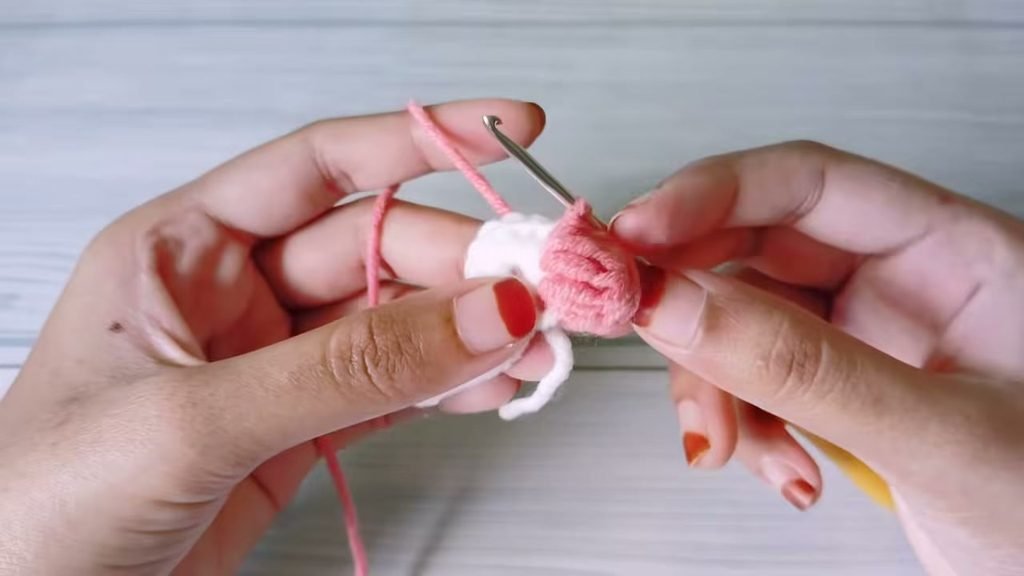
The first completed puff petal, shaped and popped outward.
- Gently press the puff outward from behind using your thumb or finger so the petal rounds outward proudly. You have finished your first puff petal!
Round 2 Continued: Petals 2 Through 6
- To start your second petal, chain 3.
- Work into the next unworked stitch: [yo, insert hook, pull up an elongated loop, yo, pull through 2 loops] 3 times in that stitch. (4 loops on hook)
- Move into the next stitch: [yo, insert hook, pull up an elongated loop, yo, pull through 2 loops] 3 times in that stitch. (7 loops on hook)
- Yo, and pull through all 7 loops at once.
- Chain 3, and slip stitch into that same second stitch to complete the petal.
- Repeat steps 8 through 12 for the third, fourth, fifth, and sixth petals, working across each pair of remaining single crochet stitches around the ring. When you finish the sixth petal, you will have worked into all 12 single crochet stitches of your base circle. (6 petals total)
Finishing Touches
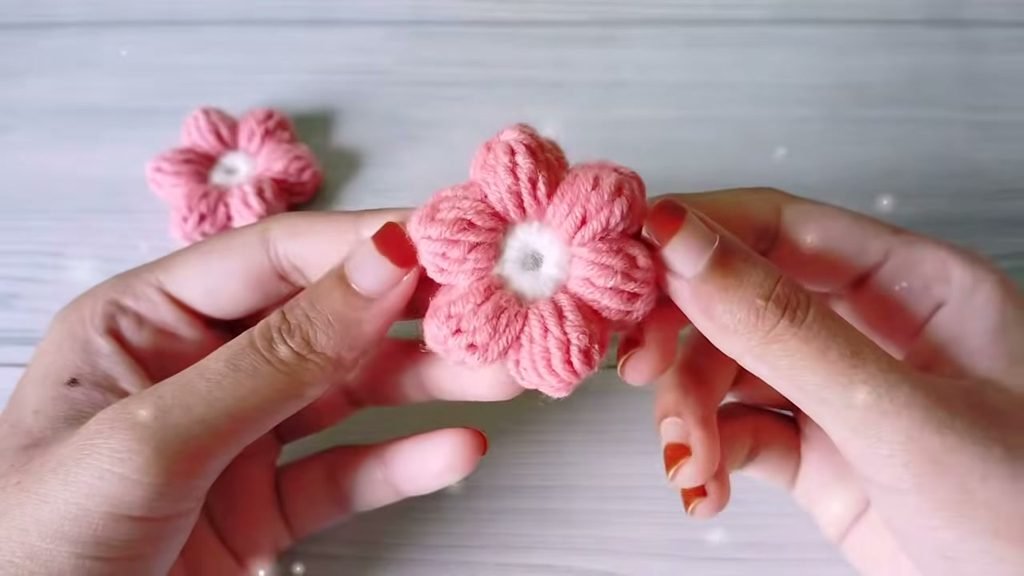
Your completed crochet puff flower, plump, neat, and ready to use.
- After making your final slip stitch into the base of the sixth petal, chain 1 to lock your work. Cut your peach yarn, leaving a tail of 4 to 5 inches, and pull the working loop all the way through.
- Turn the flower over to the wrong side. If the center hole has loosened during stitching, grasp the white magic ring tail and give it a firm, steady tug until the center hole closes completely.
- Thread each yarn tail onto your yarn needle one at a time and weave them securely through the back of the corresponding stitches. Trim away the excess yarn tails flush with the stitches.
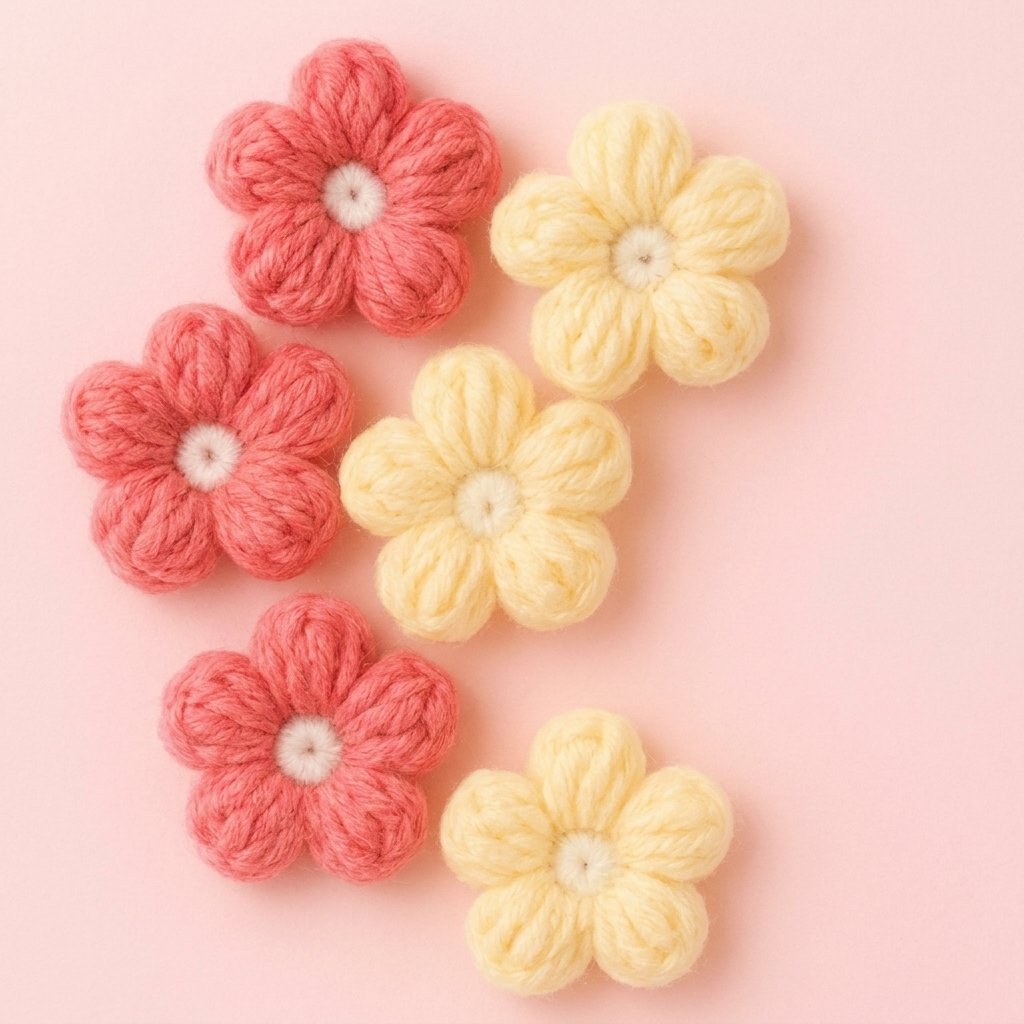
Video Tutorial
If you prefer watching the movements in real time, you can follow along with the video tutorial below. Watch how the hook glides through the stitches, how the elongated loops are pulled to equal heights, and how each petal is popped into place.
Tips and Common Mistakes
Making puff stitches is relaxing and fun, but beginners often run into a few minor hurdles. Here are my top practical tips to help you get tidy, even results every single time:
- Pull your loops high and even: When pulling up loops for each partial double crochet, pull them up so they match the height of your chain-3. If you keep your loops too short, your petals will turn out flat and tight, pulling the center circle out of shape.
- Stay relaxed with 7 loops on the hook: Having 7 loops on your hook can feel crowded. Keep your grip relaxed and turn the hook head downward slightly as you pull through all 7 loops so the hook does not snag any intermediate strands.
- Pop the petals forward: Puff stitches naturally want to sit flatter when freshly made. As soon as you slip stitch at the end of each petal, give the petal a gentle push from behind with your fingertip to pop the volume forward.
- Tighten the center ring at the very end: Working 12 stitches plus all the petal joins can cause the magic ring to stretch open. Do not worry about this while working. Simply pull the starting white yarn tail firmly once your entire flower is crocheted to snap the center shut.
Make More
Once you see how quickly these puff flowers come together, you will want to make a whole garden of them in every color palette. If you enjoyed this project, check out these related crochet patterns from the blog:
Daisy Granny Square –> https://cozyknotty.com/daisy-granny-square/
crochet peony flower –> https://cozyknotty.com/crochet-flower/
Frequently Asked Questions
What yarn weight is best for crochet puff flowers?
I used a medium weight 5-ply yarn in this tutorial, but you can also use 4-ply yarn for a slightly smaller and lighter finish. Any yarn from your stash will work nicely as long as you match your hook size to keep the stitches dense and neat.
How many petals does this puff flower pattern make?
This pattern creates a six-petal flower. Because the white center base contains 12 single crochet stitches and each petal is worked across 2 base stitches, the math divides evenly into 6 full, round petals.
Why is the center hole of my flower opening up?
It is completely normal for the center hole of a magic ring to stretch slightly while you work multiple stitches and join new yarn. Once you finish all 6 petals, simply pull the white starting tail firmly to cinch the circle tightly shut before weaving in the end.
What can I attach crochet puff flowers to?
These puffy flowers make versatile embellishments for blankets, cardigans, baby booties, tote bags, and hair accessories like clips or headbands. You can also stitch several flowers together along their petal tips to create textured blankets, scarves, or decorative wall hangings.
I would love to see your finished puff flowers and the creative projects you attach them to, so please share your makes in the comments below. Happy crocheting, Sara.