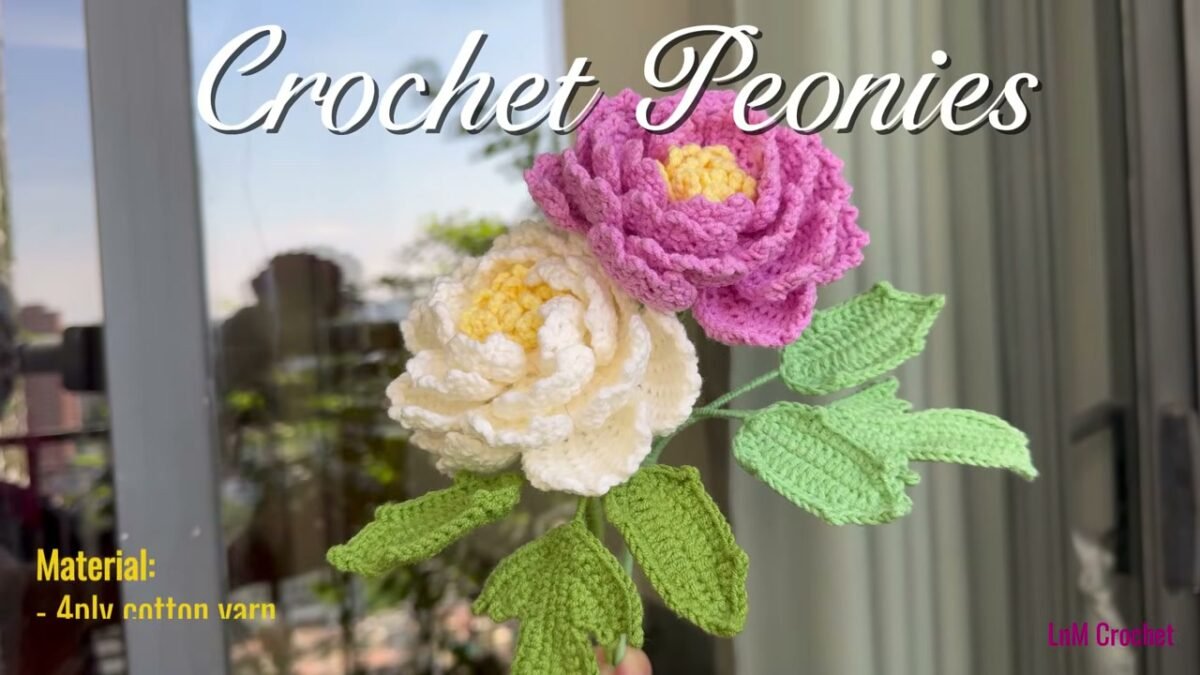
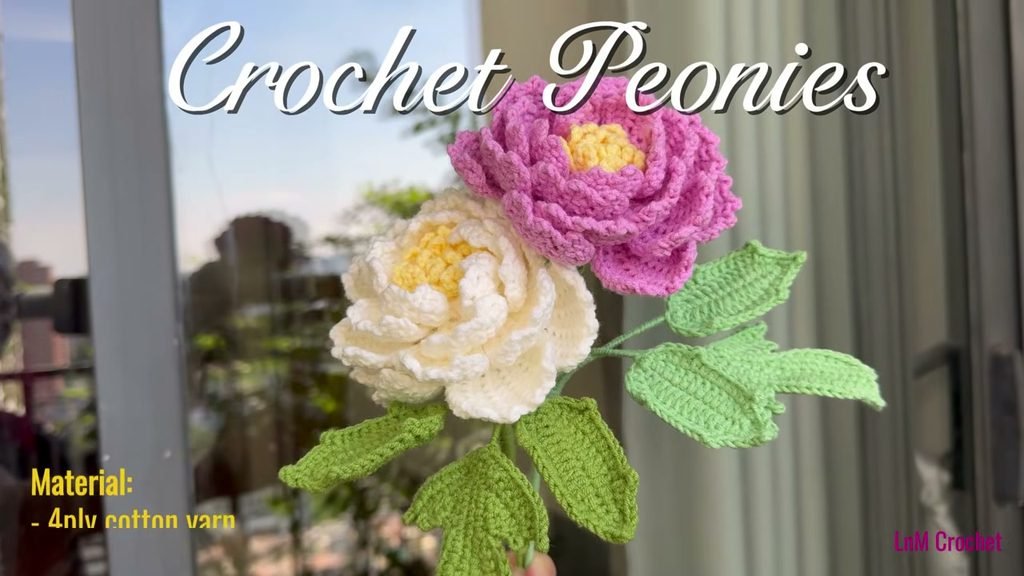
Welcome to this step by step tutorial for my layered crochet peony flower, a lush floral design featuring a dimensional looped pistil center and four tiers of ruffled petals. By borrowing the structured technique of Tunisian crochet and working it directly onto a standard hook, each petal gains natural body and gentle curvature without needing stiff wires inside the flower head.
The beauty of this construction lies in its seamless circular foundation. Instead of stitching dozens of individual petals together at the end, each successive petal tier sprouts directly from the unworked back loops of the previous round. Below you will find the complete written pattern, detailed stitch guides, materials list, assembly advice, and the full video tutorial so you can craft your own botanical centerpiece with confidence.
This post is based on the video tutorial by LnM Crochet & Handmade, linked below.
Table of Contents
- What Will I Learn?
- Materials and Tools
- Sizing and Finished Measurements
- Pattern Notes
- Abbreviations and Special Stitches
- The Written Pattern
- Video Tutorial
- Tips and Common Mistakes
- Make More: Related Patterns
- Frequently Asked Questions
Table of Contents
What Will I Learn?
In this project, you will practice using short-row Tunisian crochet stitches on a standard ergonomic hook to build firm, sculptured flower petals. You will also learn how front loop and back loop alternation allows multiple concentric tiers of petals to grow from a single expanding center.
Here are the specific techniques covered in this tutorial:
- Making a tight magic ring foundation with clean stitch tension
- Crocheting looped center stamens using chain clusters in the front loops
- Expanding the base disc using back loop single crochet increases
- Holding multiple active yarn loops on a standard crochet hook
- Executing Tunisian forward passes and return passes for firm petal fabric
- Staggering petal placement between rows so outer tiers nestle naturally
- Shaping smooth curved outer edges with graduated stitch heights
Materials and Tools
- Yarn: 4-ply combed cotton yarn (fingering or light sport weight, approximately 50 grams per ball). You will need small amounts of yellow yarn for the central pistil and stamen core, and 1 ball in your chosen petal shade such as soft pink, antique white, coral, or deep magenta.
- Crochet Hook: 2.5 mm (US size B/1 or C/2) crochet hook. A standard hook with an inline throat and a smooth shaft works best for holding short sets of loops.
- Locking Stitch Marker: At least one removable stitch marker to hold the unworked back loops while you crochet the front loop stamens and petals.
- Tapestry Needle: A blunt metal yarn needle for weaving in tails neatly inside the flower base.
- Scissors: A pair of sharp embroidery or craft scissors.
- Optional Stemming Materials: 30 cm length of 18-gauge floral stem wire, 0.4 mm to 0.5 mm craft wire, green floral tape, and hot glue if you plan to arrange your peonies into a standing bouquet.
Yarn Substitution: If 4-ply combed cotton is unavailable, any smooth mercerized cotton, cotton-acrylic blend, or sport weight bamboo yarn will work well. Avoid loosely spun or novelty yarns, because you need crisp stitch definition to easily see the back bumps of chains and vertical bars during the Tunisian rows.
Sizing and Finished Measurements
- Flower Head Diameter: Approximately 8.5 cm to 10 cm (3.3 to 4 inches) across when fully opened with all four petal layers.
- Flower Head Depth: Approximately 5 cm (2 inches) from the base of the calyx to the top edge of the inner petals.
- Customizing Size: You can stop after completing Layer 3 for a charming medium garden rose size, or work all 4 layers for a full-blown romantic peony bloom.
Pattern Notes
- Crochet Terminology: All instructions use standard US crochet terms and US spellings.
- Seamless Layering: This pattern works in a continuous expanding spiral base. The central stamens and petals are worked into the front loops only (FLO), while the base expansion rows are worked into the reserved back loops only (BLO).
- Working Loops: You do not need a special long Tunisian hook for this pattern. The widest row holds only 11 loops on the hook, which fits easily onto any standard 2.5 mm crochet hook.
- Staggered Placement: To give the peony its lifelike botanical appearance, you will work 3 slip stitches along the base before starting Layers 2, 3, and 4. This offsets the petals so they sit between the petals of the previous tier rather than stacking directly on top of each other.
Abbreviations and Special Stitches
- MR: magic ring
- ch: chain
- st / sts: stitch / stitches
- sl st: slip stitch
- sc: single crochet
- hdc: half double crochet
- dc: double crochet
- inc: single crochet increase (work 2 single crochets into the same stitch)
- FLO: front loop only
- BLO: back loop only
- Afghan dc (Tunisian Double Crochet Forward Pass): Yarn over, insert hook into the back bump or vertical bar, yarn over and pull up a loop, yarn over and pull through 2 loops on hook. Leave the remaining loop on the hook.
- Afghan sc (Tunisian Simple Stitch Forward Pass): Insert hook under the back bump or vertical bar, yarn over and pull up a loop. Leave the loop on the hook.
- Return Pass: Yarn over and draw through 2 loops at a time across the hook until only 1 working loop remains.
- ( … )* repeat: Repeat the sequence enclosed in brackets as specified.
The Written Pattern
Central Pistil Core (Yellow Yarn)
Begin with yellow yarn to create the inner pistil and stamen clusters.
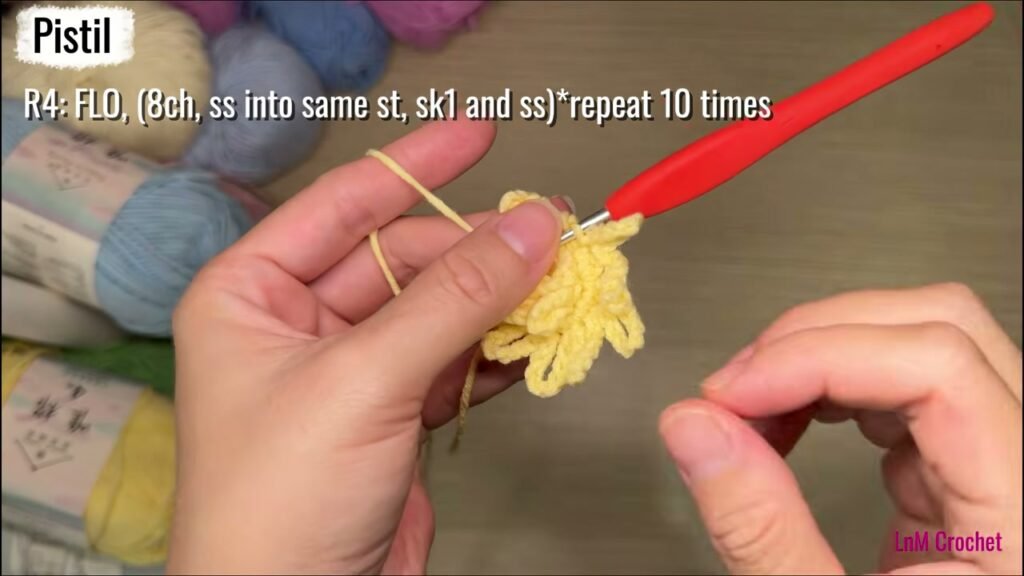
Round 1: Start with a magic ring. Chain 1, then work 10 single crochets into the ring. Pull the tail firmly to close the center hole. Work a slip stitch into the front loop only (FLO) of the first single crochet. Insert your locking stitch marker into the unworked back loop of that same first stitch to save it for Round 3. (10 sts)
Round 2 (Inner Stamens – FLO): Working in the front loops only around Round 1:
(Chain 7, slip stitch into the same front loop, skip the next front loop, slip stitch into the following front loop) repeat 5 times total. You will have 5 delicate chain-7 stamen loops standing in the center.
Round 3 (Base Expansion – BLO): Locate the marked back loop from Round 1. Slip stitch into that back loop, chain 1, then work 1 single crochet increase into each of the 10 back loops around. Work a slip stitch into the front loop only of the first stitch, and place your stitch marker into its unworked back loop. (20 sts)
Round 4 (Outer Stamens – FLO): Working in the front loops only around Round 3:
(Chain 8, slip stitch into the same front loop, skip the next front loop, slip stitch into the following front loop) repeat 10 times total. This completes 10 taller stamen loops surrounding the inner cluster. Slip stitch to secure, cut yellow yarn leaving a 4-inch tail, and pull through.
Petal Layer 1 (5 Inner Petals)
Change to your main petal color yarn. Each petal in this layer is worked across 4 stitches of the base.
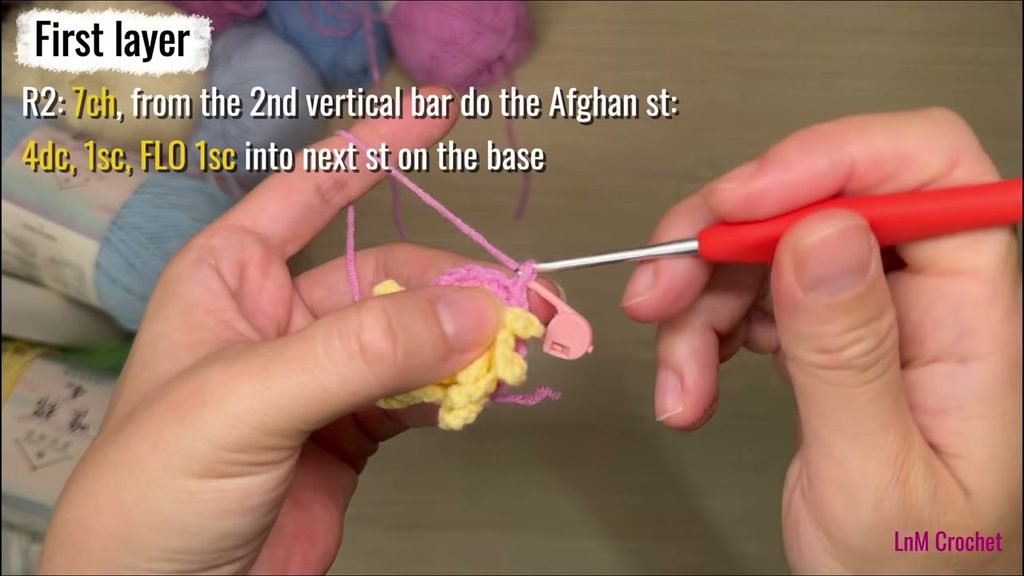
Base Round (Row 1): Remove the marker and join your petal yarn with a slip knot into the marked back loop from Round 3. Chain 1, then work 20 single crochets into the back loops around. Work a slip stitch into the front loop only of the first stitch, and place your stitch marker into its back loop for Layer 2. (20 sts)
Now crochet 5 petals directly onto the front loops:
- Row 2 (Petal Setup): Chain 7. Working into the back bumps on the reverse of the chain, skip the first bump and work into the second bump: work 4 Afghan double crochets, work 1 Afghan single crochet, then work 1 single crochet into the next front loop on the base. You will now have 7 loops on your hook. Work a return pass: yarn over and pull through 2 loops at a time until 1 loop remains on your hook.
- Row 3: Chain 2, work a slip stitch into the second vertical bar from the edge, chain 2. Work Afghan stitches into the vertical bars: 3 Afghan double crochets, 2 Afghan single crochets, then work 1 single crochet into the next front loop on the base. Work a return pass: pull through 2 loops at a time until 1 loop remains.
- Row 4 (Edge Finishing): Chain 2, work a slip stitch into the second vertical bar, chain 2. Now work standard completed crochet stitches: 3 double crochets, 1 half double crochet, 1 single crochet, then work a slip stitch into the next front loop on the base.
- Starting Next Petal: Work a slip stitch into the next front loop on the base. Repeat Rows 2 through 4 four more times.
- When all 5 petals are finished, join with a slip stitch into the first front loop.
Petal Layer 2 (5 Staggered Petals)
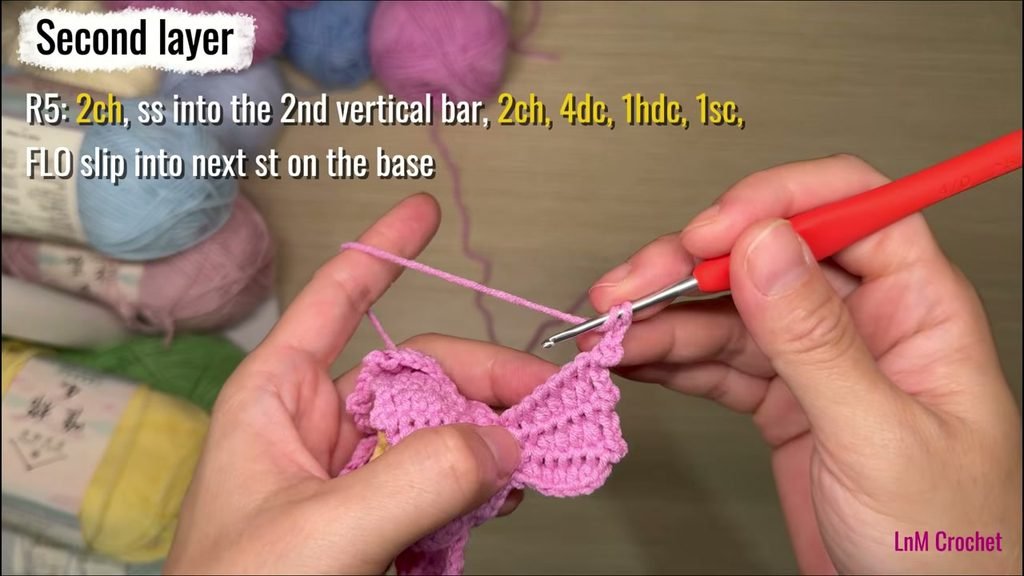
Base Round (Row 1): Slip stitch into the marked back loop behind Layer 1. Chain 1, then work in back loops only: (3 single crochets, 1 single crochet increase) repeat 5 times around. Work a slip stitch into the front loop only of the first stitch, and place your stitch marker into its back loop. (25 sts)
Staggering the Petals: Before beginning the first petal, work 3 slip stitches into the front loops of the next 3 stitches. This offsets the petals so they sit neatly between the petals of Layer 1.
Now work 5 petals, each using 5 stitches of the base:
- Row 2 (Petal Setup): Chain 8. Working into the back bumps starting in the second bump from the hook: work 5 Afghan double crochets, 1 Afghan single crochet, then 1 single crochet into the next front loop on the base. You will have 8 loops on your hook. Return pass: pull through 2 loops at a time until 1 loop remains.
- Row 3: Chain 2, slip stitch into the second vertical bar, chain 2. Work Afghan stitches: 4 Afghan double crochets, 2 Afghan single crochets, then 1 single crochet into the next front loop on the base. Return pass: pull through 2 loops at a time.
- Row 4: Repeat Row 3: Chain 2, slip stitch into the second vertical bar, chain 2. Work 4 Afghan double crochets, 2 Afghan single crochets, then 1 single crochet into the next front loop on the base. Return pass: pull through 2 loops at a time.
- Row 5 (Edge Finishing): Chain 2, slip stitch into the second vertical bar, chain 2. Work standard completed stitches: 4 double crochets, 1 half double crochet, 1 single crochet, then slip stitch into the next front loop on the base.
- Starting Next Petal: Slip stitch into the next front loop on the base. Repeat Rows 2 through 5 four more times.
- After completing all 5 petals, slip stitch to the base to secure.
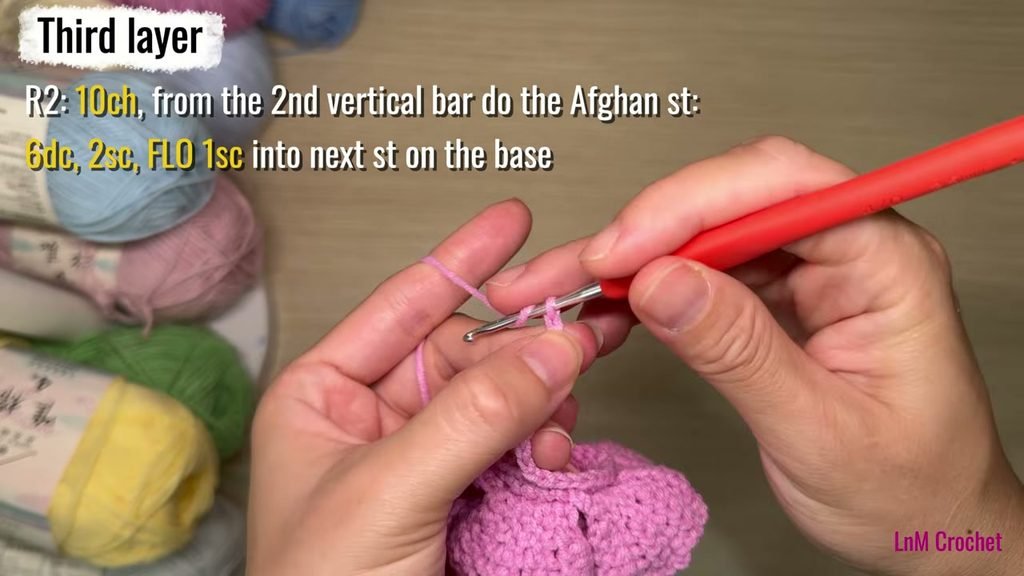
Petal Layer 3 (6 Staggered Petals)
Base Round (Row 1): Slip stitch into the marked back loop behind Layer 2. Chain 1, then work in back loops only: (4 single crochets, 1 single crochet increase) repeat 5 times around. Work a slip stitch into the front loop only of the first stitch, and place your stitch marker into its back loop. (30 sts)
Staggering the Petals: Work 3 slip stitches into the front loops of the next 3 stitches.
Now work 6 petals, each using 5 stitches of the base:
- Row 2 (Petal Setup): Chain 10. Starting in the second back bump from the hook: work 6 Afghan double crochets, 2 Afghan single crochets, then 1 single crochet into the next front loop on the base. Return pass: pull through 2 loops at a time until 1 loop remains.
- Row 3: Chain 2, slip stitch into the second vertical bar, chain 2. Work Afghan stitches: 5 Afghan double crochets, 3 Afghan single crochets, then 1 single crochet into the next front loop on the base. Return pass: pull through 2 loops at a time.
- Row 4: Repeat Row 3: Chain 2, slip stitch into the second vertical bar, chain 2. Work 5 Afghan double crochets, 3 Afghan single crochets, then 1 single crochet into the next front loop on the base. Return pass: pull through 2 loops at a time.
- Row 5 (Edge Finishing): Chain 2, slip stitch into the second vertical bar, chain 2. Work standard completed stitches: 5 double crochets, 1 half double crochet, 2 single crochets, then slip stitch into the next front loop on the base.
- Starting Next Petal: Slip stitch into the next front loop on the base. Repeat Rows 2 through 5 five more times.
- When all 6 petals are completed, slip stitch into the base.
Petal Layer 4 (6 Outer Full-Bloom Petals)
Base Round (Row 1): Slip stitch into the marked back loop behind Layer 3. Chain 1, then work 30 single crochets in the back loops only without increasing. Work a slip stitch into the front loop only of the first stitch. (30 sts)
Staggering the Petals: Work 3 slip stitches into the front loops of the next 3 stitches.
Now work 6 large outer petals, each using 5 stitches of the base:
- Row 2 (Petal Setup): Chain 11. Starting in the second back bump from the hook: work 7 Afghan double crochets, 2 Afghan single crochets, then 1 single crochet into the next front loop on the base. You will have 11 loops on your hook. Return pass: pull through 2 loops at a time until 1 loop remains.
- Row 3: Chain 2, slip stitch into the second vertical bar, chain 2. Work Afghan stitches: 6 Afghan double crochets, 3 Afghan single crochets, then 1 single crochet into the next front loop on the base. Return pass: pull through 2 loops at a time.
- Row 4: Repeat Row 3: Chain 2, slip stitch into the second vertical bar, chain 2. Work 6 Afghan double crochets, 3 Afghan single crochets, then 1 single crochet into the next front loop on the base. Return pass: pull through 2 loops at a time.
- Row 5 (Edge Finishing): Chain 2, slip stitch into the second vertical bar, chain 2. Work standard completed stitches: 6 double crochets, 1 half double crochet, 2 single crochets, then slip stitch into the next front loop on the base.
- Starting Next Petal: Slip stitch into the next front loop on the base. Repeat Rows 2 through 5 five more times.
- After finishing the sixth petal, work a slip stitch into the front loop of the final stitch on the base. Cut yarn leaving a 6-inch tail and fasten off.
Finishing and Shaping
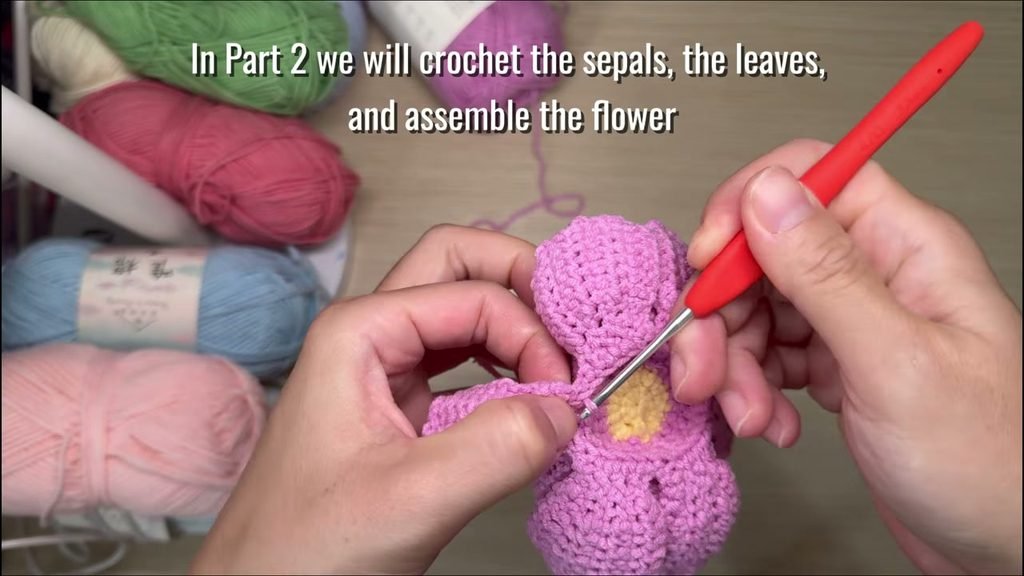
Use your tapestry needle to weave all loose tails into the underside of the flower base. With your fingers, gently cup each petal inward starting from Layer 1 around the yellow pistil, then overlap Layer 2 and Layer 3 around them. Gently flare the outer ruffled tips of Layer 4 to give the peony its signature lush, blooming silhouette.
Video Tutorial
Follow along with the complete step by step video walkthrough below to watch each Tunisian stitch pickup, loop count, and layered transition in detail:
Tips and Common Mistakes
- Work into chain back bumps: On the initial chain of each petal, pick up your loops through the single ridge bump on the back of the chain. This leaves a clean, braided edge along the outer spine of every petal.
- Mind your return pass tension: Keep an even, steady tension as you yarn over and pull through 2 loops during the return pass. If you pull too tightly, the petal will curl excessively; if too loose, the petal will lose its firm cupped posture.
- Always mark your back loops: When you slip stitch into the front loop of the first stitch on any base round, place a stitch marker into that stitch’s unworked back loop right away. Once you crochet a full layer of petals over the top, finding that first back loop is much trickier without a marker.
- Smooth hook choice: Use a crochet hook with a uniform cylindrical shaft up to the grip. Tapered ergonomic grips with very short metal shafts can make holding 8 to 11 loops awkward.
Make More: Related Patterns
- Crochet Newborn Blanket –> https://cozyknotty.com/crochet-newborn-blanket/
- crochet baby blanket —> https://cozyknotty.com/crochet-baby-blanket/
Frequently Asked Questions
Do I need a special Tunisian crochet hook for this peony?
No, you can easily make this entire flower with a standard 2.5 mm crochet hook. Because the petals are worked as short rows with at most 11 loops on the hook at one time, a standard aluminum or ergonomic hook has plenty of room.
Why do my petals look bunched up as I crochet?
Peony petals naturally cup and ruffle against each other to create the flower’s signature spherical volume. As you work successive layers, the petals overlap and support each other, creating the dense, fluffy appearance of a genuine garden peony.
Can I make this flower using worsted weight yarn?
Yes, you can use DK or worsted weight yarn with a 3.5 mm or 4.0 mm hook. This will yield an oversized statement flower measuring 12 cm to 15 cm across, perfect for hat trims, bag accents, or decorative pillow embellishments.
How do I mount this flower onto a stem?
Bend the tip of an 18-gauge floral wire into a small U-hook, apply a drop of hot glue, insert the wire up through the bottom base into the center pistil, and wrap the base with green floral tape.
I would love to see your finished peony blossoms arranged in your home, so please feel free to share your makes and questions in the comments below. Happy crocheting, Meryem!
5 replies on “Crochet flower peony”
[…] Crochet Flowers –> https://cozyknotty.com/crochet-flower/ […]
[…] Crochet Flowers —> https://cozyknotty.com/crochet-flower/ […]
[…] Crochet flower peony –> https://cozyknotty.com/crochet-flower/ […]
[…] Crochet flower peony —> https://cozyknotty.com/crochet-flower/ […]
[…] crochet peony flower –> https://cozyknotty.com/crochet-flower/ […]