Categories
All Free Crochet Crochet Flowers Crochet for Beginners free crochet patterns

crochet puff flower

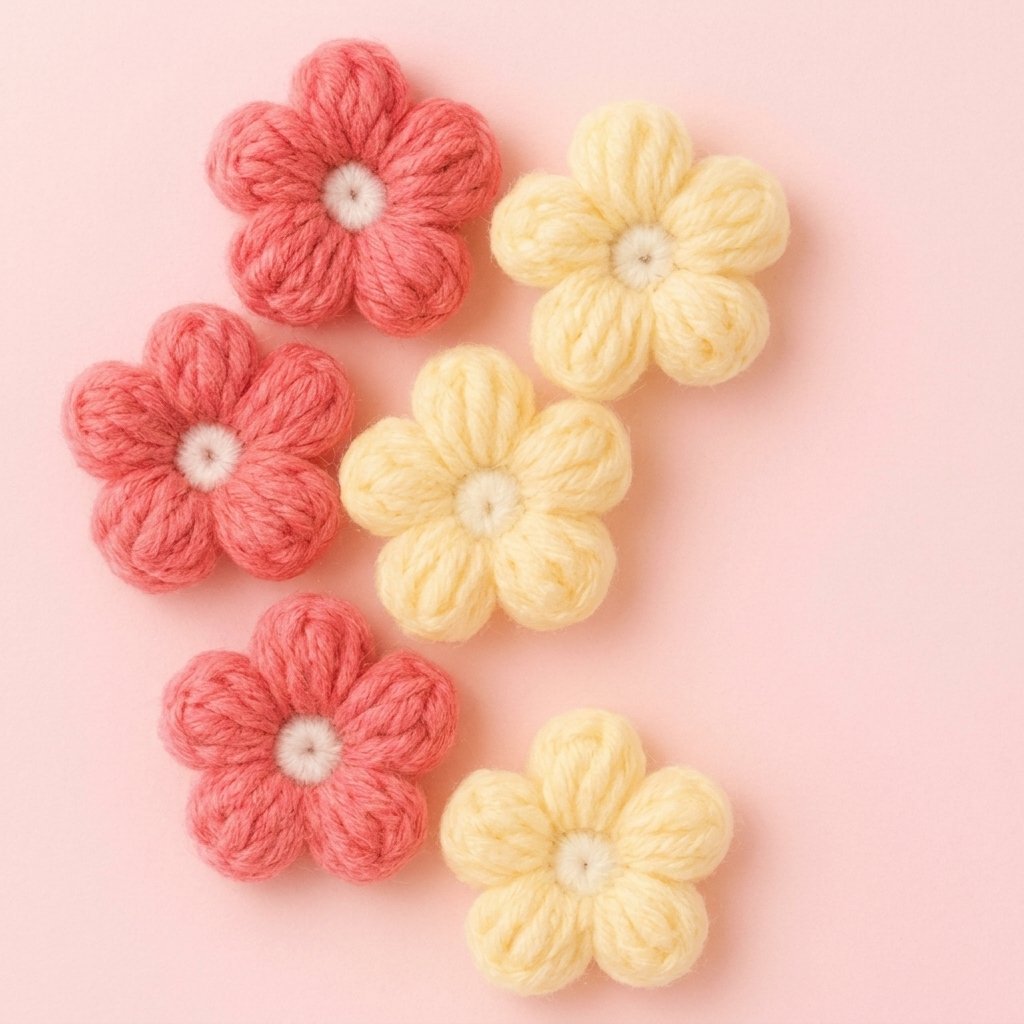
If you are looking for a charming, quick crochet project that brightens up any make, you will love learning how to make this crochet puff flower. These delightful, textured flowers have plump three-dimensional petals that look gorgeous on beanies, cardigans, baby blankets, bags, and hair clips. You can make a single flower as a sweet accent in just ten minutes, or join a bunch together to build a stunning floral project. Below you will find both the full step-by-step written pattern and the complete video tutorial, so you can choose the format that suits your learning style best.

Although the puffy, cloud-like petals look intricate, this is a beginner-friendly pattern using simple foundation stitches combined with basic yarn overs. I have broken down every movement slowly, from starting your center ring to pulling through your final loops, so you can crochet along with confidence. Grab your hook, pick out two coordinating yarn colours, and let us get started!

What Will I Learn?

Crocheting small decorative motifs is a wonderful way to build your muscle memory and master new stitch mechanics without committing to a massive blanket. In this tutorial, you will practise several core crochet skills:

  • How to start an adjustable magic ring and crochet smoothly into the circle
  • How to work basic single crochet stitches to form a neat, circular flower center
  • How to change colours cleanly by joining a second yarn shade with a slip stitch
  • How to draw up elongated loops to create thick, volumetric puff stitches across two base stitches
  • How to control tension on your hook when drawing a final loop through multiple stacked loops
  • How to shape and pop three-dimensional petals so they hold their plump rounded form
  • How to cinch the center ring tightly and weave in your loose ends securely

Materials and Tools
crochet-puff-flower-materials


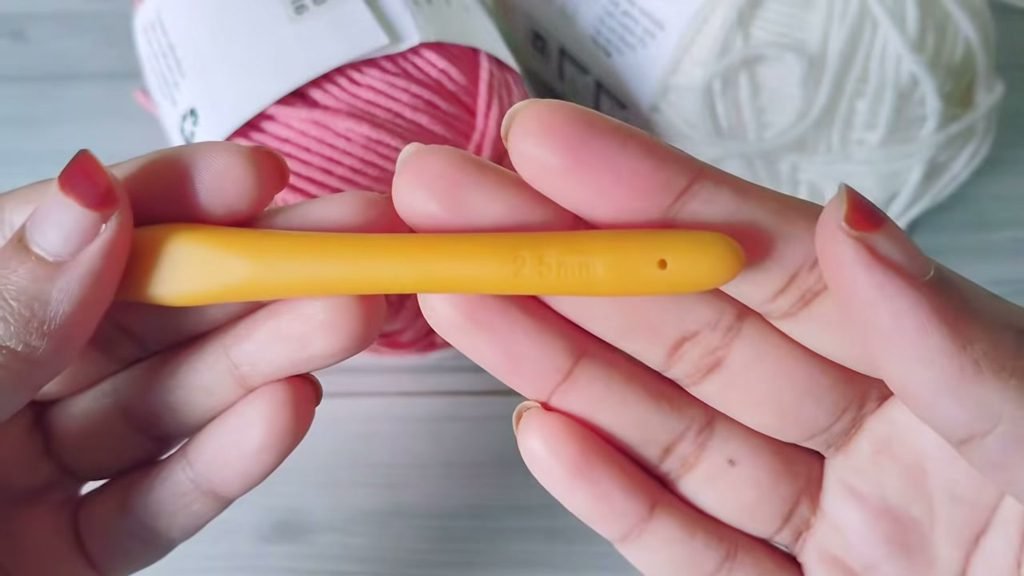
All the supplies you need to crochet your puff flower.

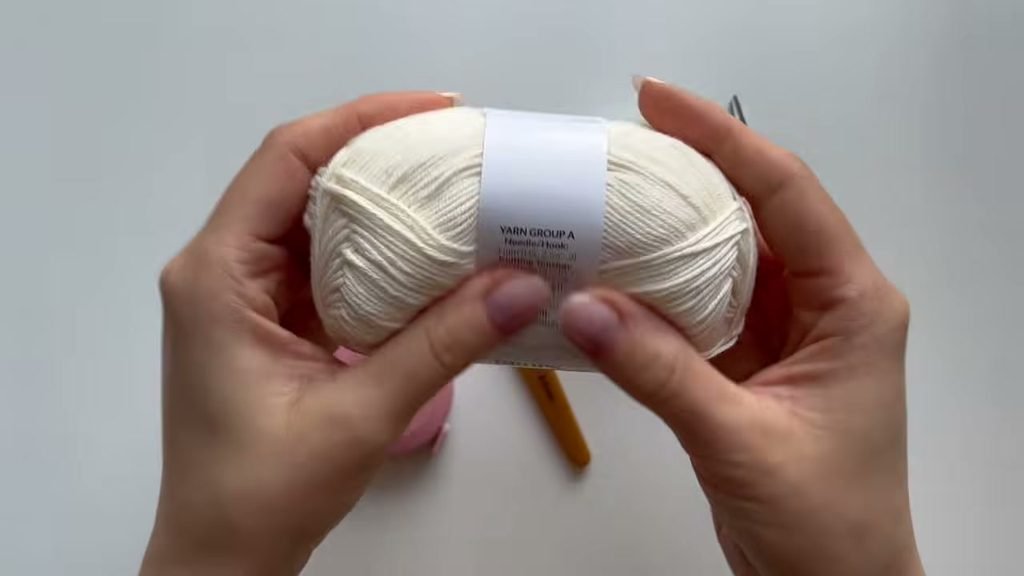
  • Yarn: Medium weight 5-ply yarn in two colours (I used white for the center base and a soft peach colour for the outer petals). You can also use 4-ply yarn if you prefer a slightly lighter, delicate texture.
  • Crochet Hook: 2.5 mm crochet hook (or the hook size recommended for your chosen yarn weight).
  • Yarn Needle: A blunt tapestry needle for weaving in tails cleanly.
  • Scissors: A sharp pair of craft scissors for cutting yarn.

Please note that you can substitute virtually any yarn weight from your stash for these flowers, from fine sport weight cotton up to chunky chenille blanket yarn. Simply choose a hook that matches your yarn gauge, keeping in mind that a slightly smaller hook creates denser, firmer petals that hold their puff shape beautifully.

Pattern Notes and Abbreviations

This pattern is written using standard US crochet terminology.

Abbreviations

  • ch: chain
  • sc: single crochet
  • sl st: slip stitch
  • st / sts: stitch / stitches
  • yo: yarn over
  • Rnd: round

Pattern Notes:

  • The flower consists of two quick rounds: a flat 12-stitch circular center worked in white, followed by 6 puffy petals worked in peach.
  • Each petal spans two single crochet stitches from the center ring, using a sequence of partial double crochet pull-ups to pack rich texture into every petal.
  • When drawing up loops for the puff stitch, keep your hook level and gently pull the loops upward to about the height of your beginning chain-3. This prevents the flower from curling inwards.
  • After completing each petal, use your finger from the back of the work to gently push the center of the puff outward towards the front so the petals remain rounded and puffy.

The Written Pattern

Follow these step-by-step instructions to create your crochet puff flower. Work slowly through your first petal, and once you establish the rhythm, the remaining five petals will fly off your hook.

Round 1: Center Base (White Yarn)
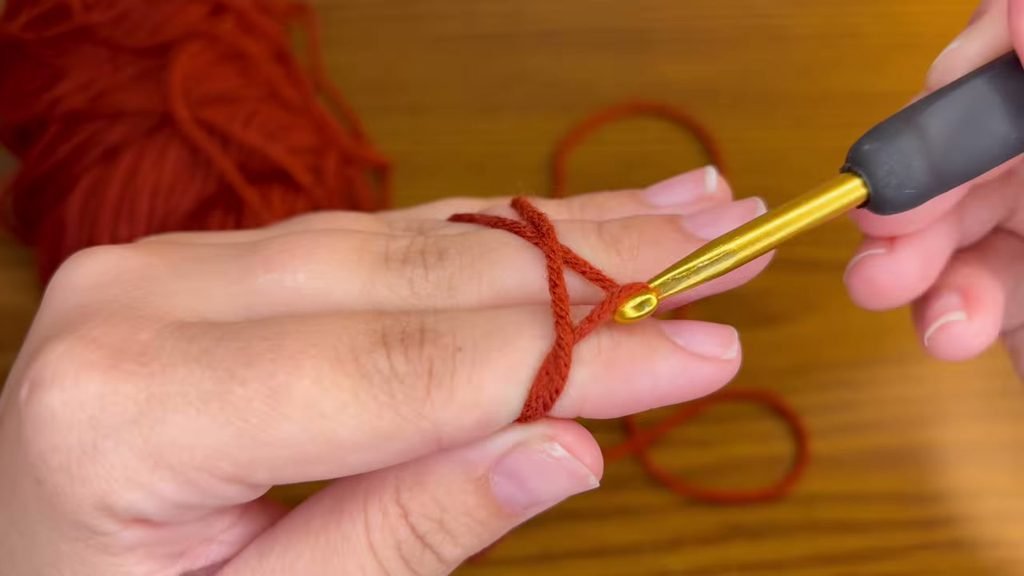
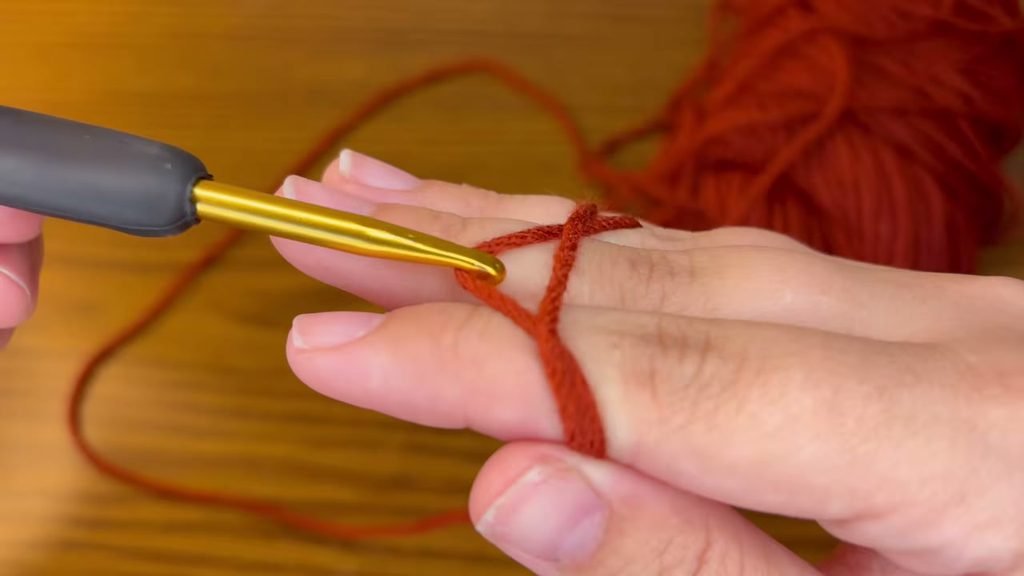
crochet-puff-flower-magic-ring-base
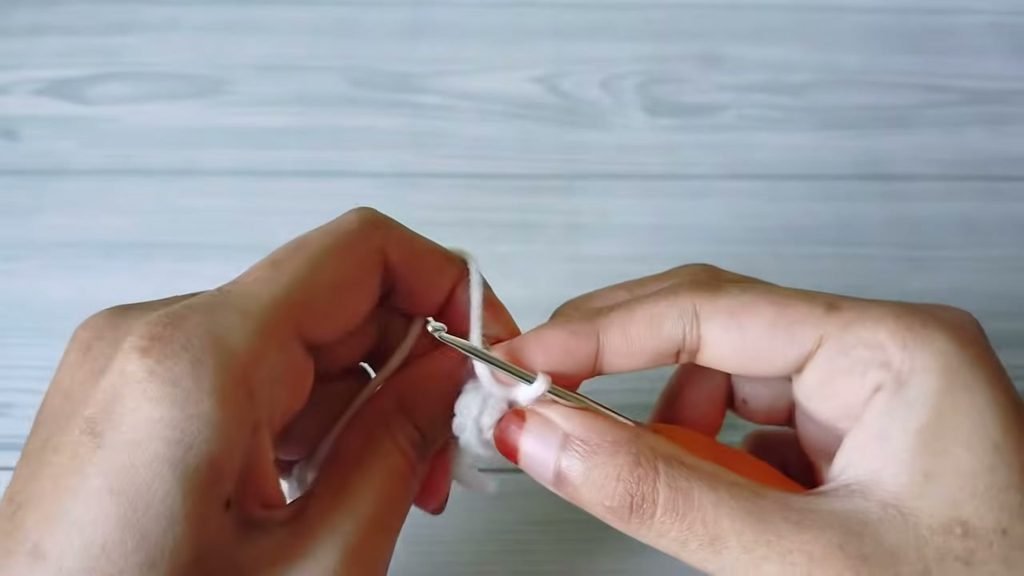
  1. Take your white yarn and create a magic ring by wrapping the yarn around two fingers to form a loop. Insert your hook into the loop, grab the working yarn, pull it through, and chain 1 to secure the ring.
  2. Work 12 single crochet (sc) stitches directly into the center of the magic ring.
  3. Pull the initial tail firmly to close the magic ring into a neat, tight circle. Do not join with a slip stitch here. Cut your white yarn, leaving a tail of about 3 to 4 inches. (12 sc)

Round 2: Petal 1 (Peach Yarn)
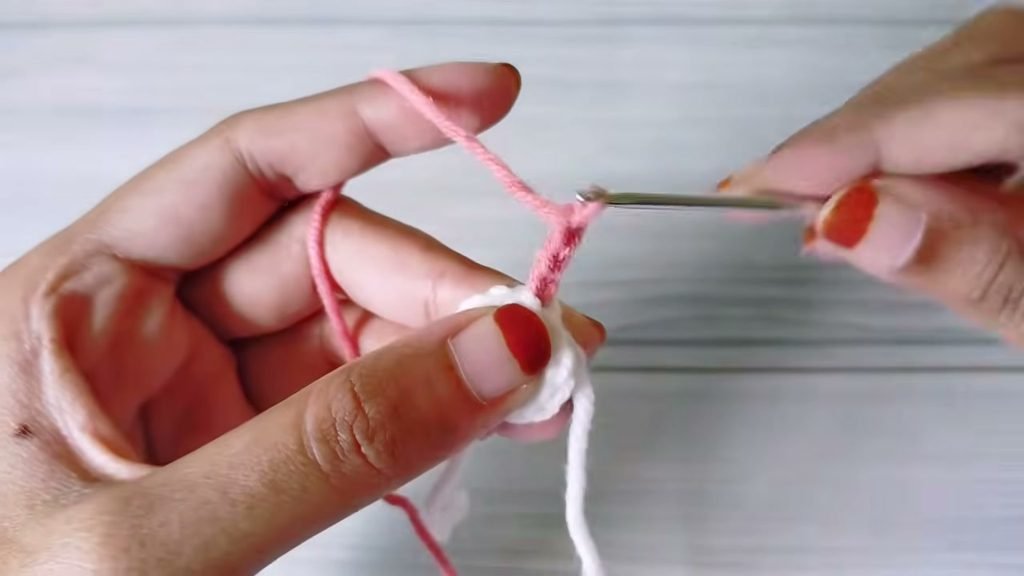
crochet-puff-flower-joining-yarn
  1. Find the very first single crochet stitch you worked in Round 1. Insert your hook under both loops of that stitch. Pull the peach yarn through the stitch and through the active loop on your hook to join the new color smoothly.
  2. Chain 3 to establish the working height for the puff stitch.
  3. Now work into the same stitch: yo, insert hook into the stitch, pull up a loop, extending it slightly longer to match the height of your chain-3. Yo again, and pull through only the first 2 loops on your hook, leaving the remaining loop on the hook. Repeat this sequence 2 more times in the exact same stitch. You will now have 4 loops on your hook.
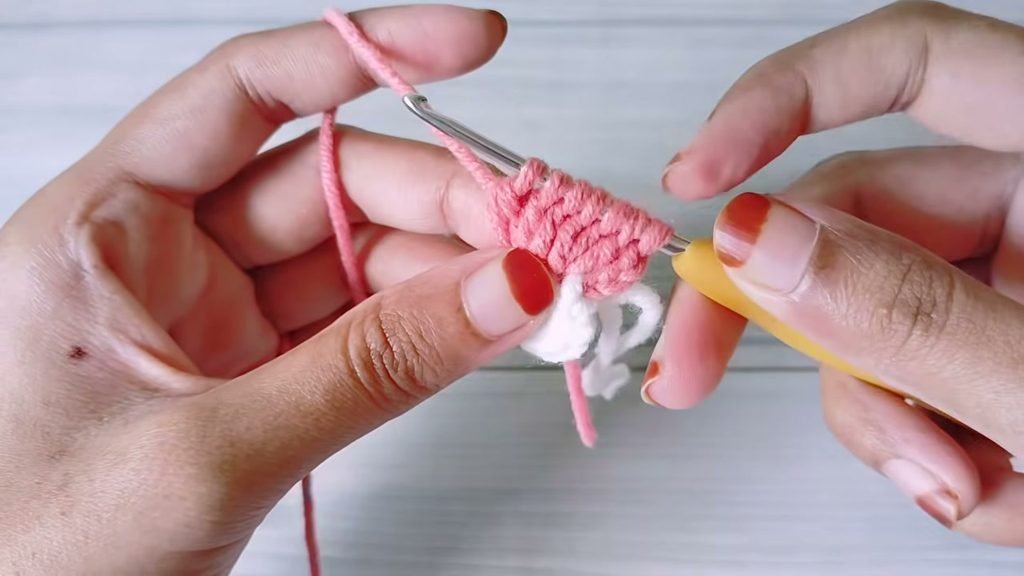
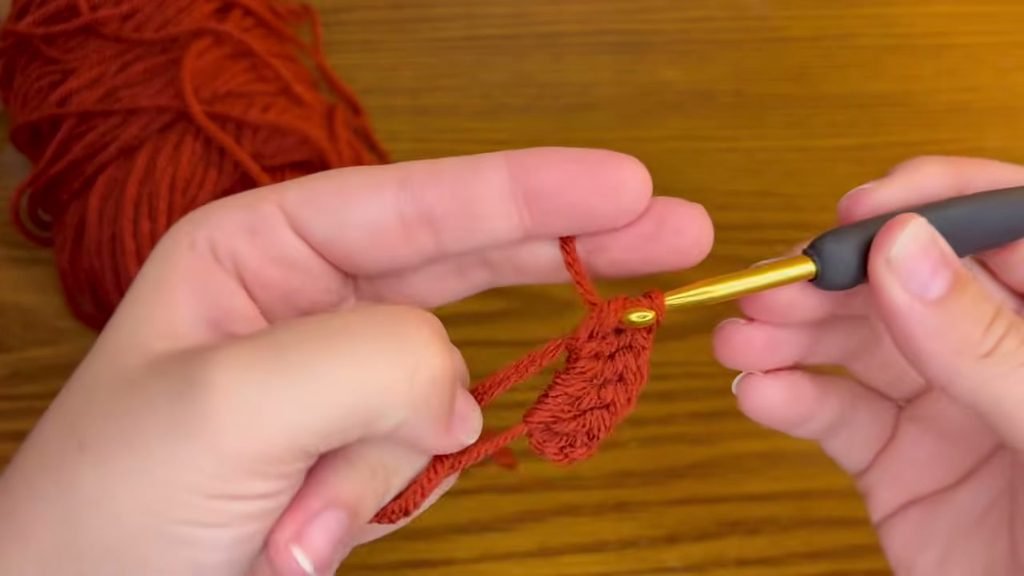
crochet-puff-flower-puff-stitch-loops


Seven loops gathered on your hook across the two base stitches.

  1. Move directly to the next stitch: yo, insert hook into the next stitch, pull up a loop to match the height, yo, and pull through only the first 2 loops. Repeat this sequence 2 more times in that same second stitch. You will now have 7 loops on your hook.
  2. Yo one final time, and carefully glide your hook through all 7 loops in a single smooth motion.
  3. Chain 3, then slip stitch into that same second stitch to anchor the petal down to the base circle.
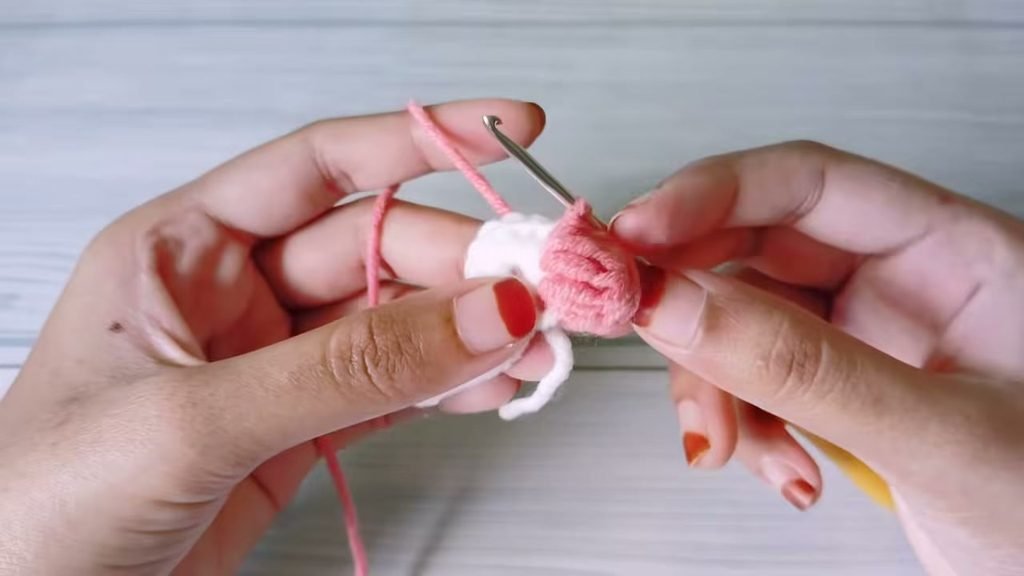
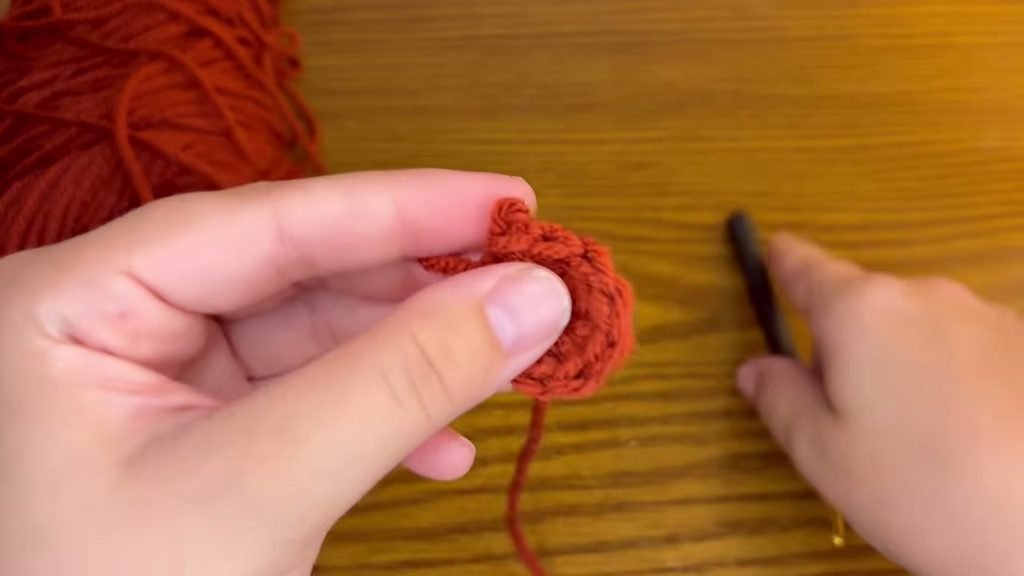
crochet-puff-flower-first-petal


The first completed puff petal, shaped and popped outward.

  1. Gently press the puff outward from behind using your thumb or finger so the petal rounds outward proudly. You have finished your first puff petal!

Round 2 Continued: Petals 2 Through 6

  1. To start your second petal, chain 3.
  2. Work into the next unworked stitch: [yo, insert hook, pull up an elongated loop, yo, pull through 2 loops] 3 times in that stitch. (4 loops on hook)
  3. Move into the next stitch: [yo, insert hook, pull up an elongated loop, yo, pull through 2 loops] 3 times in that stitch. (7 loops on hook)
  4. Yo, and pull through all 7 loops at once.
  5. Chain 3, and slip stitch into that same second stitch to complete the petal.
  6. Repeat steps 8 through 12 for the third, fourth, fifth, and sixth petals, working across each pair of remaining single crochet stitches around the ring. When you finish the sixth petal, you will have worked into all 12 single crochet stitches of your base circle. (6 petals total)

Finishing Touches
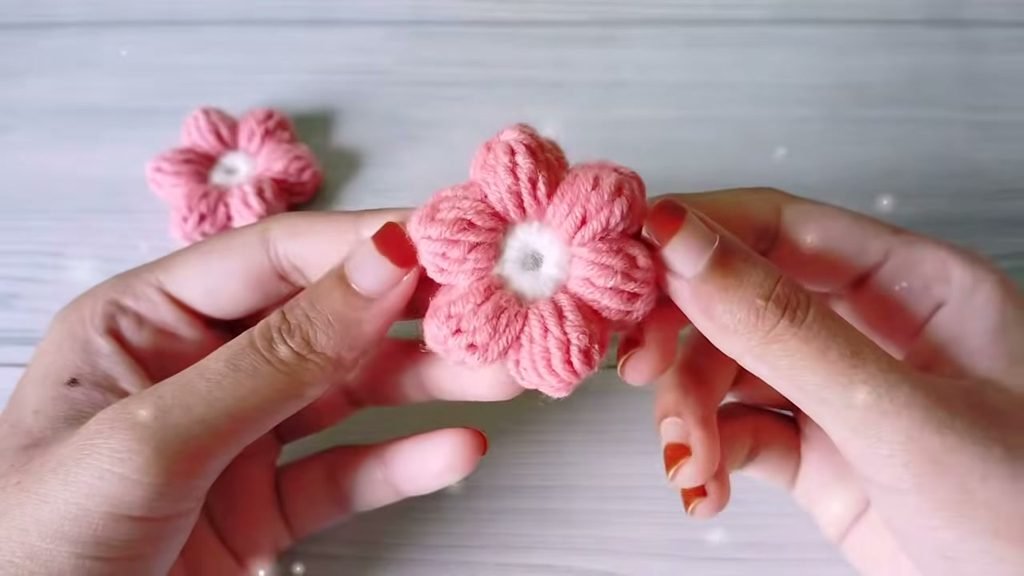
crochet-puff-flower-finished


Your completed crochet puff flower, plump, neat, and ready to use.

  1. After making your final slip stitch into the base of the sixth petal, chain 1 to lock your work. Cut your peach yarn, leaving a tail of 4 to 5 inches, and pull the working loop all the way through.
  2. Turn the flower over to the wrong side. If the center hole has loosened during stitching, grasp the white magic ring tail and give it a firm, steady tug until the center hole closes completely.
  3. Thread each yarn tail onto your yarn needle one at a time and weave them securely through the back of the corresponding stitches. Trim away the excess yarn tails flush with the stitches.
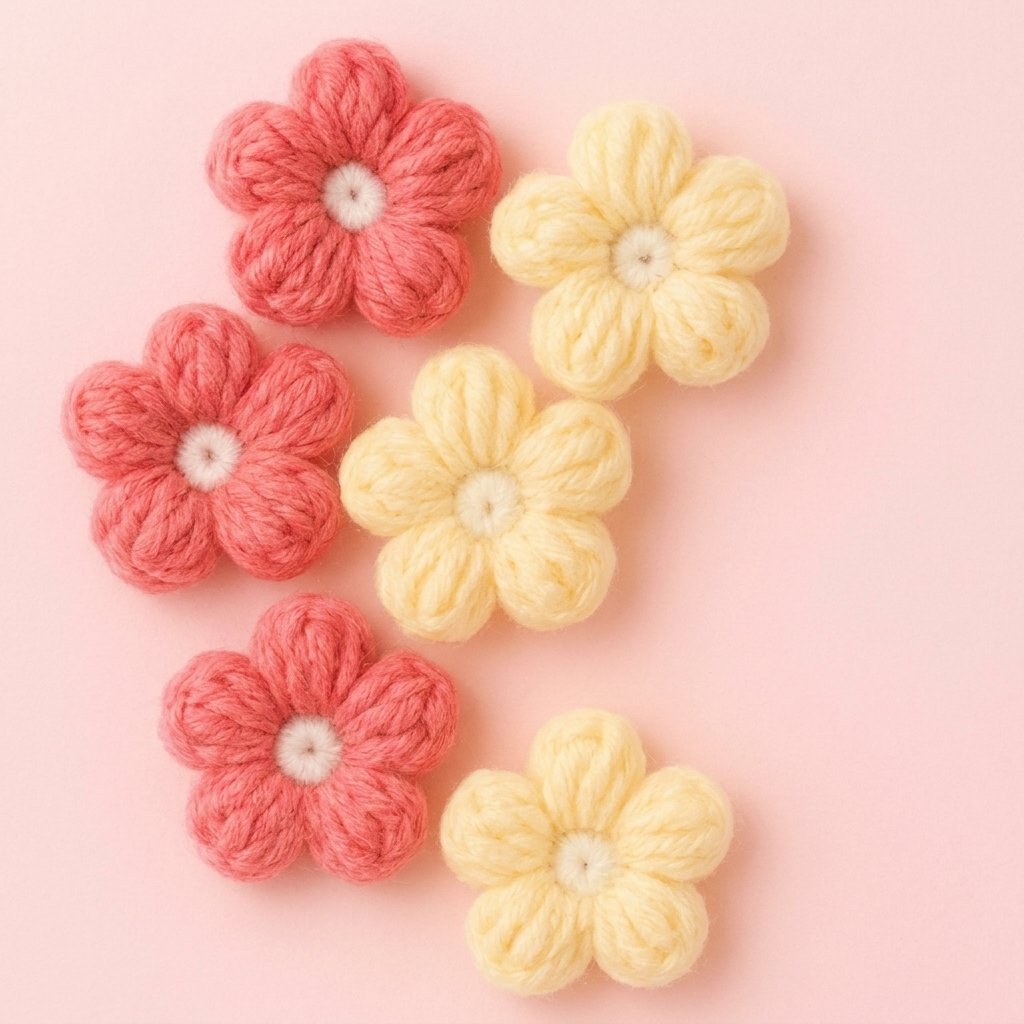
crochet-puff-flower-finished

Video Tutorial

If you prefer watching the movements in real time, you can follow along with the video tutorial below. Watch how the hook glides through the stitches, how the elongated loops are pulled to equal heights, and how each petal is popped into place.

Tips and Common Mistakes

Making puff stitches is relaxing and fun, but beginners often run into a few minor hurdles. Here are my top practical tips to help you get tidy, even results every single time:

  • Pull your loops high and even: When pulling up loops for each partial double crochet, pull them up so they match the height of your chain-3. If you keep your loops too short, your petals will turn out flat and tight, pulling the center circle out of shape.
  • Stay relaxed with 7 loops on the hook: Having 7 loops on your hook can feel crowded. Keep your grip relaxed and turn the hook head downward slightly as you pull through all 7 loops so the hook does not snag any intermediate strands.
  • Pop the petals forward: Puff stitches naturally want to sit flatter when freshly made. As soon as you slip stitch at the end of each petal, give the petal a gentle push from behind with your fingertip to pop the volume forward.
  • Tighten the center ring at the very end: Working 12 stitches plus all the petal joins can cause the magic ring to stretch open. Do not worry about this while working. Simply pull the starting white yarn tail firmly once your entire flower is crocheted to snap the center shut.

Make More

Once you see how quickly these puff flowers come together, you will want to make a whole garden of them in every color palette. If you enjoyed this project, check out these related crochet patterns from the blog:

Daisy Granny Square –> https://cozyknotty.com/daisy-granny-square/

crochet peony flower –> https://cozyknotty.com/crochet-flower/

Frequently Asked Questions

What yarn weight is best for crochet puff flowers?

I used a medium weight 5-ply yarn in this tutorial, but you can also use 4-ply yarn for a slightly smaller and lighter finish. Any yarn from your stash will work nicely as long as you match your hook size to keep the stitches dense and neat.

How many petals does this puff flower pattern make?

This pattern creates a six-petal flower. Because the white center base contains 12 single crochet stitches and each petal is worked across 2 base stitches, the math divides evenly into 6 full, round petals.

Why is the center hole of my flower opening up?

It is completely normal for the center hole of a magic ring to stretch slightly while you work multiple stitches and join new yarn. Once you finish all 6 petals, simply pull the white starting tail firmly to cinch the circle tightly shut before weaving in the end.

What can I attach crochet puff flowers to?

These puffy flowers make versatile embellishments for blankets, cardigans, baby booties, tote bags, and hair accessories like clips or headbands. You can also stitch several flowers together along their petal tips to create textured blankets, scarves, or decorative wall hangings.

I would love to see your finished puff flowers and the creative projects you attach them to, so please share your makes in the comments below. Happy crocheting, Sara.
Categories
All Free Crochet Crochet Clothing Crochet for Beginners free crochet patterns Hats, Scarves & Bags

Crochet Bag Pattern: Free Structured Clutch Bag

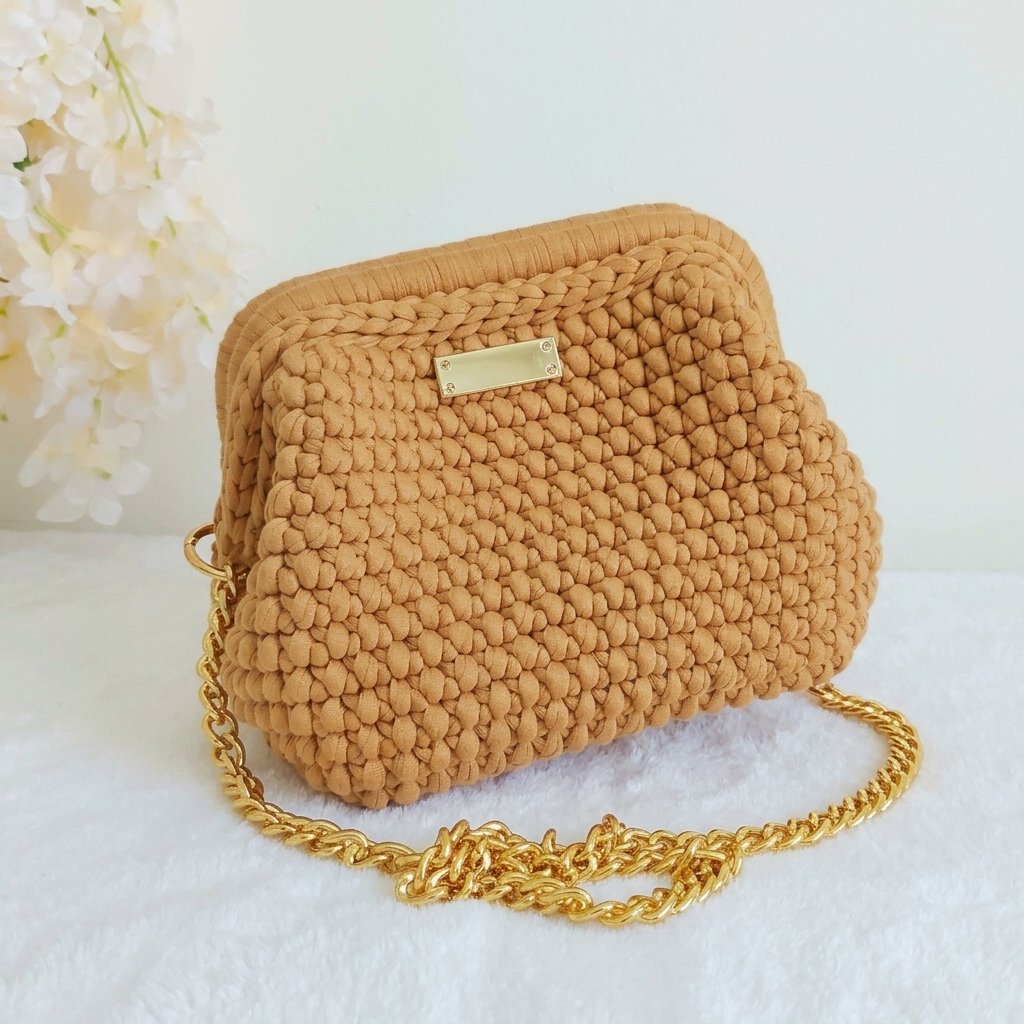
If you are looking for an accessory that combines modern style with everyday function, this crochet clutch bag is a wonderful crochet bag pattern to add to your queue. Featuring an internal metal squeeze frame and a dense twisted stitch texture, this bag works up into a firm, structured pouch that holds its shape without requiring a separate fabric lining. You can carry it as an evening clutch, snap on a chain strap for hands-free shopping, or tuck it into a larger tote as a chic cosmetic pouch.

I have put together both the complete step-by-step written pattern and the embedded video tutorial in this post, so you can follow along with every stitch, count, and finishing technique. This post is based on the video tutorial by Mary Tejidos, linked below. Take your time working the stitches with a firm tension, and you will have a gorgeous bag ready to wear in just a weekend.

What Will I Learn?

In this tutorial, I will guide you through all the steps required to create a sturdy, professional-looking handbag from scratch. You will learn:

  • How to measure and crochet a custom rectangular single crochet base tailored to your metal frame size.
  • How to work single crochet stitches into the back humps of a foundation chain for a clean, even edge.
  • How to work corner increases to turn a flat rectangle into an oval-edged perimeter base.
  • How to work the twisted single crochet stitch (punto torcido) to create a dense, ribbed texture.
  • How to complete seamless round transitions so your join lines remain completely invisible.
  • How to cover a tubular metal squeeze frame (boca de lobo) with crochet stitches.
  • How to join the covered frame to the bag body using slip stitches and attach carabiner strap hardware.

Materials and Tools

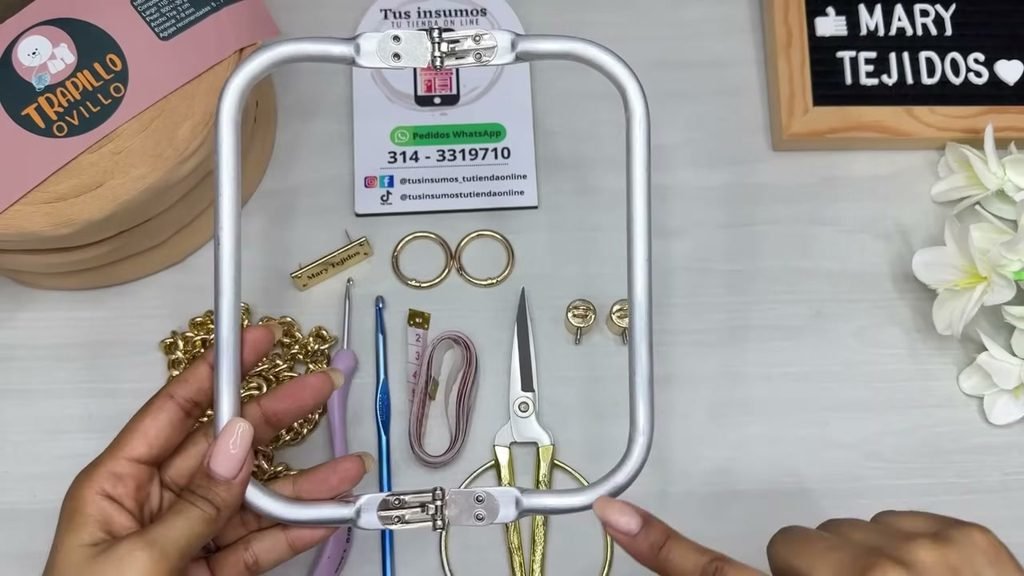
Below is the exact list of supplies I used to create this clutch bag:

  • Yarn: Premium feather t-shirt yarn (trapillo pluma), 3 cm strand width. I used approximately 540 grams from a total of 750 grams (three 250 g bobbins). This yarn is lightweight, smooth, and very gentle on the hands.
  • Crochet Hooks: 6.0 mm crochet hook (main hook for the base, body, and frame covering) and a 3.5 mm crochet hook (for weaving yarn ends under tight stitches).
  • Hardware Frame: One internal metal squeeze/spring frame (boca de lobo) measuring 16 cm wide by 18 cm long on the inside opening.
  • Strap Hardware: Two 3 cm diameter carabiner snap gate rings and one 80 cm aluminum chain strap.
  • Notions: Measuring tape, sharp scissors, stitch markers, small scraps of contrasting yarn for securing pieces, and craft silicone or fabric glue for securing woven ends.
  • Optional: One metal logo or brand label plate.
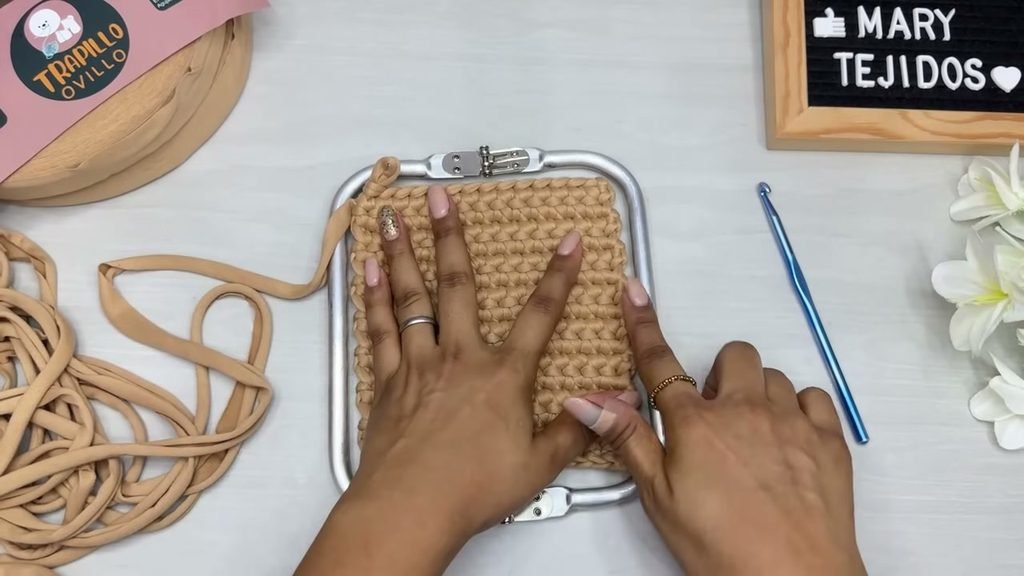
crochet-clutch-bag-materials

Yarn substitution advice: If you cannot find feather t-shirt yarn, look for a lightweight cotton ribbon yarn, a 5 mm braided cotton cord, or standard t-shirt yarn cut to a 3 cm width. Keep in mind that standard jersey t-shirt yarn is heavier than feather yarn, so your completed clutch may weigh a little more.

Finished Size and Gauge

The finished clutch bag measures approximately 21 cm wide by 19 cm tall when open, and 19 cm tall when closed. The structured rectangular base measures 14.5 cm wide by 15.5 cm long before working the bag sides. The body of the bag is worked to a height of 16.5 cm before attaching the top frame. The total weight of the completed clutch, including yarn and hardware, is approximately 620 grams.

Gauge and tension: In this project, stitch density is far more important than meeting an exact stitch gauge. Your single crochet stitches must be worked tightly so that no light passes through the fabric. If your stitches appear loose or spaced out, switch to a smaller hook such as 5.5 mm or 5.0 mm to keep the base and body firm and supportive.

Pattern Notes and Abbreviations

Please review these notes before you pick up your hook:

  • Terms: This pattern is written in standard US crochet terms and US spelling.
  • Turning chain: The chain 1 made at the beginning of flat rows does not count as a stitch throughout the base. Always work your first single crochet into the very first stitch.
  • Squeeze frame sizing: The length and width of your base depend on the internal dimensions of your squeeze frame. When your foundation chain is placed inside your frame, there should be a 2 cm gap on each side. After row 1 is complete, that gap reduces to 1 cm on each side, which is later filled by the perimeter border.
  • Seamless round joins: Each body round ends by pulling an elongated loop through the first stitch from back to front, then inserting the hook between the strands behind the join to start the next round without a visible seam.
  • Hinge clearance: When covering the metal frame, a chain space is placed directly over each hinge so the metal mechanism can flex freely without catching on the yarn.

Abbreviations (US Terms):

  • ch: chain
  • sc: single crochet
  • sl st: slip stitch
  • st(s): stitch(es)
  • twisted sc: twisted single crochet
  • inc: increase (work 3 sc in the same space at corners)

The Written Crochet Bag Pattern

Step 1: The Rectangular Base

Start with your 6.0 mm hook and t-shirt yarn. Leave a short tail for weaving.

Foundation Chain: Tie a slip knot, then chain 14 loosely. This chain should measure approximately 11 cm in length. Chain 1 more for height (total of 15 chains). Place this chain inside your squeeze frame to confirm you have approximately 2 cm of space on each side.

Row 1: Turn the chain over to view the back humps (lomitas). Insert your hook under the back hump of the second chain from the hook, yarn over, pull up a loop to the height of the hook, yarn over, and pull through both loops. Work 1 sc under the back hump of each remaining chain across to the end. Turn. (14 sc, measuring 13 cm wide with a 1 cm margin inside the frame on each side)

Row 2: Ch 1 (does not count as a stitch). Insert hook under both loops of the very first stitch, yarn over, pull up a loop, yarn over, and pull through two loops. Work 1 sc in each of the remaining 13 stitches across, making sure not to skip the final stitch. Turn. (14 sc)

Rows 3 to 16: Repeat Row 2. Maintain an even, firm tension so the fabric stays flat and dense without gaps between stitches. After completing 16 rows, your base should measure 14.5 cm wide by 15.5 cm long. Lay the piece inside your metal frame to verify that there is approximately 1 cm of clearance on all four sides.

Perimeter Round (Base Border): Do not turn your work after Row 16. You will now crochet around all four edges of the base, adding triple increases in each corner to create a rounded rectangular bottom with exactly 66 stitches.

  1. Corner 1 & Long Side 1: Ch 1, place a marker in this chain, and work 1 sc into the corner stitch. Work 15 sc evenly down the row ends along the long side (1 sc per row end). (15 sc along the side edge, plus 1 corner stitch)
  2. Corner 2 & Short Side 1: In the first foundation chain space, work 3 sc for the corner increase. Work 1 sc in each of the next 12 chain loops across the bottom edge. (12 sc)
  3. Corner 3 & Long Side 2: In the last chain loop, work 3 sc for the corner increase. Work 15 sc evenly along the second long edge, placing 1 sc into each row end. (15 sc)
  4. Corner 4 & Short Side 2: In the first stitch of the top edge, work 3 sc for the corner increase. Work 1 sc in each of the next 12 stitches across to the starting corner. (12 sc)
  5. Finish Starting Corner: Work 1 sc into the very first corner space where you made the ch 1 and first stitch. Cut yarn, pull the working loop free, and thread your yarn onto your smaller hook. Insert the hook from back to front under both loops of the first full stitch, pull the tail through to the back, then insert the hook up through the center of the final chain loop to bring the tail to the wrong side. This creates an invisible join that forms the third stitch of the starting corner. (66 stitches total around the base)
crochet-clutch-bag-base

Weave in all tails securely along the wrong side of the base using your 3.5 mm hook.

Step 2: Bag Body in Twisted Single Crochet

Turn the base over so the wrong side (the side with the horizontal ridges) is facing upward. You can join your yarn in any stitch along the perimeter. I recommend starting near the middle of one long side.

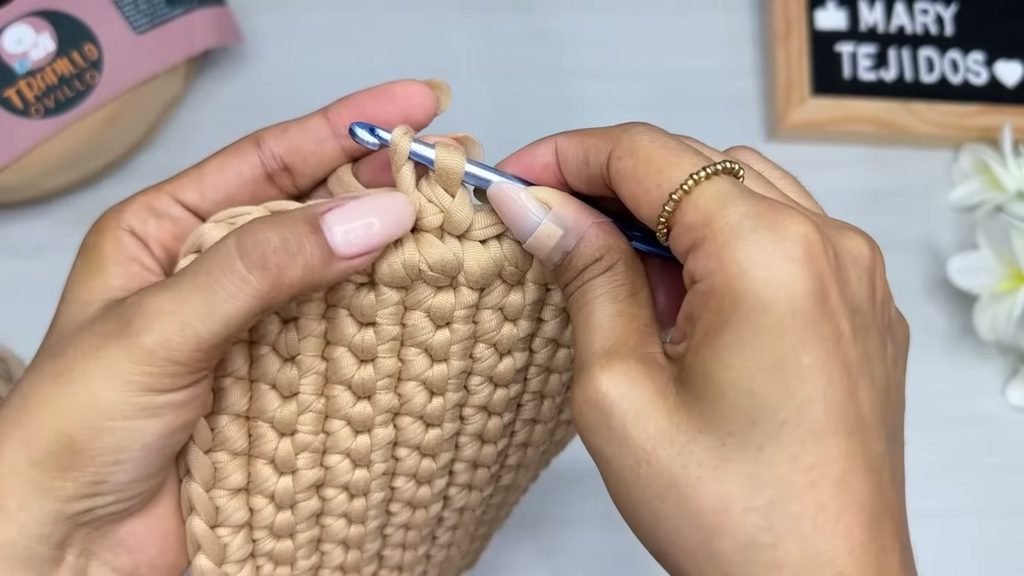
How to work the twisted single crochet (punto torcido): Insert your hook under both loops of the stitch, yarn over, pull up a loop, and twist the hook inward towards yourself so the working strand crosses over. Pull up the loop slightly to match the height of the loop on your hook, yarn over, and pull through both loops.

Round 1: Insert hook under both loops of your chosen stitch, draw up a loop, and work 1 twisted sc. Work 1 twisted sc into every stitch around the base, keeping your stitches aligned and working over the starting tail to secure it. Do not work any increases or decreases. (66 sts)

Invisible Round Closure: At the end of the round, pull the active loop slightly longer. Remove your hook, insert it from back to front under both loops of the very first stitch of the round, catch the elongated loop, and pull it to the inside of the bag. Insert your hook from front to back through the space between the two posts right below the pulled loop, place the loop back on your hook, adjust the working yarn tension, yarn over, and draw the loop through to the front. Twist the hook inward, yarn over, and pull through to form the first stitch of the next round.

Rounds 2 to 14: Work 1 twisted sc in each stitch around (66 sts). Close each round using the invisible closure technique described above. As your rounds grow, smooth the fabric with your hands so the twisted stitches stack neatly.

After completing Round 14, the body of the bag should measure approximately 16.5 cm in height from the base. Test the height by pinching the two top edges together: they should meet comfortably without pulling or distorting the fabric. Fasten off with an invisible join and weave in the end on the inside.

crochet-clutch-bag-twisted-stitch

Step 3: Covering the Squeeze Metal Frame

Now prepare your metal squeeze frame (boca de lobo). First, fold your bag body flat and find the two exact center points along the sides. Count 33 stitches on one side and 33 stitches on the other, placing a stitch marker at each hinge position. These markers indicate where the hinges of your frame must sit.

To cover the frame, hold it open with the right side facing you:

  1. Side 1: Attach t-shirt yarn onto the metal arm right beside one hinge. Work 32 sc directly around the metal bar. Keep the curl of the t-shirt yarn facing inward so the surface of each stitch looks smooth and uniform. Space the 32 stitches evenly along the arm up to the next hinge. (32 sc)
  2. Hinge 1: Do not crochet over the metal hinge itself, as this would stop the spring mechanism from closing properly. Instead, pull up the active loop and chain 1 in the air directly across the hinge joint. (1 ch)
  3. Side 2: Work 32 sc directly around the second metal arm, sliding the stitches along if necessary to fit all 32 stitches neatly before reaching the starting hinge. (32 sc)
  4. Hinge 2: Cut the yarn leaving a 10 cm tail. Pull the loop through. With your smaller hook, insert the hook from back to front under the first sc of Side 1, pull the yarn tail through, then insert the hook back down through the center of the 32nd sc. This creates a faux chain stitch spanning the second hinge. (66 stitches total: 32 sc + 1 ch + 32 sc + 1 ch)

Weave the yarn ends under the stitches along the inside of the frame. Apply a tiny dot of silicone or fabric glue to the yarn tails so they remain anchored during daily use.

Step 4: Joining the Frame to the Bag Body

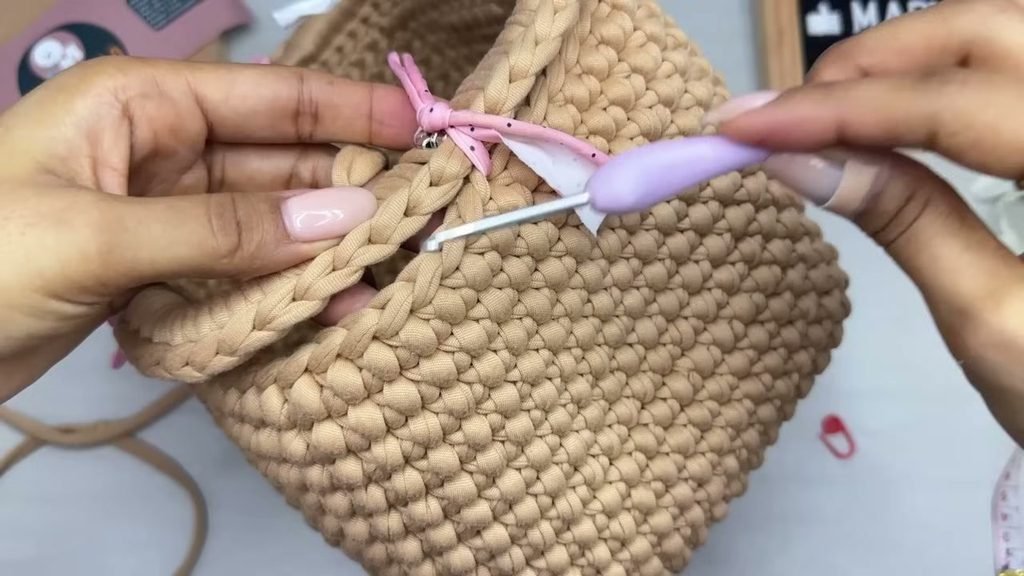
Place the crocheted frame onto the top edge of the bag body. Align the frame hinges directly above the stitch markers you placed earlier. Thread short lengths of scrap t-shirt yarn through the hinge chains and the marked bag stitches, tying loose knots to hold the frame firmly in place while you join.

crochet-clutch-bag-frame-joining

With your 6.0 mm hook, join the two pieces using slip stitches:

  1. Insert your hook through the center of a chain stitch on the frame, then through the center of the corresponding stitch on the bag body.
  2. Yarn over with your working yarn and draw a loop through both layers and through the loop on your hook to form a slip stitch.
  3. Continue working 1 sl st through both layers for every stitch around the perimeter, removing the scrap ties as you approach them. At the hinges, slip stitch through the hinge chain stitch and the marked center bag stitch below it.
  4. When you reach the starting point, cut the yarn, draw the tail through, and complete an invisible finish under the first slip stitch.
  5. Weave the yarn ends along the inside of the bag, trimming any excess.

Step 5: Hardware and Finishing Touches

To complete the bag, open the squeeze frame and locate the stitches directly below each hinge seam:

  1. Take one 3 cm carabiner ring, press the gate open, and pass it around two strong stitches right underneath the hinge seam. Snap the ring closed. Repeat on the opposite side with the second carabiner ring.
  2. Attach the ends of your 80 cm chain strap to the carabiner rings.
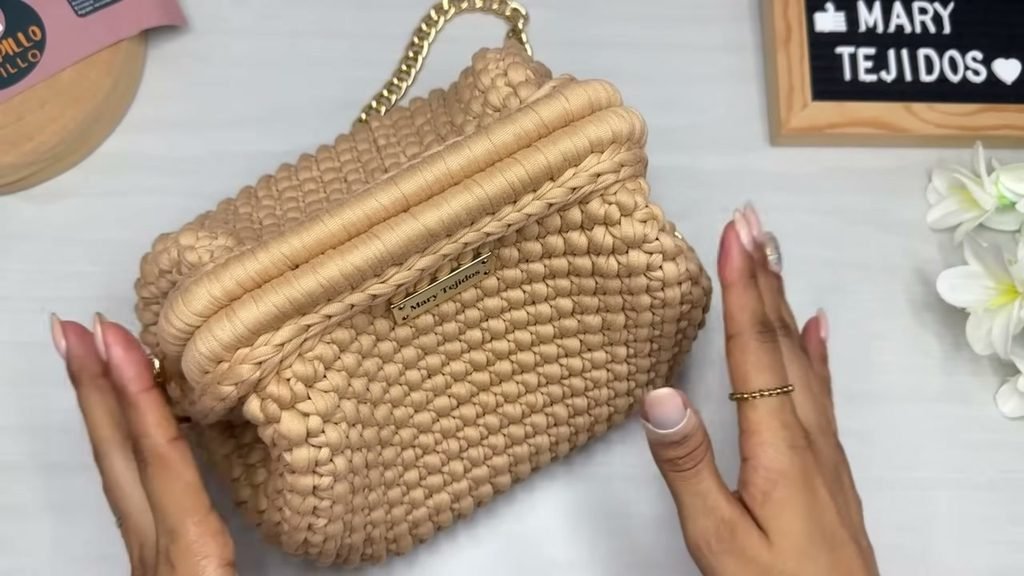
  3. If you have a metal logo or nameplate, center it on the front of the clutch approximately 4 rows below the frame, insert the prongs through the fabric, and bend them flat on the inside.
crochet-clutch-bag-finished

Video Tutorial

If you prefer watching the hands in motion or want to double-check the twisted stitch technique, watch the full video tutorial below:

https://www.youtube.com/watch?v=3ZEye3Y7voc

Tips and Common Mistakes

Here are several helpful practical tips to ensure your clutch bag turns out neat and symmetrical:

  • Keep your stitches tight: A loose stitch tension will cause the t-shirt yarn to sag under the weight of the metal frame. Check your work after three rows of the base; if you see gaps of light between the posts, change to a smaller hook size.
  • Twist the hook inwards: When working the twisted single crochet, always turn your hook head inward towards your palm before pulling the loop up to height. This creates the signature crossed-strand look and keeps the stitches dense.
  • Check frame clearance regularly: Squeeze frames can vary slightly by manufacturer. Test your base inside your frame after row 1 and after completing the perimeter round to make sure you have the required dimensions before moving onto the body.
  • Never crochet over the hinge: Wrapping yarn over the metal hinge will bind the spring and prevent the frame from snapping shut tightly. Always chain 1 in the air across the hinge.
  • Secure your ends with adhesive: T-shirt yarn is smooth and slippery. After weaving your ends through several stitches, place a small drop of craft silicone or textile glue on the tip of the tail to prevent it from sliding free over time.

Looking for another crochet bag pattern? Here are three fun patterns to try next:

Frequently Asked Questions

Can I make this clutch bag with regular cotton yarn instead of t-shirt yarn?

Yes, you can substitute other yarns, but you will need to hold multiple strands of worsted weight cotton together or choose a 5 mm braided cotton cord to achieve the required thickness. If your yarn is too thin, the stitches will lack the body needed to support the squeeze frame.

What should I do if my metal frame is a different size?

You can easily adjust the pattern to fit any size frame. Measure the inside width and length of your frame, start with a foundation chain that leaves 2 cm on each side, and work rows until the base reaches 1 cm below the top and bottom edges. Remember to count your total border stitches so you can divide them equally between the two frame sides.

Why is the base of my bag curling up at the edges?

Curling usually happens if your foundation chain was pulled too tight or if your corner increases do not have enough slack. Take care to pull each loop up to the full height of your hook when working the 3 sc corner increases, which will help the base lie completely flat.

How does the squeeze frame stay closed without a clasp or zipper?

The internal metal squeeze frame uses built-in spring tension. When you push the two side hinges inward, the frame pops open wide, and when you release or push the two sides together, the internal spring mechanism snaps securely shut.

I would love to see your finished clutch bag, so please share your photos in the comments and let me know what colors you chose. Happy crocheting, Sara.
Categories
All Free Crochet Crochet Clothing free crochet patterns Hats, Scarves & Bags

Crochet Beanie Pattern: Step-by-Step Tutorial

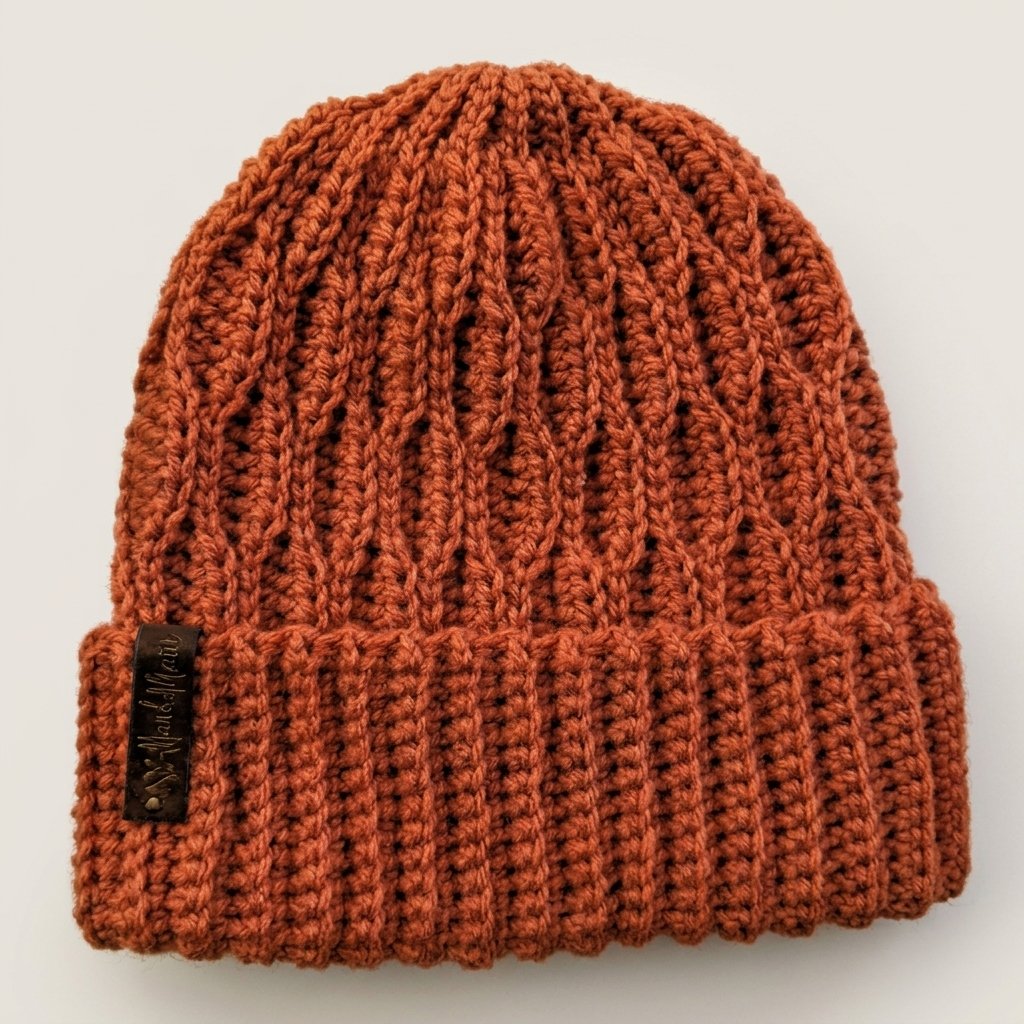
If you have been looking for a cozy, modern crochet beanie pattern that looks far more intricate than it actually is to make, you are in the right place. In this tutorial, I will guide you through crafting a textured ripple hat featuring a wide folded brim and a neat, gathered crown. You will find both my step-by-step written pattern and the companion video tutorial right here on this page, so you can follow along in whatever way suits you best.

This post is based on the video tutorial by Crochet Bits, linked below. Because the hat is worked flat in rows and then seamed into a tube, this crochet beanie pattern is an enjoyable and relaxing project that works up quickly. The gentle wavy texture is created by pairing two very simple stitches, making it a wonderful crochet beanie pattern for anyone who wants to create a polished, boutique-style winter accessory.

What Will I Learn?

Working through this crochet beanie pattern will help you master several practical crochet techniques that you can carry over into blankets, cowls, and sweaters. In this tutorial, you will learn:

  • Stretchy, elastic ribbing using single crochet worked through the back loop only.
  • Sculpted wave texture created by alternating blocks of half double crochet and slip stitches.
  • Crown shaping with short rows so the top gathers without bulky bunches of fabric.
  • A clever bridging trick for picking up the horizontal bar of a turning chain to eliminate gaps between short rows.
  • Invisible, flat slip-stitch seam to join the starting edge and final row cleanly.
  • Gathered crown finish using a yarn needle for a smooth, puckering-free top.

Materials and Tools

Below is the list of materials needed for this crochet beanie pattern, which can be adapted to suit whatever yarn you have in your stash:

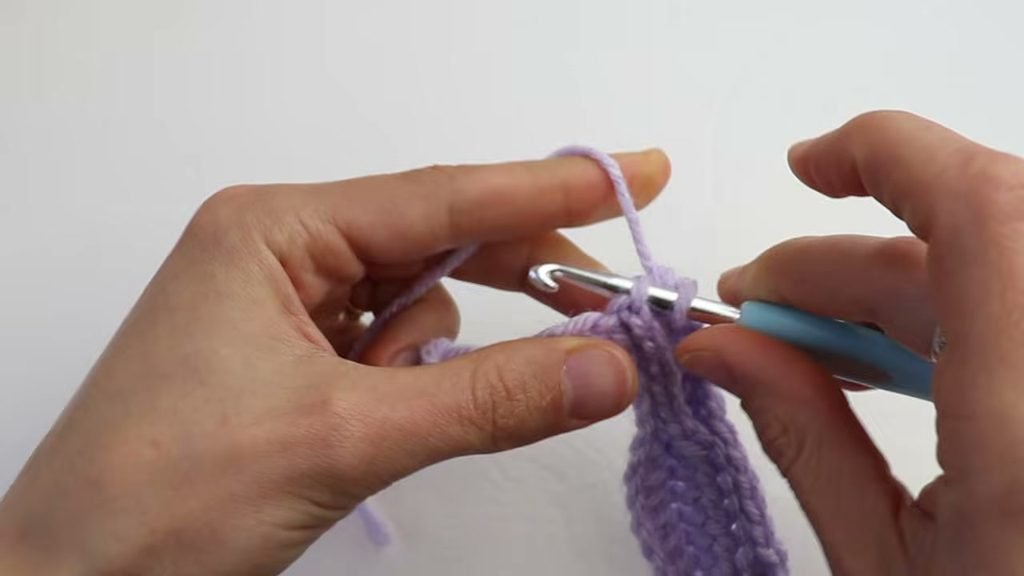
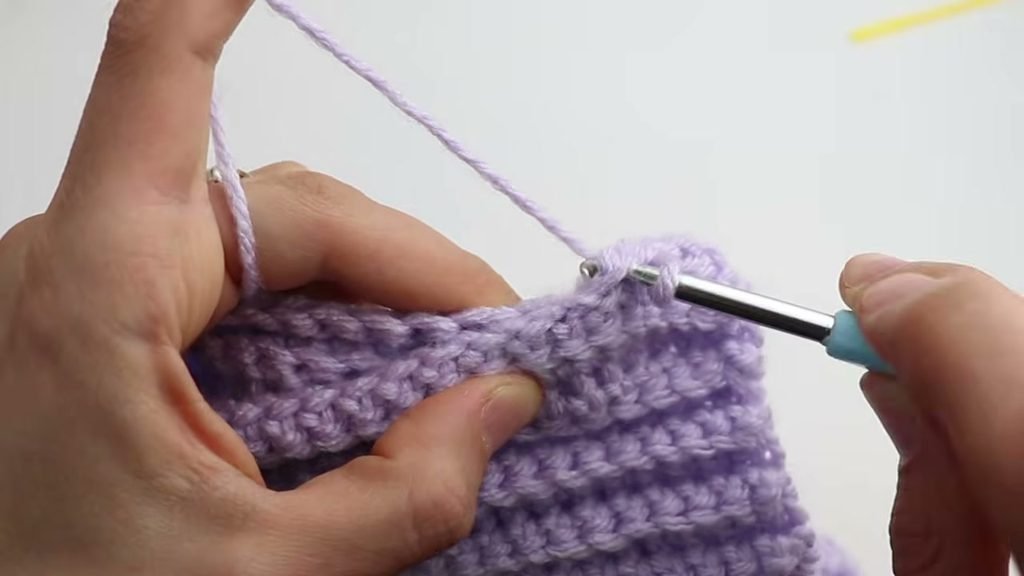
  • Yarn: Medium weight yarn (Category 4, worsted or aran weight). Bernat Premium by Yarnspirations in the colour Baby Lilac was used for the sample. You will only need approximately half of one skein (about 100 grams, or roughly 180 to 200 metres) to complete the hat.
  • Crochet Hook: 5.0 mm (US size H/8).
  • Yarn Needle: A blunt-tipped tapestry needle for seaming and closing the crown.
  • Measuring Tape: To check your starting chain and overall width.
  • Scissors: For cutting your yarn and trimming ends.

Please note that you can easily substitute any worsted or aran weight acrylic, wool, or blended yarn. If you decide to crochet a matching cowl or scarf later, keep in mind that the remaining half skein will not be quite enough, so be sure to pick up an extra skein before you start.

Gauge and Finished Size

This crochet beanie pattern is designed to fit an average adult head (suitable for both women and men simply by choosing your preferred shade), with generous stretch thanks to the ribbed construction.

  • Foundation Chain Length: Approximately 33 to 35 cm (13.5 inches) long when laid flat without stretching.
  • Total Fabric Width: Approximately 46 cm (18 inches) wide before seaming, measured across the rows unstretched.
  • Brim Depth: 24 stitches wide, designed to fold up into a cozy double-thick brim.

Note: Stitch gauge is not critical for this crochet beanie pattern because the design is completely customizable. If your yarn or tension produces a shorter foundation chain, you can simply adjust the starting chain in multiples of 12 plus 6 stitches (plus 1 turning chain), as explained in the notes below.

Pattern Notes and Abbreviations

This crochet beanie pattern is written in standard US crochet terms.

Stitch Abbreviations

  • ch: chain
  • sl st: slip stitch
  • sc: single crochet
  • hdc: half double crochet
  • BLO: back loop only
  • st(s): stitch(es)
  • RS: right side
  • WS: wrong side

Pattern Notes

  • Stitch Multiple: The ripple pattern requires a multiple of 12 stitches plus 6 stitches (plus 1 turning chain). The starting chain of 55 consists of 24 stitches for the folded brim, 24 stitches for the two wave pattern repeats, 6 stitches for the crown short row, and 1 turning chain.
  • First Chain Count: Do not tighten your initial slip knot. Count that slip knot as your very first chain. Keeping it loose makes it easy to work into at the end of Row 3.
  • Back Loop Only (BLO): Starting in Row 2, all stitches across the brim and body are worked through the back loop only, which creates the distinctive ridges and elastic stretch.
  • Edging Neatness: For the very last single crochet stitch at the outer edge of the brim, work underneath both top loops rather than just the back loop. This provides stability and stops the bottom hem from flaring out or over-stretching.
  • Tension on Slip Stitches: When working the slip stitches across the ripple body, keep your tension relaxed. Pulling slip stitches too tightly will make it difficult to insert your hook into them on the subsequent row.
  • Crown Short Rows: Rows 1 and 2 stop 6 stitches short of the crown end. Rows 3 and 4 work all the way across those remaining 6 stitches. Alternating these heights tapers the top of the hat naturally, preventing excess bulk when you gather the crown.

The Written Pattern

Starting the Foundation Chain

Start with a slip knot on your hook, leaving a standard tail. Remember not to pull the slip knot tight, as you will count it as chain number 1.

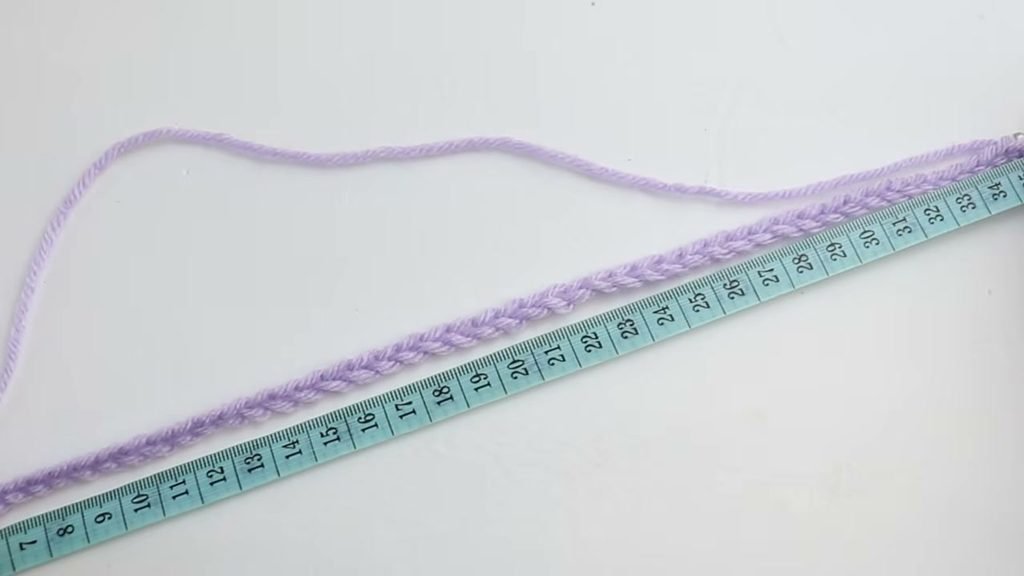
Foundation Chain: Ch 54. Measure your chain flat along your tape measure. For an adult fit, your chain should measure between 33 and 35 cm (13.5 inches). If you are happy with the length, chain 1 extra for your turning chain, bringing your total count to 55 chains.

crochet-ripple-hat-foundation-chain

Row 1 (Right Side)

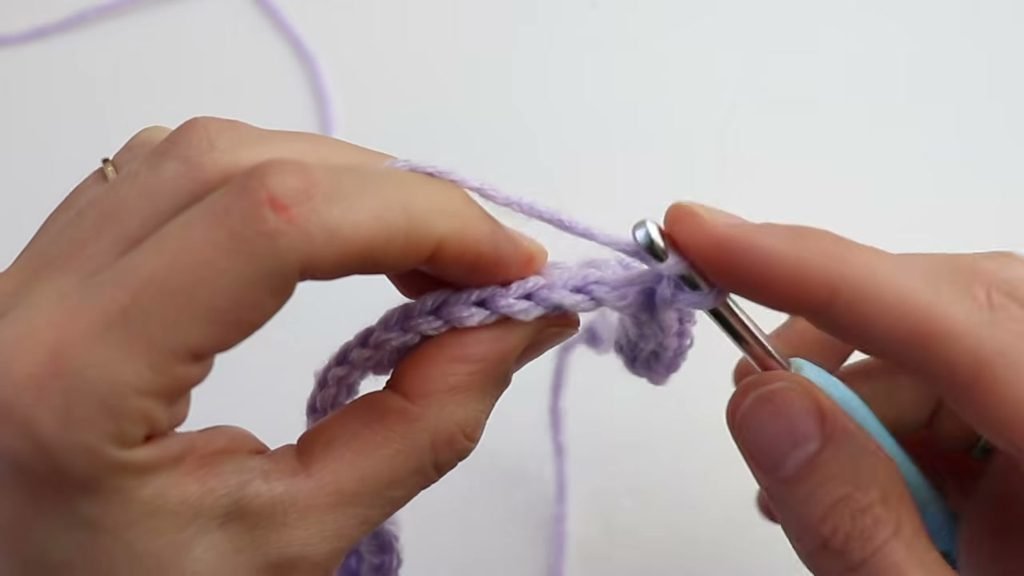
Row 1 (RS): Starting in the 2nd ch from hook, sc 1 in each of next 24 ch (folded brim). [Hdc 1 in each of next 6 ch, sl st 1 in each of next 6 ch] twice. Leave the last 6 ch unworked to begin shaping the tapered crown. (48 sts worked, 6 ch left unworked). Ch 1, turn.

crochet-ripple-hat-row-1-stitches

Row 2 (Wrong Side)

Row 2 (WS): Sl st BLO in each of next 6 sts, hdc BLO in each of next 6 sts, sl st BLO in each of next 6 sts, hdc BLO in each of next 6 sts. Sc BLO in each of next 23 sts, then work 1 sc underneath both loops of the 24th and final brim stitch for a clean edge. (48 sts). Ch 1, turn.

crochet-ripple-hat-row-2-texture

Row 3 (Right Side)

Row 3 (RS): Sc BLO in each of next 24 brim sts. [Sl st BLO in each of next 6 sts, hdc BLO in each of next 6 sts] twice. To bridge the short-row step without leaving a hole, insert hook under the horizontal bar of the previous turning chain and directly into the next unworked chain stitch. Yarn over and pull through all 3 loops on your hook to complete a seamless slip stitch. Work 1 sl st in each of the remaining 5 ch stitches across to the end, working into the loose slip knot on your last stitch. (54 sts). Ch 1, turn.

Row 4 (Wrong Side)

Row 4 (WS): [Sl st BLO in each of next 6 sts, hdc BLO in each of next 6 sts] twice, sl st BLO in each of next 6 sts. Sc BLO in each of next 23 sts, then work 1 sc through both loops of the final brim stitch. (54 sts). Ch 1, turn.

crochet-ripple-hat-crown-step-technique

Repeating the Pattern

Rows 1 through 4 form the complete 4-row pattern repeat. Repeat these four rows in sequence until your hat reaches the desired width:

  • Row 5 (Repeat Row 1): Sc BLO in each of next 24 sts. [Hdc BLO in next 6 sts, sl st BLO in next 6 sts] twice. Leave last 6 crown sts unworked. (48 sts). Ch 1, turn.
  • Row 6 (Repeat Row 2): Sl st BLO in next 6 sts, hdc BLO in next 6 sts, sl st BLO in next 6 sts, hdc BLO in next 6 sts. Sc BLO in next 23 sts, sc 1 through both loops of the last st. (48 sts). Ch 1, turn.
  • Row 7 (Repeat Row 3): Sc BLO in next 24 sts. [Sl st BLO in next 6 sts, hdc BLO in next 6 sts] twice. Pick up horizontal bar of turning chain and sl st into next st, sl st BLO in remaining 5 sts to end. (54 sts). Ch 1, turn.
  • Row 8 (Repeat Row 4): [Sl st BLO in next 6 sts, hdc BLO in next 6 sts] twice, sl st BLO in next 6 sts. Sc BLO in next 23 sts, sc 1 through both loops of the last st. (54 sts). Ch 1, turn.

Continue repeating Rows 5 through 8 until your piece measures approximately 46 cm (18 inches) wide when laid flat unstretched, or until it fits comfortably around your head. Always finish on an even-numbered row (a complete Row 4 or Row 8) so that your working yarn ends up at the brim edge, ready for seaming.

crochet-ripple-hat-seaming-side

Seaming the Hat

Lay your crocheted rectangle flat on your table. Fold the fabric in half with the wrong side facing outwards and the right side tucked inside, bringing the foundation chain edge directly against your final row of stitches.

Starting at the brim end, insert your crochet hook into the outer loop of the starting foundation chain on one edge, and through the corresponding back loop of the final row on the opposite edge. Yarn over and pull the yarn through all three loops on your hook to complete a slip stitch.

Repeat this process stitch for stitch all the way along the seam up to the crown edge. Keep your slip stitches evenly tensioned so the seam remains elastic and lies completely flat. When turned right side out, this seam will be invisible within the ribbed texture.

Closing the Crown

crochet-ripple-hat-closing-crown

Once you reach the top of the seam, cut your yarn, leaving a generous tail of approximately 20 to 25 cm (8 to 10 inches). Pull the tail through your working loop and pull snug to secure it with a knot.

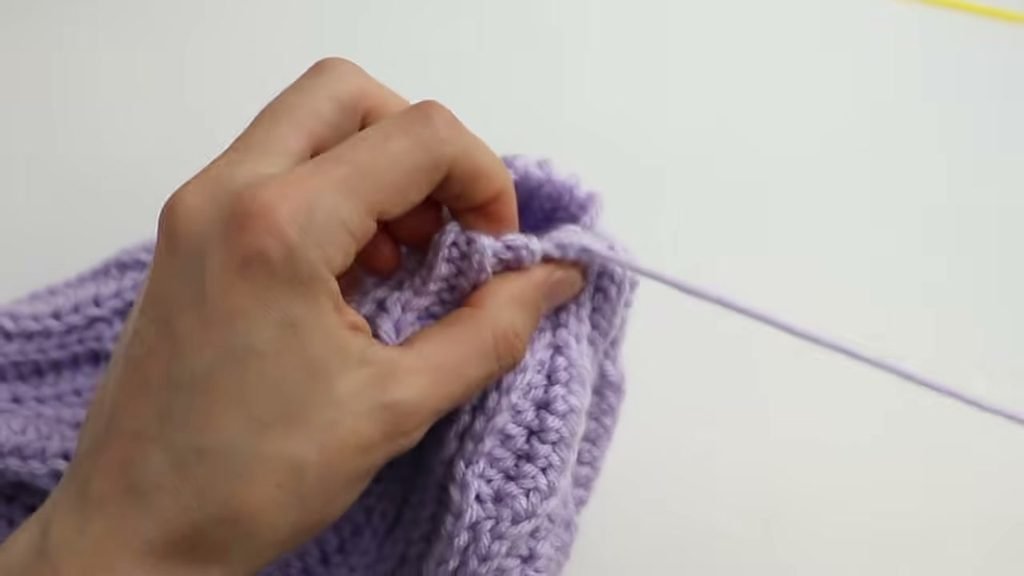
Thread the yarn tail onto your blunt tapestry needle. Look closely at the top edge of your hat. You will see the horizontal bars created by the turning chain-1 of the extended rows. Insert your needle under each of these horizontal bars around the entire top opening. Pull the yarn slowly and steadily to gather the crown closed. If you are using a woolen yarn, pull gently so the strand does not snap.

Once the opening is gathered, pass your needle through the same loops a second time to reinforce the closure. Pull tight, push your needle through to the inside (wrong side) of the hat, knot securely, and weave in all remaining loose ends. Turn your hat right side out, fold up the cozy ribbed brim, and your ripple beanie is ready to wear.

Video Tutorial

If you find visual demonstrations helpful, you can watch the entire step-by-step process in the tutorial below. Feel free to pause and rewatch any specific stitch technique as you crochet along.

Tips and Common Mistakes

  • Keep your slip knot loose: Remember that the starting slip knot counts as your first chain stitch. If you pull it tight at the beginning, you will struggle to work the final slip stitch into it at the end of Row 3.
  • Relax your slip stitch tension: Crocheters often pull slip stitches tighter than regular stitches. Consciously keep your hands relaxed during the 6 slip-stitch sections, otherwise inserting your hook on the return row will feel stiff and frustrating.
  • Always anchor the last brim stitch: Working underneath both loops of the very last single crochet on the brim edge prevents the brim from rolling or developing a loose, wavy border.
  • Pick up the horizontal bar at the crown step: When transitioning across the short row in Rows 3 and 7, always pick up the horizontal bar of the turning chain along with the next stitch. This bridging technique pulls the two levels together and eliminates unsightly holes at the top of the hat.
  • Pull the gathering tail gently: When closing the crown, pull the yarn tail steadily and smoothly. If you are working with a roving or single-ply yarn, pulling too quickly or forcefully can cause the yarn to break.

Make More

If you enjoyed crafting this cozy hat, here are a few more crochet projects you might like to try next:

Frequently Asked Questions

Can I adjust the width of the folded brim?

Yes, absolutely. The brim in this crochet beanie pattern is set to 24 single crochet stitches, which creates a wide, warm cuff when folded up. If you prefer a narrower cuff or a slouchier fit with a smaller fold, you can reduce the brim stitch count to 16 or 18 stitches. Simply subtract that number from your total foundation chain, keeping the remaining ripple and crown counts identical.

Why are 6 stitches left unworked at the crown in Rows 1 and 2?

Leaving those 6 stitches unworked creates a short row. Because rows 1 and 2 do not travel all the way to the top while rows 3 and 4 do, fewer rows of fabric are built at the very crown than at the brim. This naturally tapers the circumference of the cylinder so that when you draw the crown shut, you have significantly less bulk to cinch together.

Can I adapt this crochet beanie pattern for children or larger head sizes?

Yes. To adjust the height of the hat, adjust your starting chain using the stitch multiple of 12 plus 6 stitches (plus 1 turning chain). To adjust the circumference around the head, simply crochet fewer or more 4-row pattern repeats before seaming. Try wrapping the unseamed piece around the wearer’s head to check the fit before you begin the joining seam.

Is this crochet beanie pattern suitable for men as well as women?

Yes, this design is completely unisex. The geometric ripple texture and clean vertical ribbing look wonderful in any colour palette, whether you choose soft pastels, rich jewel tones, or classic neutrals like charcoal, navy, and oatmeal.

I would love to see your finished ripple hat! Share your makes in the comments below or tag me on social media. Happy crocheting, Sara.
Categories
All Free Crochet Crochet Clothing Crochet for Beginners free crochet patterns

Crochet Cardigan Pattern: Free Floral Lace Cardigan

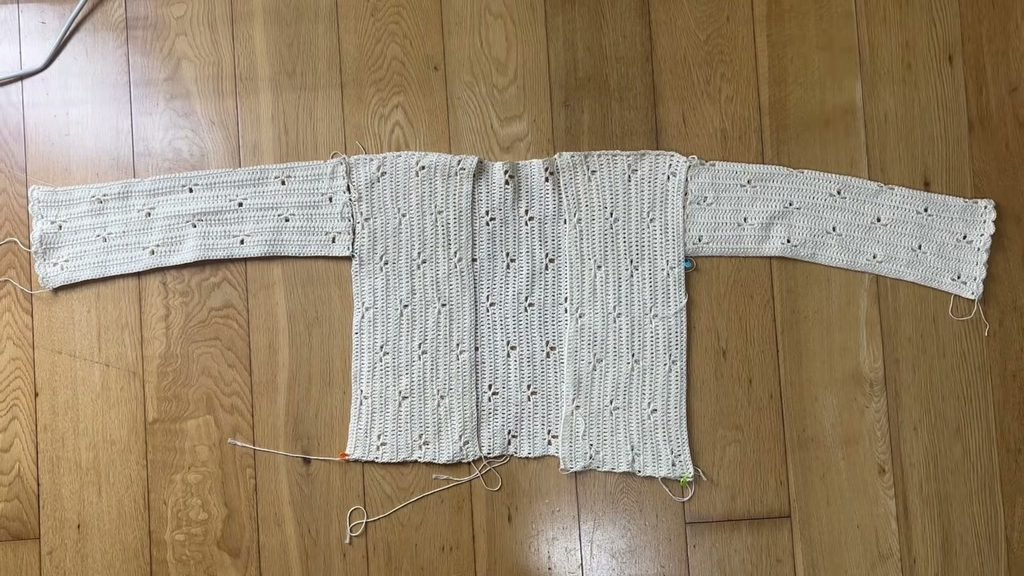
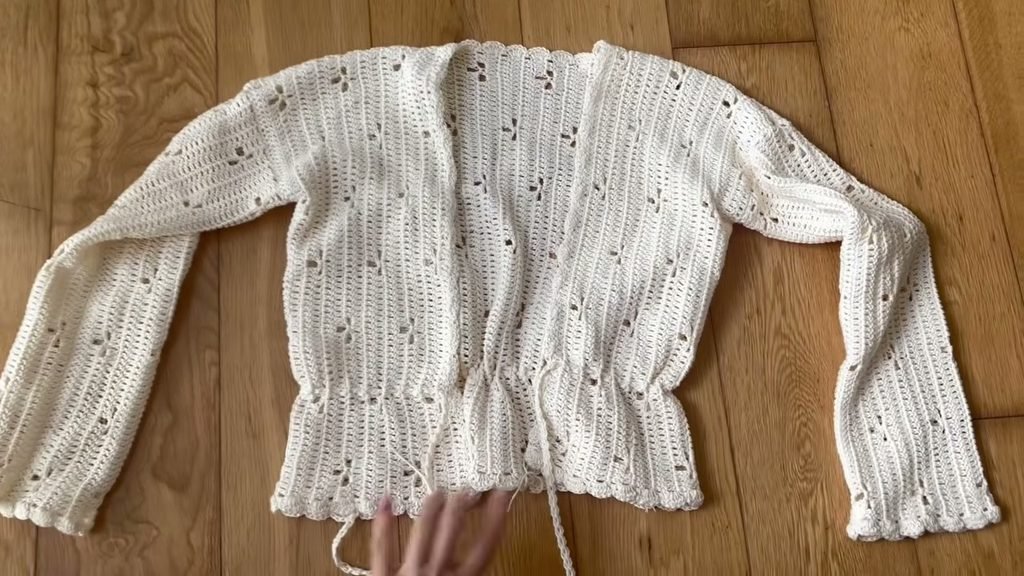
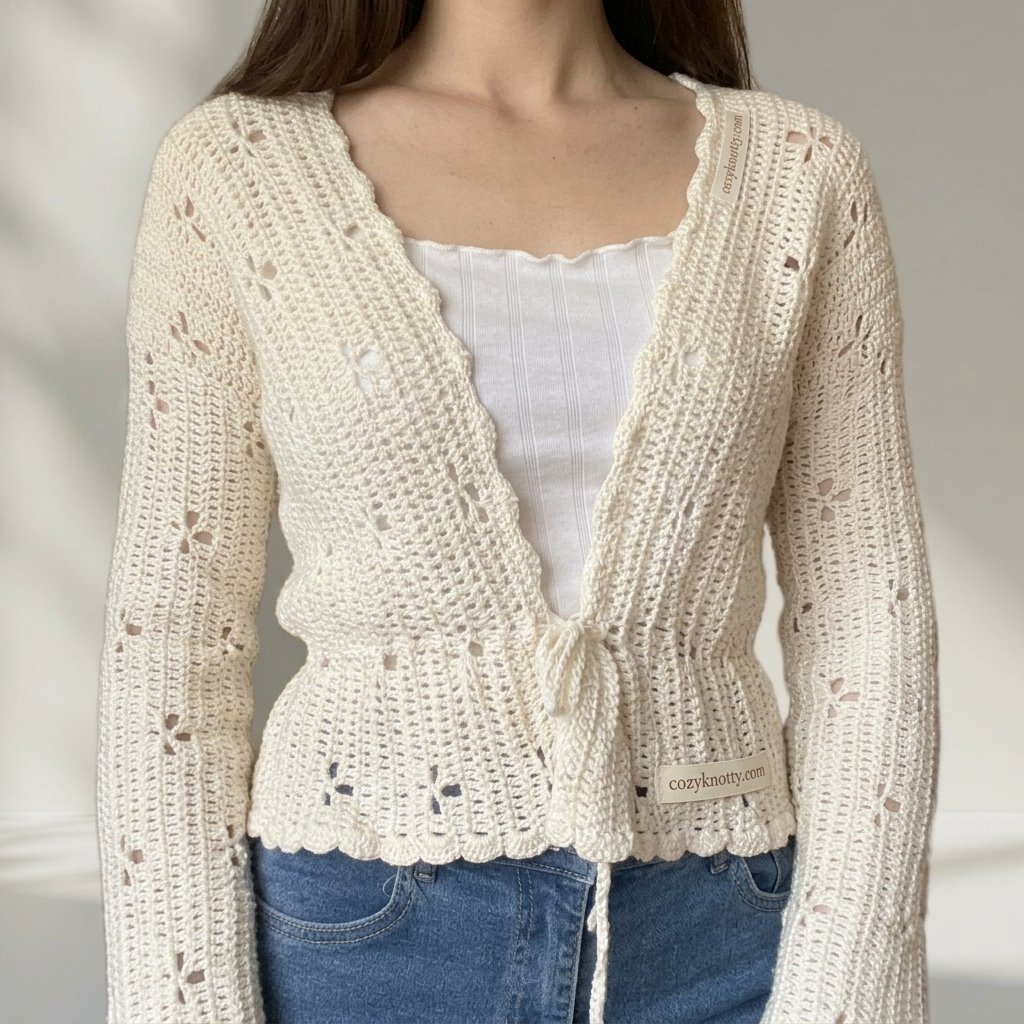
Lightweight crochet cardigans are timeless staples for any handmade wardrobe, and this floral lace crochet cardigan pattern is especially enchanting. With its staggered openwork flower motifs, delicate scalloped shell borders, and flattering waist tie cord, this cardigan brings romantic elegance to any warm-weather outfit. Because it is worked sideways with zero complex shaping, this design is both approachable and wonderfully adaptable to any body size.

There are no armhole curves, waist decreases, or complicated sewing steps required. Every single piece is joined using your crochet hook, keeping assembly smooth and enjoyable. I will guide you through each stage of the project, from working the foundation row and mastering the 6-row floral repeat to seaming the shoulders, attaching the sleeves, and adding the scalloped trim. Below, you will find the complete written pattern, helpful tips, and the full video tutorial.

This post is based on the video tutorial by Alona crochets, linked below.

What Will I Learn?

Crocheting this lace garment is a fantastic way to develop your intermediate garment-making skills. By working through this pattern, you will learn:

  • How to work a foundation double crochet row for stretchy, comfortable garment edges.
  • How to crochet open lace floral motifs using simple chain spaces and single crochet petal anchors.
  • How to stagger lace motifs across alternating row sets for a balanced, flowing pattern.
  • How sideways garment construction works, using foundation length to set height and row count to set width.
  • How to join garment shoulders, sleeves, and side seams cleanly with single crochet stitches.
  • How to add a decorative 5-double crochet scalloped shell border around hems and neckline edges.
  • How to make an adjustable textured cord tie to cinch the waistline.

Materials and Tools

crochet-floral-cardigan-materials

To crochet this floral cardigan, you will need a lightweight, breathable cotton or linen blend yarn that holds stitch definition and drapes gracefully.

  • Yarn: Drops Safran (100% cotton, 160 meters / 175 yards per 50g ball) or any comparable sport weight yarn (Weight 2 / 5-ply). For a size Small to Medium, you will need approximately 350 to 450 grams of yarn, with additional yardage for larger sizes or longer tunic lengths.
  • Crochet Hook: 3.0 mm crochet hook (or the hook size that gives you the recommended drape and fabric tension).
  • Measuring Tape: Essential for checking your vertical foundation length and panel widths.
  • Stitch Markers: Useful for marking armhole openings and tracking pattern repeats.
  • Scissors & Tapestry Needle: For cutting yarn and weaving in ends.

You can substitute any lightweight fiber you prefer, such as bamboo, linen blend, or light fingering/DK yarn. Be sure to swatch your stitch repeat first, as fiber elasticity will affect how much the lace opens up during blocking.

Sizing and Customization

This cardigan follows a completely made-to-measure approach. Instead of following rigid size charts, you build the garment around your own body measurements.

In this pattern, the foundation row establishes the vertical length of the cardigan (from shoulder to bottom hem), while the number of rows worked establishes the horizontal width across your body.

  1. Cardigan Length (Foundation Stitches):
    • The demonstration sample uses an 83-stitch foundation, measuring approximately 44 cm (17.5 inches) laid flat and stretching to about 50 cm (20 inches) in wear.
    • To adjust the length, add or subtract stitches in multiples of 24 stitches to keep the floral lace repeat aligned.
    • Cropped length: 59 stitches (83 minus 24).
    • Standard length: 83 stitches.
    • Longer or tunic length: 107 stitches (83 plus 24).
  2. Panel Widths (Row Counts):
    • Back Panel: Work rows until the panel width equals half of your bust circumference plus 4 to 6 cm of comfortable ease. In the sample (84 cm bust), the back panel consists of 49 rows, measuring about 47 cm flat and stretching to 60 cm.
    • Front Panels (Make 2): Work rows until each front panel covers approximately one quarter of your front torso, leaving a 10 to 13 cm opening in the center for the neckline. In the sample, each front panel has 19 rows (about 18 cm flat width).
    • Sleeves (Make 2): The sleeve foundation matches the length from your shoulder down to your wrist (83 stitches in the sample). Work rows until the rectangle wraps comfortably around the widest part of your upper arm (28 rows in the sample).

Pattern Notes

Please keep these helpful pointers in mind before beginning your stitches:

  • Crochet Terms: This pattern is written in standard US crochet terms with US spelling throughout.
  • Skill Level: Advanced beginner to intermediate. Familiarity with basic stitches and counting pattern repeats is helpful.
  • Turning Chains: A chain 3 at the start of a double crochet row counts as the first stitch. Always skip the first base stitch and begin your double crochets in the second stitch. At the end of each row, remember to place your final stitch into the top of the turning chain 3.
  • Flower Stitch Mechanics: Each floral motif is built across three consecutive rows:
    • First lace row: establishes the flower base with a chain-2 window (chain 2, skip 1 stitch, 1 double crochet).
    • Second lace row: creates the flower center and petals (chain 2, 1 single crochet in the chain-2 space, chain 2, skip 2 stitches, 1 double crochet).
    • Third row: seals the flower with solid double crochets (2 double crochet in the first chain-2 space, 1 double crochet in the single crochet, 2 double crochet in the next chain-2 space).
  • Staggered Motif Layout: The cardigan alternates between two flower arrangements. Set 1 features 4 flowers along the row, while Set 2 features 3 flowers positioned directly between the flowers of Set 1.

Terms and Abbreviations

AbbreviationUS Term Definition
chChain stitch
sl stSlip stitch
scSingle crochet
dcDouble crochet
fdcFoundation double crochet
st / stsStitch / stitches
sp / spsSpace / spaces
skSkip
yoYarn over

Floral Crochet Cardigan Pattern

Follow along through each section: crocheting the back panel, making the two front panels, seaming the shoulders, working and attaching the sleeves, adding the scalloped border, and crafting the optional waist cord.

Part 1: The Back Panel

The back panel is worked sideways from one edge across to the other.

  1. Foundation Row: Work 83 foundation double crochet (fdc). Alternatively, chain 85, insert hook into the 4th chain from hook, and work 1 double crochet in each chain across (83 stitches total, counting the skipped 3 chains as stitch 1).
crochet-floral-cardigan-foundation-row
  1. Row 2 (Flower Set 1 Base): Chain 3, turn. Skip the first stitch, work 1 double crochet in each of the next 4 stitches (5 stitches total counting chain 3). *Chain 2, skip 1 stitch, double crochet in next stitch, work 22 more double crochet (23 double crochet total after the chain space)*. Repeat from * to * across the row until 6 stitches remain. Chain 2, skip 1 stitch, double crochet in each of the last 5 stitches. (You will have 4 chain-2 window spaces across the row).
  2. Row 3 (Flower Set 1 Petals): Chain 3, turn. Skip first stitch, work 1 double crochet in each of the next 2 stitches (3 stitches total, leaving 2 stitches unworked before the chain-2 space). *Chain 2, single crochet directly into the chain-2 space, chain 2, skip 2 stitches, double crochet in the 3rd stitch. Work double crochets across until 2 stitches remain before the next chain space*. Repeat from * to * across to the final flower, finish with chain 2, single crochet in space, chain 2, skip 2 stitches, and double crochet in each of the last 3 stitches.
crochet-floral-cardigan-flower-stitch
  1. Row 4 (Solid Row): Chain 3, turn. Work 1 double crochet in each stitch across, placing 2 double crochets in each chain-2 space, 1 double crochet in each single crochet, and 2 double crochets in the next chain-2 space. (83 double crochet total).
  2. Row 5 (Flower Set 2 Base – Staggered): Chain 3, turn. Work 1 double crochet in each of the next 16 stitches (17 stitches total counting chain 3). *Chain 2, skip 1 stitch, double crochet in next stitch, work 22 more double crochet (23 double crochet total)*. Repeat across to place 3 staggered flower windows, finishing with 17 double crochets to balance the row.
  3. Row 6 (Flower Set 2 Petals – Staggered): Chain 3, turn. Work double crochets across until 2 stitches remain before the first chain space. *Chain 2, single crochet in space, chain 2, skip 2 stitches, double crochet in next stitch. Work double crochets across to 2 stitches before the next space*. Repeat across, finishing with double crochets to the end.
  4. Row 7 (Solid Row): Chain 3, turn. Work a solid row of double crochets, placing 2 double crochets in each chain-2 space, 1 double crochet in each single crochet, and 2 double crochets in the next chain-2 space. (83 double crochet).
  5. Rows 8 through 49: Repeat Rows 2 through 7, alternating between the 4-flower set and the 3-flower set, until you complete 49 rows (or your desired back panel width). Fasten off.

Part 2: The Front Panels (Make 2)

Each front panel is worked using the exact same stitch pattern as the back panel, but with fewer total rows.

  1. Work the foundation row with 83 stitches, exactly matching your back panel length.
  2. Work Rows 2 through 7 following the floral lace pattern.
  3. Continue the repeat until you have completed 19 rows in total (or your desired front chest coverage).
  4. Fasten off, leaving an 8-inch yarn tail for shoulder joining.
  5. Repeat steps 1 through 4 to produce a second identical front panel.
crochet-floral-cardigan-joining-panels

Part 3: Joining the Shoulders

Lay the back panel flat with the right side facing up. Place the two front panels on top with their wrong sides facing you, aligning the outer edges and bottom hem.

  1. Align the top edge of each front panel with the outer top edge of the back panel. The 10 to 13 cm open gap in the center forms the back neck opening.
  2. Join yarn at the outer shoulder corner. Working through both thicknesses at the same time, place 2 single crochet stitches into the side edge of each double crochet row end.
  3. Work single crochet stitches evenly across the top shoulder edge until the front panel row ends are joined to the back panel. Chain 1, cut yarn, and pull through.
  4. Repeat on the opposite shoulder, ensuring your seams are worked from the same orientation.

Part 4: Sleeves and Armhole Assembly

Try on the cardigan to check the armhole depth. Place stitch markers below your armpit on both sides (in the sample, 28 stitches down from the shoulder seam on both front and back).

  1. Sleeve Foundation: Work 83 foundation stitches (matching your shoulder-to-wrist arm length).
  2. Sleeve Rows: Work in the 6-row floral repeat for 28 rows (or the number of rows needed to circle your upper arm comfortably). Fasten off.
  3. Sleeve Seaming: Fold the sleeve rectangle in half lengthwise. Working through both long edges with your hook, join the seam from wrist to shoulder using single crochet stitches, stretching the fabric gently so the seam does not pull tight.
  4. Sleeve Cuff Border: Work around the wrist opening. Chain 1, work 1 single crochet in the first row end. In the next row end, work 5 double crochet (shell). In the following row end, work 1 single crochet. Continue alternating 5 double crochet shells and single crochet anchors around the cuff edge. Join with a slip stitch into the starting single crochet and fasten off.
  5. Make a second identical sleeve.
  6. Attaching Sleeves: Seam the cardigan side edges from the bottom hem up to the armhole marker using single crochet. Then pin the open sleeve top into the armhole opening and seam all the way around with single crochet stitches.
crochet-floral-cardigan-scallop-border

Part 5: Scalloped Shell Borders

The scalloped shell border adds a sweet vintage finish along the front opening, neckline, and bottom hem.

  1. With the reverse side of your garment facing you, join yarn at the lower edge of one front panel.
  2. Chain 1, work 1 single crochet in that corner space. Skip 2 stitches, work 5 double crochet into the third stitch. Skip 2 stitches, work 1 single crochet into the next stitch.
  3. Continue working this shell pattern up the vertical front edge. When you reach the side row ends along the neckline, work 5 double crochet into one row end, then 1 single crochet into the next row end.
  4. Continue the scalloped pattern around the back neck, down the second front panel, and continuously along the entire lower hem.
  5. Join with a slip stitch to the first single crochet, fasten off, and weave in all loose yarn ends.
crochet-floral-cardigan-sleeves-and-fit

Part 6: Optional Waist Cord Tie

If you wish to cinch your cardigan at the waist, make this simple textured cord:

  1. Make a slip knot and chain 2. Yarn over, insert hook into the first chain, yarn over and pull up a loop (3 loops on hook). Yarn over, pull through 1 loop, then yarn over and pull through all 3 loops.
  2. Chain 2. Insert hook into the middle space between the turning chain and the stitch. Yarn over, pull up a loop, yarn over, pull through 1 loop, yarn over and pull through all 3 loops.
  3. Repeat step 2 until the cord reaches approximately 140 cm (55 inches) in total length. Fasten off.
  4. Try on your cardigan, locate your natural waistline, and weave the cord in and out through the lace eyelets around your torso.

Step-by-Step Garment Summary

Garment PieceFoundation StitchesRows WorkedFinished Dimensions (Sample)
Back Panel83 fdc (vertical length)49 rows44 cm long, 47 cm wide flat (stretches to 60 cm)
Front Panels (Make 2)83 fdc (vertical length)19 rows each44 cm long, 18 cm wide flat each
Sleeve Panels (Make 2)83 fdc (wrist to shoulder)28 rows each44 cm long, 16-18 cm folded width
Borders & CuffsN/A1 round per edge5-dc shells and single crochet anchors
Waist Cord TieChain 2 startRepeated to length140 cm total cord length (70 cm folded)

Video Tutorial

If you prefer watching each step worked in real time, follow along with the complete step-by-step video demonstration below. You can pause or rewind whenever you need a closer look at the floral lace repeat or assembly technique.

Tips and Common Mistakes

Keep these practical suggestions in mind for the neatest finished cardigan:

  • Use Foundation Double Crochet for Flexible Hems: Starting with standard chains can create a tight edge that pulls or puckers. If you use chains instead of foundation double crochet, go up one full hook size for the chain to preserve elasticity.
  • Count Your Stitches on Every Solid Row: Every solid double crochet row (Rows 1, 4, and 7) must maintain your original count of 83 stitches. Remember that each chain-2 space receives 2 double crochets and each single crochet receives 1 double crochet.
  • Watch Your Turning Chain Placement: The final double crochet of each row must be worked into the top of the turning chain 3 from the row below. Skipping this stitch causes your panel edges to taper inward.
  • Keep Single Crochet Seams Relaxed: When joining panels with single crochet, give your fabric a gentle stretch every 10 stitches. A tight crochet seam will cause puckering along the shoulders and sides.
  • Block Before Final Wear: Because cotton yarn relaxes when washed, pin your finished cardigan flat and steam or mist lightly with water to open up the delicate flower petals.

How to Style and Make More

This floral lace cardigan pairs beautifully over sun dresses, camisoles, and high-waisted jeans. Wear it open for a breezy bohemian look or cinched with the waist tie for a defined silhouette.

If you enjoyed this crochet cardigan pattern, explore these other garment tutorials on the blog:

Frequently Asked Questions

Can I make this cardigan longer or shorter?

Yes, you can easily customize the length by adding or subtracting stitches from your foundation row. Because each floral repeat occupies 24 stitches, adjust your foundation count by multiples of 24 (such as 59 stitches for a cropped fit or 107 stitches for tunic length).

Can I use acrylic yarn instead of cotton?

Yes, you can use any yarn fiber you prefer. Keep in mind that cotton provides crisp stitch definition and cool breathability for summer, while acrylic yarn will produce a softer, warmer drape suitable for autumn layering.

How do I know how many rows to make for my size?

Measure your bust circumference and divide by two. Work rows on your back panel until the flat width equals that half-bust measurement plus 4 to 6 cm of ease. For the front panels, work rows until each side covers about half of your chest, leaving a comfortable 10 to 13 cm opening for the neck.

Do I have to add the waist cord?

Adding a waist tie is entirely up to your personal style preference. The design wears beautifully as a relaxed open-front duster without any cord, or you can add small buttons along the vertical opening instead.

I would love to see your finished floral cardigan, so please share your color choices and completed makes in the comments below. Happy crocheting, Sara!

Categories
All Free Crochet Crochet Clothing Crochet for Beginners free crochet patterns

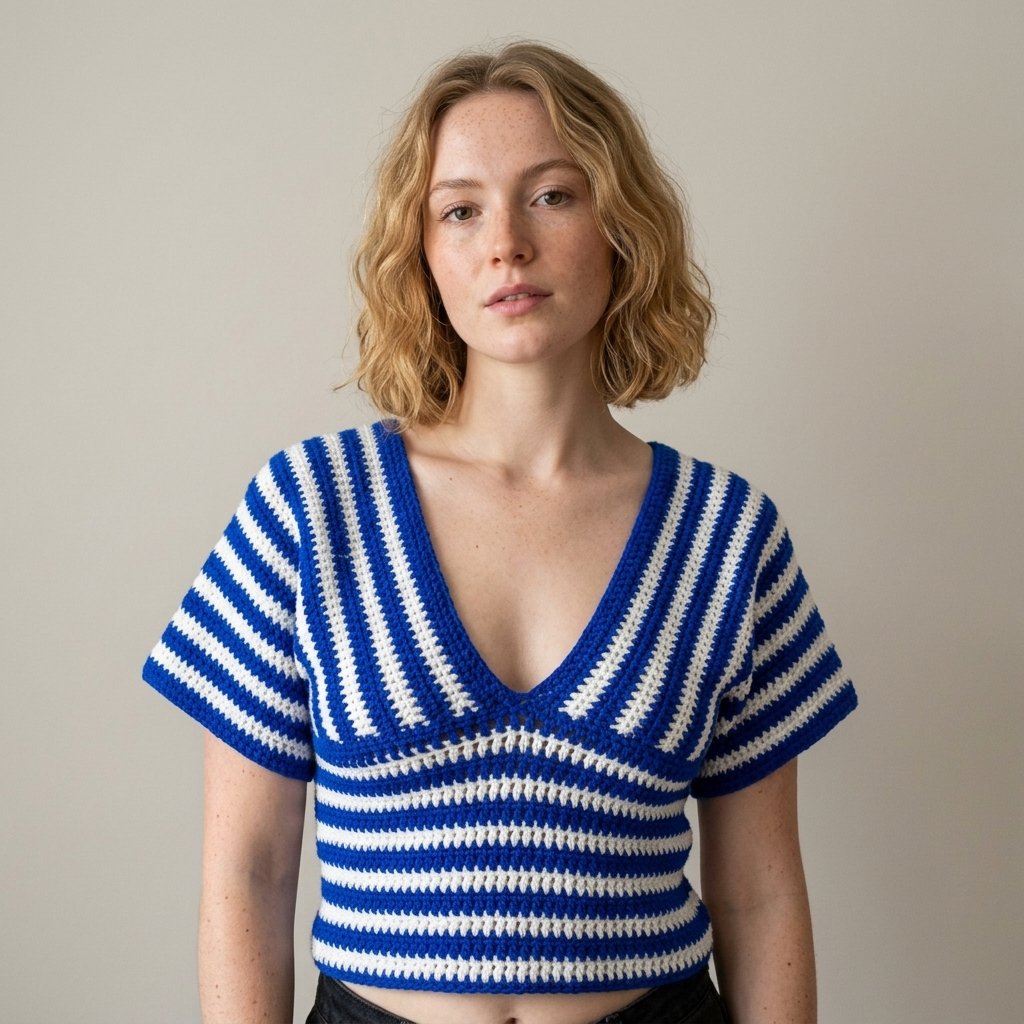
How to Crochet a Trendy Striped V-Neck Crochet Top: Easy Beginner Pattern

Crocheting your own clothes is one of the most rewarding milestones in maker life, and this trendy striped V-neck crochet top is the ideal garment to begin with. Featuring bold nautical stripes, an effortless drop-shoulder silhouette, and a flattering V-neckline, this crochet top looks chic while remaining wonderfully easy to construct. The entire piece comes together from three simple rectangular sections worked in basic double crochet stitches.

Because there is no complex shaping, increasing, or armhole decreasing, you can customize the measurements so your handmade crochet top fits your body perfectly. I will guide you through each step of the process, including taking your personal measurements, carrying your yarn neatly across rows to avoid weaving in dozens of tails, assembling the panels, and adding a crisp neckline border. Below, you will find the complete written pattern for this beginner-friendly crochet top, along with helpful tips and the full video tutorial.

This post is based on the video tutorial by Merlyncrochets, linked below.

What Will I Learn?

Crocheting this wearable crochet top introduces you to practical garment construction techniques that build your confidence with handmade clothing. Following this tutorial will teach you:

  • How to build a made-to-measure crochet top using body measurements rather than rigid sizing charts.
  • How to work clean color changes on the final yarn over of double crochet stitches.
  • How to carry inactive yarn beneath your working stitches so you never have to cut and join yarn after every single stripe.
  • How to work both flat rows and circular rounds in matching two-tone stripes.
  • How to assemble flat rectangular panels onto a lower body tube to create a flattering V-neck front and back.
  • How to add a snug single crochet border along raw row edges to pull the neckline flat against your skin.

Materials and Tools

To crochet this crochet top, you need only two contrasting shades of yarn and a few basic notions. Choosing an easy-care acrylic or soft cotton yarn ensures your crochet top drapes comfortably and holds its shape through regular washings.

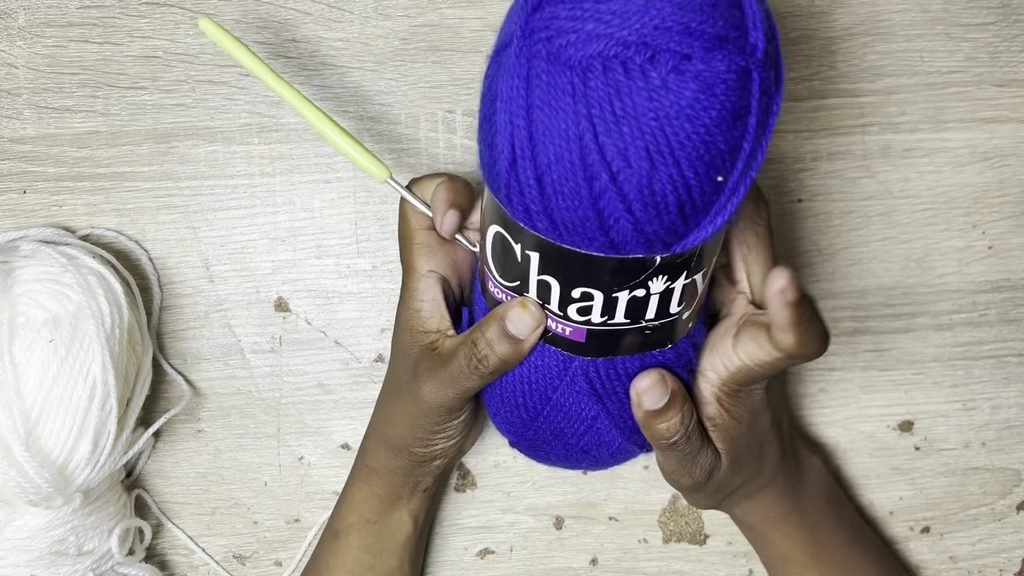
  • Yarn: DK weight yarn (Light Category 3) in two contrasting colors:
    • Color A (Primary): Navy blue (approximately 150 to 200 grams, depending on size).
    • Color B (Secondary): Crisp white (approximately 100 to 150 grams).
    • Total yarn requirement for this crochet top is roughly 250 to 300 grams for a size Small, with more yarn needed for larger sizes.
  • Crochet Hook: 3.5 mm (US E/4) crochet hook. Although the yarn label suggests a 4.0 mm hook, dropping down to a 3.5 mm hook creates tighter, denser stitches that prevent the fabric from being see-through.
  • Tapestry Needle: A blunt yarn needle for seaming and weaving in ends.
  • Measuring Tape: To take accurate body measurements.
  • Stitch Markers: Essential for marking center points during garment assembly.
  • Scissors: For trimming yarn tails.
crochet-striped-v-neck-top-materials

You can substitute any yarn weight you prefer for this crochet top, including sport weight linen or worsted weight cotton. If you choose a thicker yarn, swatch first and adjust your foundation chain count so the fabric reaches your personal body measurements.

Sizing and Measurements for Your Crochet Top

This garment uses a made-to-measure design approach. The sample shown in the demonstration is a size Small. [CHECK: exact finished dimensions were not measured with a ruler on screen in the video].

To tailor the crochet top to your unique body, take two simple tape measurements before beginning:

  1. Panel Length (Underbust to Back): Place the tape measure under your bust, run it up over your shoulder, and down to your back waistline where you want the top panel to sit. Make an un-stretched foundation chain that equals this length. In the sample, this was 100 chains (measuring approximately 98 double crochet stitches across).
  2. Waist Circumference (Lower Tube): Wrap the tape measure around your torso at the waistline or underbust where you want the bottom section to sit. Make a chain that circles your torso comfortably with a little breathing room. In the sample, this was 115 chains.
  3. Sleeve Width: You control the sleeve length by the number of rows worked on the two shoulder panels. Working 23 rows produces a modest cap or drop sleeve, while working more rows creates longer short sleeves for a relaxed-fit crochet top.

Pattern Notes

Please review these construction notes to ensure smooth stitching from start to finish:

  • Crochet Terms: This pattern is written in standard US crochet terms with US spelling throughout.
  • Skill Level: Beginner friendly. The garment requires only chain, slip stitch, single crochet, and double crochet stitches.
  • Garment Architecture: The crochet top consists of three main components: two identical striped rectangular shoulder panels and one lower torso tube. The shoulder panels fold over your shoulders, meet in the center to form the V-neck, and attach to the circular waist section.
  • Turning Chains: A chain 2 at the start of a row or round counts as the first double crochet stitch. Work your subsequent double crochet into the next stitch across.
  • Seamless Stripe Technique (Carrying Yarn): Do not cut your yarn after each stripe. When working the final double crochet of a row, pull through the new color on the last two loops to complete the stitch. When starting the next row, lay the inactive yarn along the top of the previous row and crochet right over it. Give the carried strand a gentle tug every few stitches to keep the edge neat and flat.

Terms and Abbreviations

AbbreviationUS Term Definition
chChain stitch
sl stSlip stitch
scSingle crochet
dcDouble crochet
st / stsStitch / stitches
eaEach
yoYarn over

Striped V-Neck Crochet Top Pattern

Follow along with the four distinct phases of this project: crocheting the shoulder panels, working the lower body tube, assembling the garment pieces, and adding the neckline trim.

crochet-striped-v-neck-top-carrying-yarn

Part 1: Shoulder Panels (Make 2 Identical)

The two shoulder panels form the upper bodice and drop sleeves of your crochet top. Begin with Color A (navy blue).

  1. Foundation: Make a chain of 100 (or the chain length matching your underbust-to-back measurement).
  2. Row 1 (Color A): Yarn over, insert your hook into the 3rd chain from the hook, and work 1 double crochet. Work 1 double crochet in each chain stitch across to the end of the row. On the final double crochet, complete the stitch normally until two loops remain on your hook. Introduce Color B (white) by pulling it through the final two loops to finish the stitch cleanly. (98 double crochet).
  3. Row 2 (Color B): Chain 2 and turn your work. Lay the inactive Color A yarn along the tops of the Row 1 stitches. Insert your hook into the next stitch, capturing the blue yarn underneath your stitch as you pull up a loop, and complete a double crochet. Work 1 double crochet in each stitch across while continuing to enclose the blue strand. Give the carried yarn a slight tug so it remains invisible. On the last double crochet, pull Color A through the final two loops.
  4. Row 3 (Color A): Chain 2 and turn your work. Lay the inactive Color B yarn along the top edge. Work 1 double crochet in each stitch across, enclosing the white yarn underneath. On the final stitch, pull Color B through the final two loops.
  5. Rows 4 through 23: Continue alternating between Color B and Color A for each row, carrying the non-working yarn inside the stitches. Complete a total of 23 rows (or your desired sleeve width).
  6. After finishing Row 23, fasten off both yarn strands, leaving an 8-inch tail for seaming.
  7. Repeat steps 1 through 6 to make a second identical striped rectangle.
crochet-striped-v-neck-top-waist-section

Part 2: Lower Torso Tube

The bottom section forms the waistband and torso of the crochet top, worked in continuous joined rounds. Begin with Color A (navy blue).

  1. Foundation: Make a slip knot and chain 115 (or the chain length matching your waist circumference plus comfortable ease). Being careful not to twist the chain, join with a slip stitch into the very first chain to form a large ring.
  2. Round 1 (Color A): Chain 2 (counts as 1 double crochet). Work 1 double crochet in each chain stitch all the way around the ring. Join with a slip stitch into the top of the beginning chain 2. Attach Color B (white) with a small knot on the reverse side. (115 double crochet).
  3. Round 2 (Color B): Turn your work. Chain 2. Work 1 double crochet in each stitch around, enclosing the carried Color A yarn underneath the stitches just as you did on the flat panels. Join with a slip stitch to the top of the beginning chain 2. Switch back to Color A on the join.
  4. Round 3 (Color A): Turn your work. Chain 2. Work 1 double crochet in each stitch around while carrying Color B underneath. Join with a slip stitch into the top of the beginning chain 2, switching to Color B.
  5. Rounds 4 through 15: Alternate between Color B and Color A for each round, turning after every round to keep the seam vertical and tidy. Complete 15 rounds in total (or continue until the tube reaches your desired hemline).
  6. Fasten off both colors and weave in your lower foundation tail.
crochet-striped-v-neck-top-shoulder-panel

Part 3: Garment Assembly

Once your three components are finished, it is time to connect them into a wearable crochet top. Lay out the pieces on a clean, flat surface.

  1. Mark the Center Points: Fold the lower torso tube flat so the round joining seam sits at the back center. Place a stitch marker at the front exact center stitch, and another marker at the back exact center stitch.
  2. Position the Panels: Fold each shoulder panel in half lengthwise (so the 23 rows run horizontally across your chest and shoulders). The open folded ends will rest at the waistline, while the fold sits at the top of your shoulder.
  3. Align the Front V-Neck: Place the inner front corners of both panels directly next to each other at the front center stitch marker. This meeting point creates the base of your front V-neck.
  4. Align the Back: Match the inner back corners of both panels at the back center stitch marker to mirror the V-neckline on the reverse side.
  5. Seam Panels to Waist: Using Color A and your 3.5 mm hook, join yarn at the center front marker. Working through both the edge of the panel and the top round of the lower tube, work single crochet stitches evenly across to join the right panel to the waistband. Repeat for the left panel, and then across the back.
  6. Seam Underarm Sides: Try on the garment to decide how large you want your armhole openings to be. From the bottom of the armhole opening down to the waistline, join the front and back edges of each shoulder panel using single crochet stitches (or seam with a tapestry needle).
crochet-striped-v-neck-top-finished-look

Part 4: V-Neck Border and Finishing

Adding a fitted border along the raw edges of the V-neck pulls the neckline flush against your chest and prevents your crochet top from sagging.

  1. Attach Color A with a slip stitch at the front center point of the V-neckline.
  2. Work single crochet stitches evenly up along the row ends of the right front panel, over the shoulder fold, down along the back V-neckline, up the other back side, over the left shoulder, and down to the front center.
  3. Place approximately 2 single crochet stitches around the post of each double crochet row end. Work these stitches with slightly firm tension so the border draws the neckline into a neat, tailored shape.
  4. Join with a slip stitch into the starting stitch at the V-neck point, fasten off, and leave a 6-inch tail.
  5. Weave in all remaining yarn tails on the inside of the garment using your tapestry needle.
Crochet Top
Crochet Top

Step-by-Step Garment Summary

Garment SectionPiece CountKey MeasurementsStitch Technique
Shoulder PanelsMake 2Ch 100, work 23 rows (98 dc per row), alternating Color A & BFlat double crochet rows, carrying unused color underneath
Lower Torso TubeMake 1Ch 115, join in ring, work 15 rounds (115 dc per round)Joined double crochet rounds, turning after each round
AssemblyAll PiecesFold panels over shoulders, match front/back centers to tubeSingle crochet seam along waistline and lower underarms
Neckline BorderTrimWork 1 round of snug single crochet along row endsFirm single crochet border around entire front and back V-neck

Video Tutorial

If you enjoy visual guidance alongside your written pattern, watch the complete video walkthrough below. You can see the yarn-carrying technique in action and observe how Madeline pins and seams the crochet top pieces together.

Tips and Common Mistakes

Keep these helpful tips in mind to achieve a clean, professional finish on your handmade crochet top:

  • Gently Tug Carried Yarn: When carrying your non-working yarn inside the double crochet stitches, remember to pull the strand slightly every 10 to 15 stitches. This prevents the carried color from peeking through on the front side, but be careful not to pull too hard or your fabric will bunch up.
  • Turn After Every Round on the Waist Tube: Turning your work after each joined round on the lower torso keeps the seam straight. If you work in continuous un-turned rounds, your seam will spiral diagonally across your back.
  • Test the Waist Fit Before Proceeding: After joining your foundation chain into a circle and working Round 1, slip the ring over your head and shoulders down to your waist. It should fit comfortably with ease. If it feels restrictive, rip back and add 8 to 12 chains before continuing.
  • Keep the Neckline Border Snug: Raw row edges can stretch out easily during handling. When working the single crochet border around the V-neck, maintain firm tension so the border draws the neckline neatly inward against your chest.
  • Check Sleeve Length as You Go: Because the shoulder panels are simple rectangles, you can drape a panel over your shoulder at Row 18 or 20 to preview how far down your upper arm the sleeve will drape before deciding whether to stop or add more rows.

How to Style Your Crochet Top

This lightweight striped crochet top pairs effortlessly with your favorite warm-weather pieces. Wear it tucked into high-waisted denim cutoffs for a classic summer look, layer it over a swimsuit at the beach, or pair it with wide-leg linen trousers for an easy weekend outfit.

If you love making wearable garments, explore these other fun crochet patterns on the blog:

Frequently Asked Questions

Can I make this crochet top in one solid color instead of stripes?

Yes, this pattern works beautifully in a solid shade or with an ombre yarn. If you make a solid crochet top, you can skip the yarn-carrying steps entirely, which makes the project even faster to finish.

How do I adjust this pattern for larger or plus sizes?

To scale up this crochet top, increase the foundation chain on the shoulder panels so they measure from your underbust up over your shoulder to your back waistline with plenty of drape. Increase the waist foundation chain in multiples that circle your waist comfortably. You can also work 27 to 35 rows on the shoulder panels for wider, more relaxed sleeves.

Why is my carried yarn showing through my stitches?

If the carried yarn peeks out visibly, your working stitches may be slightly too loose, or the carried yarn may be drooping between stitches. Use a 3.5 mm hook to keep your fabric tight and remember to give the inactive yarn a gentle smoothing pull every few stitches.

Is this crochet top comfortable for hot summer weather?

Yes, especially when made with a cotton, bamboo, or linen blend yarn. The natural drape of the rectangular drop sleeves and the open V-neck allow plenty of airflow, keeping you cool on warm days.

I would love to see how your own custom-fit striped crochet top turns out, so please share your finished makes in the comments below. Happy crocheting, Sara !

Categories
All Free Crochet Crochet for Beginners Crochet Stitches free crochet patterns Granny Squares

How to Crochet a Daisy Granny Square: Easy Beginner Pattern

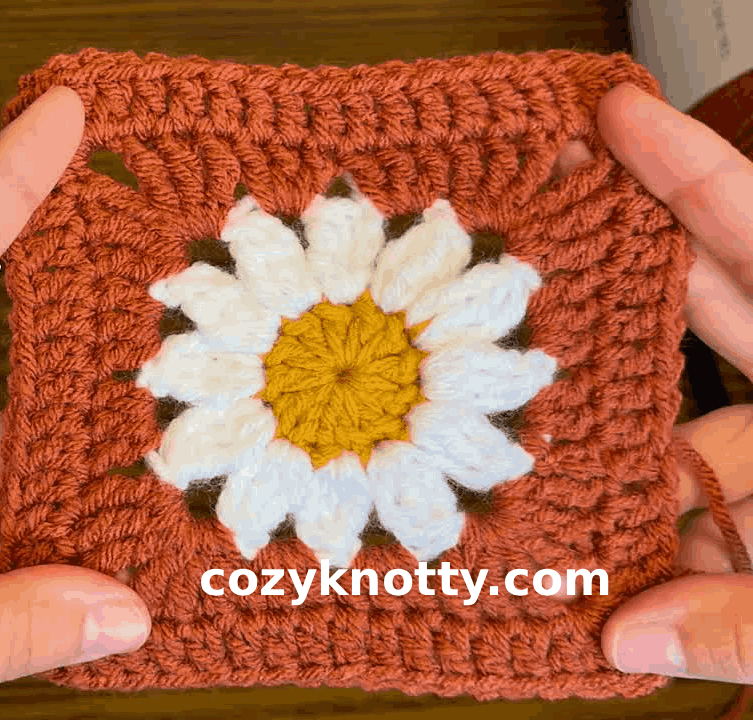
The daisy granny square is one of the most cheerful, classic motifs in crochet. With its sunny yellow center, textured dimensional petals, and neat square frame, this motif turns simple stitches into a miniature work of art. You can join several squares together to create vibrant summer blankets, market tote bags, cushion covers, or lightweight cardigans.

Although the floral center looks intricate, this pattern is completely accessible for confident beginners. I will guide you through every stage of the process, including starting with a magic ring, working treble crochet cluster petals, cleanly joining new yarn colors, and turning a circular flower into a crisp four-sided square. Below, you will find the complete written pattern, helpful tips, and the full video tutorial.

This post is based on the video tutorial by Heritage Charm Crochet, linked below.

What Will I Learn?

Working this floral square helps you practice several core crochet skills that apply to many other projects. By following this guide, you will master the following techniques:

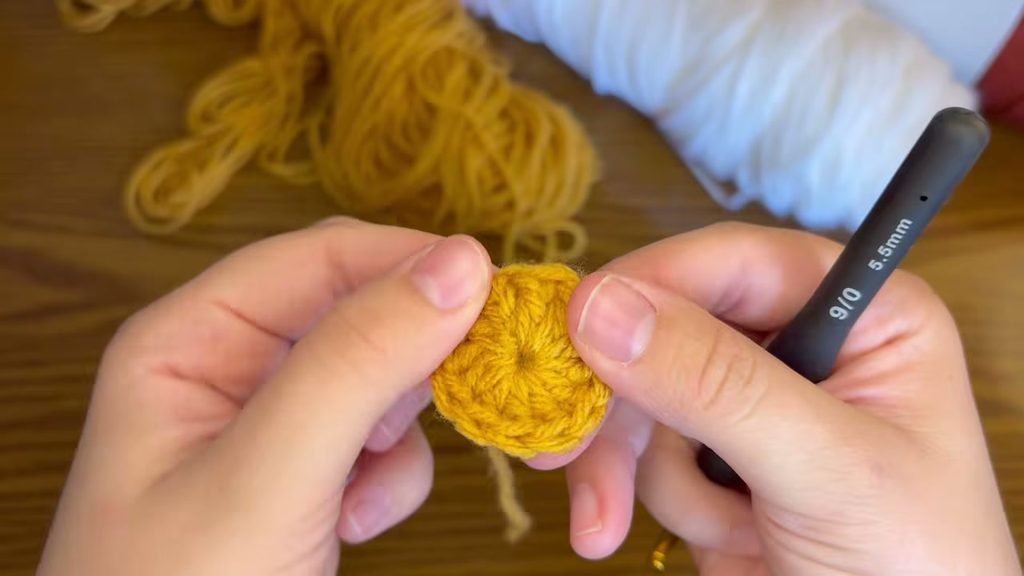
  • Creating a tight, adjustable foundation using the magic ring.
  • Crocheting 12 double crochet stitches into a ring to build a circular flower center.
  • Working treble crochet cluster stitches (3 treble crochet together) to form raised, textured daisy petals.
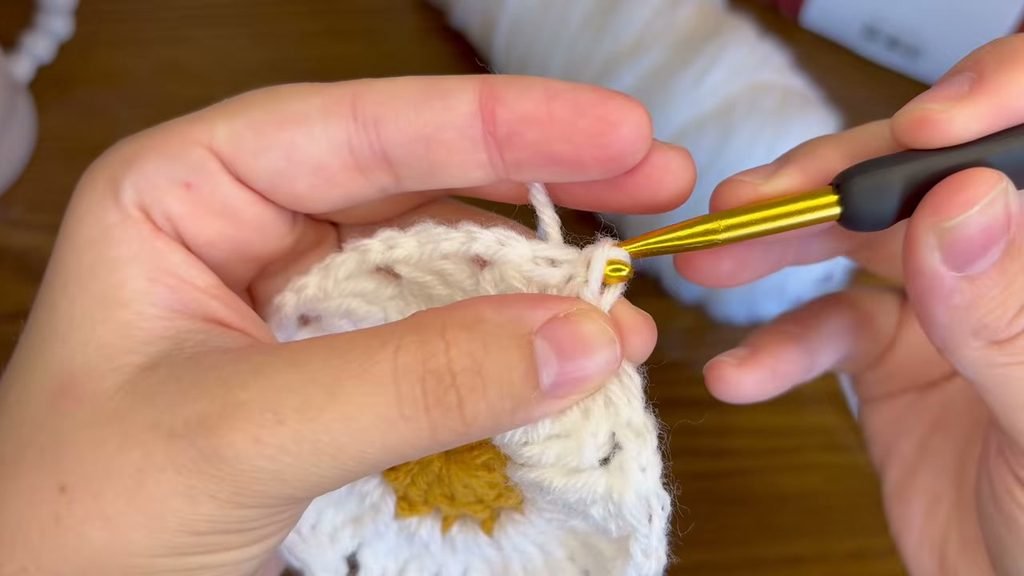
  • Attaching new yarn colors seamlessly with a simple slip knot and slip stitch join.
  • Squaring a round circle using a combination of double crochet groups and treble crochet corner clusters.
  • Adding a clean, solid double crochet border that makes joining finished squares simple and uniform.

Materials and Tools

To crochet this daisy granny square, you need only a few basic supplies and three contrasting yarn shades. Choosing smooth acrylic or cotton blend yarn helps the individual petals pop clearly.

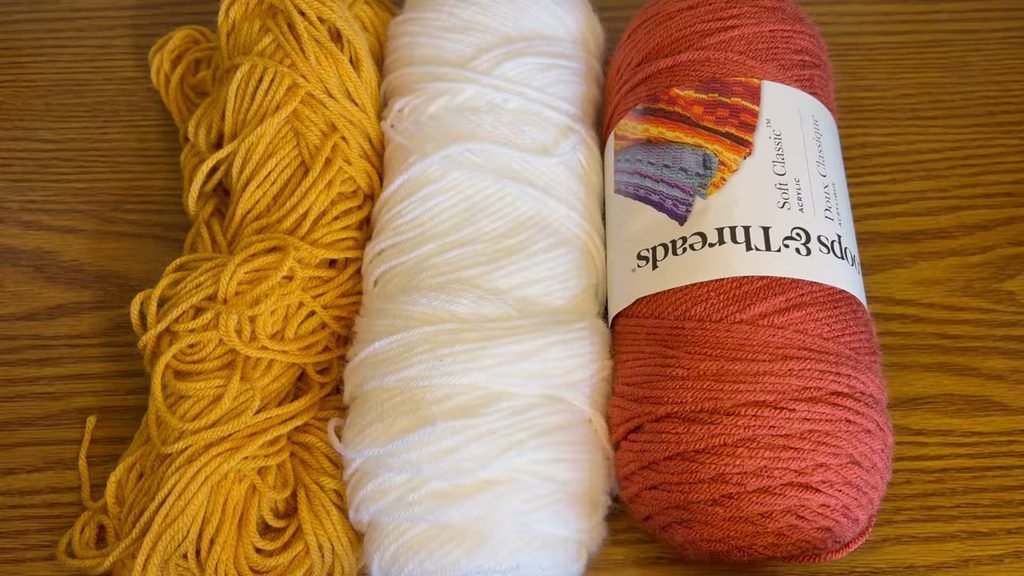
  • Yarn: Medium worsted weight yarn (Category 4) in three colors:
    • Color A (Middle): Yellow or mustard for the flower center.
    • Color B (Petals): Crisp white or cream for the daisy petals.
    • Color C (Outer Border): Rust orange, sage green, navy blue, or any contrasting background color.
  • Crochet Hook: 5.0 mm (US H/8) crochet hook (or 5.5 mm US I/9 depending on your personal tension).
  • Tapestry Needle: A blunt yarn needle for weaving in ends.
  • Scissors: For cutting yarn tails between color changes.
crochet-daisy-granny-square-materials

You can substitute any yarn weight you prefer, including DK weight cotton or chunky yarn. When altering the yarn thickness, pair your yarn with the hook size recommended on the ball band so your stitches remain neat without pulling too tight.

Sizing and Gauge

Using medium worsted weight yarn and a 5.0 mm crochet hook, each finished daisy granny square measures approximately 4.5 inches by 4.5 inches (11.5 cm by 11.5 cm). [CHECK: exact finished dimensions were not measured on screen in the video].

Exact gauge is not critical when crocheting individual motifs for decorative projects. However, maintaining consistent hand tension across all your squares ensures that every block turns out the same size, which makes assembling blankets or bags much easier. If your square curls tightly into a bowl, try relaxing your tension or moving up half a hook size. If your square ripples along the edges, switch to a slightly smaller hook.

Pattern Notes

Please read through these helpful notes before picking up your hook:

  • Crochet Terms: This pattern is written in standard US crochet terms with US spelling throughout.
  • Skill Level: Confident beginner. The pattern uses basic stitches along with treble crochet clusters.
  • Color Sequence: Work Round 1 in yellow (Color A), Round 2 in white (Color B), and Rounds 3 and 4 in your chosen background color (Color C).
  • Fastening Off: Cut your yarn and fasten off at the end of Round 1 and Round 2. Do not cut your yarn after Round 3, because Round 4 continues directly with the same background yarn.
  • Chain Counts: In Round 1, the starting chain 3 counts as the first double crochet. In Round 2, the starting chain 3 forms the first leg of the initial petal cluster. In Round 3, the starting chain 3 counts as the first double crochet of the side cluster. In Round 4, the starting chain 2 counts as the first double crochet.
  • Treble Cluster Technique: Each petal in Round 2 consists of 3 treble crochet stitches worked together in the same stitch. Yarn over twice, insert hook into the stitch, yarn over, pull up a loop, [yarn over, pull through two loops] twice, leaving two loops on the hook. Repeat this twice more in the same stitch until you have four loops on the hook, then yarn over and pull through all four loops at once.

Terms and Abbreviations

AbbreviationUS Term Definition
chChain stitch
sl stSlip stitch
dcDouble crochet
trTreble crochet (triple crochet)
st / stsStitch / stitches
sp / spsSpace / spaces
yoYarn over
3 tr tog3 treble crochet together (petal cluster stitch)

Daisy Granny Square Pattern

Follow along round by round to make your daisy granny square. Take your time on the petal round to ensure each cluster is plump and even.

crochet-daisy-granny-square-round1-center

Round 1: Yellow Daisy Center

With Color A (yellow), begin by creating a magic ring.

  1. Chain 3. This starting chain counts as your first double crochet stitch.
  2. Work 11 double crochet into the center of the magic ring.
  3. Count your stitches carefully around the ring. Including the starting chain 3, you should have 12 double crochet stitches in total.
  4. Gently pull the yarn tail to close the center hole firmly.
  5. Join the round with a slip stitch into the top of the beginning chain 3.
  6. Cut the yellow yarn, fasten off, and pull the working loop through. Pull the foundation tail once more to ensure the center ring is cinched completely shut.

Stitch count: 12 double crochet stitches.

crochet-daisy-granny-square-round2-petals

Round 2: White Petals

Take Color B (white) to build the daisy petals. You will work into each of the 12 stitches from Round 1 without skipping any stitches.

  1. Place a slip knot on your hook. Insert your hook under both top loops of any double crochet from Round 1, and make a slip stitch to join the white yarn securely.
  2. First Petal: Chain 3 (counts as the first partial treble). Yarn over twice, insert hook into the exact same stitch, yarn over and pull up a loop. Yarn over and pull through two loops, yarn over and pull through two loops (2 loops remain on hook). Yarn over twice, insert hook into the same stitch again, yarn over and pull up a loop, yarn over and pull through two loops, yarn over and pull through two loops (3 loops remain on hook). Yarn over and pull through all 3 loops on your hook. Chain 2 to complete the petal spacing.
  3. Petals 2 through 12: In the very next stitch, work a 3 treble crochet together cluster (3 tr tog). Yarn over twice, insert hook into the stitch, yarn over, pull up a loop, [yarn over, pull through two loops] twice (2 loops on hook). Yarn over twice, insert into the same stitch, [yarn over, pull through two loops] twice (3 loops on hook). Yarn over twice, insert into the same stitch once more, [yarn over, pull through two loops] twice (4 loops on hook). Yarn over and pull through all 4 loops on your hook. Chain 2.
  4. Repeat step 3 in every remaining stitch around the circle. Do not skip any stitches. You must complete 12 distinct petals separated by chain-2 spaces.
  5. After working the 12th petal, chain 2. Join the round by working a slip stitch into the top of the initial chain-3 petal cluster.
  6. Cut the white yarn and fasten off.

Stitch count: 12 petal clusters, 12 chain-2 spaces.

crochet-daisy-granny-square-round3-squaring

Round 3: Squaring the Circle

Now take Color C (rust orange or your preferred background color). In this round, you work solely into the chain-2 spaces between the petals to transform the circular daisy into a flat four-corner square.

  1. Place a slip knot on your hook. Join Color C with a slip stitch into any chain-2 space around the flower.
  2. First Side Group: Chain 3 (counts as 1 double crochet). Work 2 double crochet into the same chain-2 space.
  3. Second Side Group: In the next chain-2 space, work 3 double crochet. You now have two consecutive groups of 3 double crochet along the first side.
  4. Corner 1: In the next chain-2 space, work the first corner: 3 treble crochet, chain 2, and 3 treble crochet, all into that single space. The taller treble stitches build the corner point.
  5. Side 2: In the next chain-2 space, work 3 double crochet. In the following chain-2 space, work 3 double crochet.
  6. Corner 2: In the next chain-2 space, work [3 treble crochet, chain 2, 3 treble crochet].
  7. Side 3: In the next chain-2 space, work 3 double crochet. In the following chain-2 space, work 3 double crochet.
  8. Corner 3: In the next chain-2 space, work [3 treble crochet, chain 2, 3 treble crochet].
  9. Side 4: In the next chain-2 space, work 3 double crochet. In the following chain-2 space, work 3 double crochet.
  10. Corner 4: In the final chain-2 space, work [3 treble crochet, chain 2, 3 treble crochet].
  11. Join the round with a slip stitch into the top of the beginning chain 3. Do not cut your yarn.

Stitch count: 4 corners of [3 tr, ch 2, 3 tr] and 8 side groups of 3 dc (totaling 24 treble crochet, 24 double crochet, and 4 corner chain-2 spaces).

crochet-daisy-granny-square-round4-border

Round 4: Solid Double Crochet Border

Continuing with Color C, this final round adds structural stability and creates smooth, solid edges that make joining squares clean and hassle-free.

  1. Chain 2. This starting chain counts as your first double crochet stitch.
  2. Work 1 double crochet into each stitch across the side until you reach the corner chain-2 space. Be sure to work into the top of every treble and double crochet stitch.
  3. Corner: In the corner chain-2 space, work 2 double crochet, chain 2, and 2 double crochet.
  4. Work 1 double crochet in every stitch along the next side (12 stitches in total across the side).
  5. Work [2 double crochet, chain 2, 2 double crochet] into the corner chain-2 space.
  6. Repeat working 1 double crochet in each stitch along the remaining sides and [2 double crochet, chain 2, 2 double crochet] in each corner space.
  7. After working the final corner, work 1 double crochet into any remaining stitches before the start of the round, then join with a slip stitch into the top of the beginning chain 2.
  8. Cut your yarn leaving a 6-inch tail for weaving, and pull the loop through to fasten off.

Stitch count: 16 double crochet per side (64 double crochet total) plus 4 corner chain-2 spaces.

Finishing and Blocking

crochet-daisy-granny-square-round4-border

Thread your tapestry needle with each yarn tail on the back of the work. Weave each tail securely through several stitches in one direction, then turn and weave back in the opposite direction before trimming the excess. Pay extra attention to the yellow center tail: weave it around the base of the Round 1 stitches in a tight circle so the magic ring will never pull loose during washing.

For the crispest presentation, pin your finished squares to a blocking board with rust-proof pins, spritz lightly with cold water, and allow them to dry completely. Blocking opens up the petals and produces sharp, straight square edges.

crochet-daisy-granny-square

Step-by-Step Round Summary

RoundYarn ColorKey Stitches and PlacementTotal Stitches
Round 1Color A (Yellow)Magic ring, ch 3 (counts as dc), 11 dc into ring, sl st to join12 dc
Round 2Color B (White)Join with sl st, 12 petals of [3 tr tog, ch 2] worked in each st around, sl st to join12 petals, 12 ch-2 sps
Round 3Color C (Orange)Join in ch-2 sp, work [3 dc] in side sps and [3 tr, ch 2, 3 tr] in corner sps, sl st to join24 dc, 24 tr, 4 corner ch-2 sps
Round 4Color C (Orange)Ch 2 (counts as dc), 1 dc in every st across sides, [2 dc, ch 2, 2 dc] in each corner sp, sl st to join64 dc (16 per side), 4 corner ch-2 sps

Video Tutorial

If you prefer watching the stitches worked in real time, follow along with the complete step-by-step video demonstration below. You can pause or rewind any section whenever you need a closer look at stitch placement.

Tips and Common Mistakes

Keep these practical troubleshooting tips in mind as you crochet your squares:

  • Count Your Stitches on Round 1: You must have exactly 12 double crochet stitches (including the chain 3) at the end of Round 1. If you end up with 11 or 13 stitches, your petals will not divide evenly into four corners during Round 3.
  • Do Not Forget the Chain 2 Between Petals: In Round 2, always work a chain 2 after every single 3-treble cluster. Those chain-2 spaces provide the foundation openings where all of Round 3 will be worked.
  • Secure the Magic Ring Firmly: Pull the magic ring tail firmly after completing Round 1. Weave the tail in securely with a tapestry needle, passing back and forth through the base stitches at least three times so it will never unspool.
  • Maintain Consistent Treble Height: Keep your yarn tension relaxed when pulling through the two loops of each treble crochet in Round 3. If your trebles are worked too tightly, the corners will pull inward and make the square cup.
  • Catch the First Stitch After Each Corner: In Round 4, the very first stitch right after a corner can hide slightly under the corner cluster. Make sure your hook goes into that first stitch so your side count remains at 16 double crochet.

What to Make With Daisy Granny Squares

Because this square has a sturdy solid border, joining several motifs together is quick and enjoyable. Here are a few creative ideas for using your daisy squares:

  • Summer Daisy Tote Bag: Join 13 or 15 squares together to create a charming retro tote bag.
  • Cozy Floral Baby Blanket: Combine 30 to 48 pastel daisy squares with a wide scalloped border for a treasured nursery gift.
  • Daisy Patchwork Pillow: Sew a 3 by 3 grid of 9 squares for the front of a decorative accent cushion.
  • Explore More Free Patterns :
  • Crochet Newborn Blanket –> https://cozyknotty.com/crochet-newborn-blanket/

Frequently Asked Questions

Can I use different yarn weights for this daisy granny square?

Yes, you can make this motif with sport weight, DK, worsted, or bulky yarn. Simply adjust your crochet hook to match your chosen yarn weight. Thinner yarns create delicate, small motifs perfect for garments, while thicker yarns make large, plush squares ideal for floor pillows and heavy throws.

Why is my daisy granny square curling or not lying flat?

Curling usually happens when your chain-2 spaces in Round 2 or Round 3 are worked too tightly. If your square curls up into a bowl, try loosening your hand tension slightly or adding an extra chain to the corner spaces. Blocking your finished square with damp blocking pins will also flatten minor curling.

How do I join daisy granny squares together smoothly?

Because Round 4 produces a clean, solid double crochet border with 16 stitches per side, you can easily join squares using a slip stitch join through the back loops only, a whipstitch with a yarn needle, or a continuous join-as-you-go method.

Do I have to use a magic ring to start the square?

While the magic ring gives the tightest, cleanest center hole, you can also start by chaining 4 and working a slip stitch into the first chain to form a small ring. Then work your Round 1 chain 3 and 11 double crochet into the center of that chain ring.

I would love to see the cheerful color combinations you choose for your daisy granny squares, so please share your finished makes in the comments below. Happy crocheting, Sara!

Categories
All Free Crochet Crochet for Beginners Crochet Stitches free crochet patterns

Crochet magic ring

Starting a circular crochet project with a completely closed, hole-free center is one of the most rewarding milestones for any crocheter. The magic ring, also widely known as the magic circle or adjustable loop, is the gold standard foundation technique for granny squares, amigurumi plushies, round beanies, coasters, and mandalas. While traditional methods of joining chains into a circle often leave an unsightly hole that allows stuffing or light to peek through, a magic ring pulls completely shut into a tight, seamless center.

Although the finger placement can feel slightly awkward when you first attempt it, once your muscle memory kicks in, you will be able to form a magic circle in mere seconds without even looking at your hands. In this comprehensive beginner guide, I walk you through the entire process slowly and clearly, covering both right-handed and left-handed methods, how to work your first round of stitches into the loop, and how to lock your tail so it never comes undone. This post is based on the video tutorial by Heritage Charm Crochet, linked below.

What Is a Magic Ring?

A magic ring is an adjustable foundation loop that acts like a drawstring. Instead of working your opening stitches into a fixed chain ring or into a tight single chain, you crochet directly over an open sliding loop of yarn and its tail end. Once your first round of stitches is finished, you pull the yarn tail firmly, cinching the center opening down to zero diameter.

This technique provides three distinct advantages for your projects:

  • Gapless Center: It completely eliminates the hollow hole in the middle of circular items, which is critical for stuffing amigurumi toys.
  • Custom Tension: You can adjust the circle to be slightly open or fully cinched shut depending on the design.
  • Smooth First Round: It provides plenty of roomy access while you work your initial stitches, eliminating the frustration of cramming bulky stitches into tiny chain spaces.

What Will I Learn?

By following this step-by-step tutorial, you will master the foundational mechanics of the magic circle:

  • How to wrap yarn around your fingers to create the signature crossed X anchor.
  • How to position and rotate your crochet hook under the strands to form the initial working twist.
  • How to draw yarn through the loop to establish a functioning, adjustable drawstring circle.
  • How to mirror the exact same steps comfortably if you are a left-handed crocheter.
  • How to work standard stitches (such as single crochet and double crochet) over both strands of the ring.
  • How to pull the tail, close the center opening completely, and secure the end permanently against unraveling.

Materials and Tools

You can make a magic ring using any yarn fiber and any hook size that matches your project requirements. For practicing the technique, I recommend the following setup:

  • Yarn: Medium worsted weight acrylic or smooth cotton yarn. A smooth, light-colored yarn with good twist makes it much easier to see the crossing strands on your fingers than dark or fuzzy novelty yarn.
  • Crochet Hook: 5.0 mm (US H/8) crochet hook. An ergonomic hook with a smooth metal throat glides effortlessly under the loops.
  • Tapestry Needle: A blunt metal yarn needle to weave the remaining tail securely into the back of your work.
  • Scissors: For cutting yarn tails.

Right-Handed Magic Ring Step-by-Step

Follow these numbered steps slowly with your yarn in hand. Remember that speed comes with practice, so take your time on each motion.

Step 1: Wrap the Yarn to Form an X

Hold your non-dominant (left) hand out flat in front of you with your palm facing toward your chest:

crochet-magic-ring-wrapping-yarn-fingers
  1. Take the yarn tail in your right hand. Dangle the cut tail end downward across the front of your first three fingers (index, middle, and ring finger), leaving a 10 to 12 cm tail hanging toward your palm.
  2. Pinch the tail gently against the side of your index finger using your left thumb to hold it in place. Tuck the lower tail under your pinky finger for gentle tension.
  3. With your right hand, take the working yarn (the strand connected to the skein) and wrap it around the back of those three fingers, bringing it forward over the top of your fingers.
  4. Cross the working strand diagonally over the initial tail strand, forming a distinct X shape on the front of your fingers.
  5. Pinch the intersection of the X firmly with your thumb to hold both strands securely.
  6. Wrap the working yarn once more around the back of your fingers, creating two parallel horizontal bars across the back of your hand.
crochet-magic-ring-pulling-loop-secure

Step 2: Insert Hook and Twist

Hold your crochet hook in your right hand like a pencil or knife, ensuring the hook point is facing downwards:

  1. Slide your hook under the first (rightmost) strand of the X on your fingers.
  2. Catch the second (leftmost) strand of yarn with your hook point.
  3. Pull that second strand of yarn underneath the first strand toward the right.
  4. Rotate and twist the head of your crochet hook upward toward the ceiling. This twist locks the yarn on your hook into a small live loop.

Step 3: Yarn Over and Pull Through to Lock

Now you will create the locking chain that stabilizes the adjustable circle:

  1. Carefully reach over with your hook and catch the working yarn (the strand leading to the skein).
  2. Pull that strand directly through the loop that is currently on your hook.
  3. Gently slide your fingers out of the big yarn ring, being careful not to let the loop pull apart.
  4. Hold the base of the loop between your thumb and middle finger. You now have a working loop on your hook and an adjustable large circle made of two parallel strands: the main circle and the cut yarn tail.
crochet-magic-ring-hook-under-loop

Step 4: The Adjustability Test

Before you crochet any stitches, perform a quick test: gently tug on the short yarn tail. The large circle should smoothly shrink in diameter. Loosen it back up with your fingers. If the loop glides easily when you pull the tail, your magic ring is correctly formed. If it locks into an immovable knot, unpick it and repeat Steps 1 through 3.

Left-Handed Magic Ring Step-by-Step

Crocheting with your left hand uses the exact same geometry mirrored across your right hand:

  1. Position Your Right Hand: Extend your right hand with fingers relaxed. Dangle the yarn tail downward across your first three fingers, holding the end steady with your right thumb and pinky.
  2. Form the Mirrored X: Bring the working yarn around the back of your three fingers and cross it diagonally over the front tail to create the X. Trap the crossing point with your right thumb.
  3. Hook Motion: Hold your hook in your left hand with the point directed down. Slide the hook under the first strand, catch the second strand, and pull it underneath. Rotate your hook tip upward to form the loop twist.
  4. Locking the Circle: Catch the working yarn with your left-handed hook and draw it through the loop. Slide your right fingers out of the circle, leaving a clean, adjustable drawstring ring.
crochet-magic-ring-left-handed-method

How to Crochet Stitches into the Ring

Once your magic ring is formed, you work your required pattern stitches directly into the center of the large loop.

Crucial Golden Rule: Catch Both Strands

Whenever you insert your hook into the magic ring, you must insert it under both the ring strand and the short yarn tail together. The tail must be trapped inside the base of every single stitch around the circle. If your stitches only encircle one strand, the magic ring will fail to cinch shut when you pull the tail.

crochet-magic-ring-crocheting-first-round

Working Single Crochet (sc)

Single crochet is standard for amigurumi and tight circular projects:

  1. The initial locking loop on your hook does not count as a stitch. For single crochet, you can chain 1 or work directly into the ring.
  2. Insert your hook through the center of the ring, catching both the circle strand and the tail.
  3. Yarn over and pull up a loop through the ring (2 loops on hook).
  4. Yarn over and pull through both loops on your hook. Your first single crochet is complete.
  5. Repeat for the required number of stitches (typically 6 sc for amigurumi).

Working Double Crochet (dc)

Double crochet is common for granny squares, mandalas, and hats:

  1. Chain 2 or 3 to reach double crochet height. Note that the initial locking chain made during the magic ring setup is not counted as one of your turning chains.
  2. Yarn over, insert hook through the center of the ring under both strands, yarn over and pull up a loop (3 loops on hook).
  3. Yarn over and pull through 2 loops (2 loops on hook).
  4. Yarn over and pull through the remaining 2 loops.
  5. Repeat until you have the required stitch count (typically 12 dc for round flat circles).
crochet-magic-ring-cinching-closed-circle

How to Close and Secure the Magic Ring

Closing the ring is the most satisfying step in the entire process:

  1. Hold the body of your crocheted stitches gently between your thumb and fingers.
  2. Take the short yarn tail in your other hand and pull it firmly and steadily. Watch as the stitches slide along the drawstring, drawing together until the center hole completely disappears.
  3. Insert your hook into the top of the very first stitch of the round and work a slip stitch to join the circle into a complete wheel.
  4. Give the yarn tail one final firm tug to ensure the center hole is closed as tightly as possible.

How to Lock the Tail Permanently

A magic ring is an adjustable loop, which means without proper securing, gentle washing or stretching can cause the center hole to open back up. To make your magic ring permanent and machine-wash safe:

  1. Thread the short yarn tail onto a blunt tapestry needle.
  2. Turn your work to the wrong (back) side.
  3. Weave the needle through the dense base of the stitches around the center circle in one direction for about half the circumference.
  4. Reverse your direction, skip a tiny fiber to prevent pulling the thread back out, and weave in the opposite direction through the same base stitches.
  5. Weave in a third direction or split a yarn ply with your needle, pull snug, and snip the excess tail close to the fabric. Three passes in alternating directions will lock the drawstring permanently.
crochet-magic-ring
crochet-magic-ring

Magic Ring vs Chain-2 Method

FeatureMagic Ring (Magic Circle)Chain-2 Method (Chain and Join)
Center HoleCompletely closed with 0 mm gapSmall permanent gap in center (2 mm to 4 mm)
AdjustabilityFully adjustable drawstringFixed diameter; cannot be tightened after working
Best ProjectsAmigurumi plushies, beanies, solid coastersLacy granny squares, projects where a small center hole is desired
Learning CurveModerate (requires finger wrapping practice)Very easy (simple chain stitches only)
SecurityRequires thorough 3-pass weaving to lock tailNaturally secure because stitches enter a locked chain

Video Tutorial

Watch both right-handed and left-handed demonstrations in clear, slow motion in the video tutorial: How to Crochet a Magic Ring for Beginners | Easy Step-by-Step Tutorial by Heritage Charm Crochet.

Tips and Common Mistakes

  • Leaving Too Short of a Tail: If your initial yarn tail is only 3 or 4 cm long, you will struggle to cinch the ring closed and will not have enough length left to weave in securely with a tapestry needle. Always leave a generous 10 to 12 cm tail.
  • Stitches Bunching Up: If your stitches feel cramped as you work into the ring, gently pull the circle open wider with your fingers. The ring is completely adjustable while you are working into it.
  • Ring Will Not Close: If you pull the tail and the circle refuses to budge, one of two things happened: either you accidentally split a strand of yarn with your hook point while working stitches, or you did not crochet over both strands. Ensure your hook always clears both yarn strands cleanly.
  • Chenille or Velvet Yarn Snapping: Fluffy blanket and chenille yarns have delicate polyester fuzz on a thin thread core. Pulling the tail hard on chenille yarn can strip the fuzz or snap the core. For chenille yarn, cinch the ring halfway closed after 3 stitches, then finish the remaining stitches and pull gently.
  • Do Not Count the Locking Loop as a Chain: When a pattern calls for chaining 3 for your first double crochet, do not count the initial locking chain made to secure the magic ring as one of those chains. Work your full chain count so your first stitch reaches proper height.

Now that you have mastered the magic ring, put your new skill to work with these free circular patterns:

Frequently Asked Questions

Is a magic ring and a magic circle the same thing?

Yes, magic ring, magic circle, and adjustable loop are different names for the exact same crochet technique. Different designers and pattern publishers use these terms interchangeably.

Can my magic ring unravel in the washing machine?

The magic ring will only unravel if the tail is simply cut short without being woven in. Because the center is an adjustable slip knot, you must weave the tail back and forth in three alternating directions through the base of the stitches with a tapestry needle to anchor it permanently.

What if I cannot get the hang of the magic ring?

If you find the finger wrapping challenging, you can use the chain-2 alternative: chain 2, then work all of your first-round stitches directly into the first chain from your hook. While this leaves a tiny gap, it is a practical alternative while you build your crochet confidence.

Why does my circle ruffle or bowl when I keep crocheting?

Ruffling or bowling is caused by your stitch increase rate in subsequent rounds, not the magic ring itself. In general crochet math, a flat single crochet circle requires 6 increases per round, a half double crochet circle requires 8 to 10 increases per round, and a double crochet circle requires 12 increases per round.

I would love to hear how your magic ring turned out, so please leave a comment below if you have any questions or tell me what circular project you are starting next. Happy crocheting, Sara!

Categories
All Free Crochet Crochet for Beginners free crochet patterns Hooks, Yarn & Tools

Crochet Hook Size Chart: US, UK & Metric Conversions

Free crochet hook size chart with US, UK and metric conversions, yarn weight pairings, and tips for choosing the right hook for any project.

You open a new pattern and it says “use a size H-8 hook.” You look at your hooks and they’re marked 5 mm, or 6, or just a number with no letter at all. Which one is it?

Crochet hook sizes are labeled in three different systems, and they don’t line up neatly. This crochet hook size chart puts US, UK and metric sizes side by side, then shows you how to match hooks to yarn, pick the right one for your project, and fix common sizing problems.

Crochet Hook Size Chart

Bookmark this one. It covers the standard hook sizes you’ll find in most craft stores.

Metric (mm)US SizeUK/Canada Size
2.0 mmnone (steel/fine)14
2.25 mmB-113
2.75 mmC-212
3.0 mmnone11
3.25 mmD-310
3.5 mmE-49
3.75 mmF-59
4 mmG-68
4.5 mm77
5 mmH-86
5.5 mmI-95
6 mmJ-104
6.5 mmK-10½3
8 mmL-110
9 mmM/N-1300
10 mmN/P-15000
15 mmP/Qn/a

Important: sizes vary slightly between brands, and some hooks carry only a millimeter size or only a letter. Always check the mm marking on your hook, and when brands disagree, trust the millimeters.

How to Read a Crochet Hook Size Chart

Each row of the chart is one hook, listed in the three systems used around the world.

Metric (mm). This is the diameter of the hook’s shaft, the part that determines how large your stitches will be. Because it’s an actual measurement, it’s the most dependable system, and it’s the same in every country.

US sizes. These use a letter and number together (like H-8), though some hooks show only one or the other. The letters run from B up, and the numbers run alongside them. Because brands don’t always agree on the pairing, a US “I” from one maker can be slightly different from another’s.

UK/Canadian sizes. Older UK sizing is a number system that runs backwards: the smaller the number, the bigger the hook. A UK 4 is larger than a UK 8. Many UK patterns have moved to metric, but you’ll still see the old sizes in vintage patterns.

Steel hooks. Very fine hooks used for thread crochet, like doilies and lace, use their own numbering. Larger numbers are smaller hooks, and the sizes run well below 2 mm. If you’re working with thread, check that the pattern says whether it means steel or standard hooks.

Quick tip: If a pattern lists only one system, find that size in the chart, then confirm the mm size. Write the mm size in the margin so you don’t have to look it up again.

crochet hook size chart

Crochet Hook Sizes and Yarn Weight Guide

Hook size and yarn weight go together. The thicker the yarn, the larger the hook you’ll generally need. Most yarn labels show a number from 0 to 7 in a small skein symbol, which is the Craft Yarn Council’s standard weight system.

Yarn WeightCategoryCommon NamesTypical Hook Size
0LaceThread, crochet cotton, fingering (fine)1.6-2.25 mm
1Super FineFingering, sock, baby2.25-3.5 mm
2FineSport, baby3.5-4.5 mm
3LightDK, light worsted4.5-5.5 mm
4MediumWorsted, afghan, aran5.5-6.5 mm
5BulkyChunky, craft, rug6.5-9 mm
6Super BulkySuper chunky, roving9-15 mm
7JumboJumbo, roving15 mm and up

These ranges are starting points, not rules. They’re based on what produces a fabric with a comfortable drape, and your project may need something different (more on that below).

Two terms that cause confusion: DK and light worsted are both weight 3, and aran and worsted are both weight 4, even though the names differ by country. If your yarn label has no number, compare the yardage per 100 g: more yardage means thinner yarn.

How to Choose the Right Crochet Hook Size

Choosing a hook is a short process once you know the steps.

  1. Start with the pattern. The designer chose a hook to match the stitch pattern and the gauge, so begin there.
  2. Check the yarn label. It will recommend a hook range. Use it as a cross-check, especially if you’re substituting yarn.
  3. Work a gauge swatch. Crochet a square of about 4 x 4 inches (10 x 10 cm) in the stitch pattern and measure how many stitches and rows fit. Too many stitches per inch means your work is too small, so go up a hook size. Too few means it’s too large, so go down.
  4. Think about the fabric you want. A larger hook makes a softer, drapier, more open fabric. A smaller hook makes a denser, stiffer, more structured one.
  5. Factor in your own tension. Tight crocheters often need to go up a size, and loose crocheters often need to go down. It’s one of the main reasons two people can follow the same pattern and get different results.

Hook material matters too. Aluminum hooks are smooth and fast, which is great for slippery or splitty yarn, but can feel cold. Bamboo and wood grip the yarn more and slow you down slightly, which many beginners like. Plastic is lightweight and budget-friendly. Ergonomic handles help if your hands tire easily.

Hook shape matters. Tapered (or “pointed”) heads slide easily into stitches and suit fine work. Inline hooks have a flatter head that holds the yarn more securely and gives very even stitches. Neither is better, so try both.

Crochet Hook Size Chart for Beginners

If you’re just starting, don’t overthink it. A 5 mm to 6 mm hook (H-8 to J-10) with worsted weight (4) yarn is the sweet spot:

  • Stitches are big enough to see clearly.
  • It’s easy to spot and fix mistakes.
  • Projects grow quickly, which keeps you motivated.
  • Worsted yarn is widely available and affordable.

What to avoid at first:

  • Very thin thread or lace-weight yarn (hard to see stitches)
  • Fuzzy or mohair yarn (hard to see where to insert the hook)
  • Very dark colors (stitches disappear)
  • Very slippery yarn (it slides off the hook)

Best beginner yarn: a smooth, light-colored cotton or acrylic blend in worsted weight. Light colors make stitches easy to read, and smooth yarn makes it easy to rip back and try again.

A starter set to consider: a 4 mm, 5 mm and 6 mm hook will cover most beginner projects, like dishcloths, scarves and simple hats.

Best Crochet Hook Size for Different Projects

Different projects call for different fabrics, so the hook you want isn’t always the one on the label.

ProjectSuggested HookWhy
Amigurumi (stuffed toys)2.5-3.5 mmA smaller hook than the yarn suggests makes tight stitches, so stuffing doesn’t show through
Blankets5.5-6.5 mm (worsted)Soft drape without being too loose
Scarves4.5-6 mmDrape is key, so match the hook to the yarn weight
Hats4.5-5.5 mmFirm enough to hold its shape
Sweaters/cardigansPer patternGauge is critical, so always swatch
Socks2.25-3.5 mmDense fabric that wears well
Lace and doilies1.6-2.25 mm (thread)Fine detail needs a fine hook
Market bags and baskets3.5-4.5 mmA tight stitch resists stretching
Chunky throws8-15 mmBig stitches work up fast
Washcloths and dishcloths3.5-5 mmDense fabric scrubs better

Rule of thumb: for projects that need to hold their shape (toys, bags, baskets), go down a hook size or two from the label. For projects that should drape (shawls, scarves, blankets), stay at or go up from the label.

What Happens If You Use the Wrong Crochet Hook Size?

A hook that’s a size or two off won’t ruin a scarf, but it will change fit, drape, yarn usage and comfort.

If your hook is too small:

  • The fabric turns out stiff and tight.
  • Your hands may cramp from forcing the hook through stitches.
  • The finished piece comes out smaller than the pattern says.
  • You may run out of yarn sooner than expected, since stitches are denser.

If your hook is too large:

  • The fabric turns out loose, floppy and full of gaps.
  • Wearables may sag or stretch out of shape.
  • The finished piece comes out larger than the pattern says.
  • Toys may show stuffing through the gaps.

The fix is simple: work a gauge swatch every time you start a project that needs to fit, like garments, hats and gloves. It takes ten minutes and can save you hours of frogging (ripping out stitches).

Common mistake: assuming the label hook is always right. Labels are an average. Your tension, stitch pattern and the project’s purpose should all weigh in.

Frequently Asked Questions

How do I know what size crochet hook to use?

Start with the hook recommended in your pattern. If the pattern doesn’t say, check your yarn label for its suggested range. Then crochet a gauge swatch: if your swatch is smaller than the pattern’s gauge, go up a hook size, and if it’s larger, go down.

What is the most common crochet hook size?

The H-8 (5 mm) is the most widely used, along with the G-6 (4 mm) and I-9 (5.5 mm). These pair well with worsted and DK weight yarns, which are the most popular weights.

Are US and UK crochet hook sizes different?

Yes. US sizes use letters and numbers (like H-8), where bigger usually means a bigger hook. Older UK sizes use a number system that runs the opposite way, where smaller numbers mean bigger hooks. The metric (mm) size is the same everywhere, so it’s the safest way to compare.

What size crochet hook is best for beginners?

A 5 mm to 6 mm hook (H-8 to J-10) with worsted weight yarn is the easiest starting point. Stitches are easy to see, and projects work up quickly.

How do I convert crochet hook sizes to millimeters?

Find your US or UK size in the chart above and read across to the metric column. If your hook has no markings, use a hook gauge, a small tool with sized holes that tells you the exact size in mm.

Can I use a different hook size than the pattern says?

Yes, if you check your gauge. Changing hook size changes your stitch size, so always swatch first. Adjusting the hook is also a common way to match a pattern’s gauge when your tension differs from the designer’s.

Do I need different hooks for different yarns?

You don’t need a hook for every yarn weight, but a range of sizes helps. A set covering 2.5 mm to 6 mm handles most projects.

More Crochet Projects

Crochet Newborn Blanket –> https://cozyknotty.com/crochet-newborn-blanket/

Crochet Flowers —> https://cozyknotty.com/crochet-flower/

Categories
All Free Crochet Amigurumi & Animals Crochet for Beginners free crochet patterns

Crochet pumpkin

If you are looking for a quick autumn project that adds cozy handmade warmth to your home decor, this easy crochet pumpkin is one of the most rewarding patterns you can make. This beginner-friendly design uses a flat-ribbed construction that naturally tapers at both ends, completely eliminating the need for complicated amigurumi decreases or working in tight circular rounds. Once you master the simple one-row repeat, these sweet pumpkins work up in just an hour or two, making them wonderful for mantelpiece displays, Halloween centerpieces, Thanksgiving tables, or handmade gifts.

One of the best features of this design is its versatility. You can finish your pumpkin with a classic crocheted stem and twisting curly green vine tendrils, or insert a fragrant natural cinnamon stick tied with rustic jute twine for an authentic farmhouse touch. Below, you will find complete row-by-row instructions, size adjustment formulas, and step-by-step assembly guides to help you sculpt the perfect plump pumpkin. This post is based on the video tutorial by JMCrochet, linked below.

What Will I Learn?

By following this tutorial, you will practice several practical crochet techniques:

  • Graduating stitch heights from slip stitches up to half double crochets to create natural end tapers.
  • Working in the back loop only (BLO) to produce deep, elastic accordion ridges that resemble pumpkin furrows.
  • Seaming a flat rectangular ribbed piece into a seamless cylindrical tube.
  • Working continuous spiral rounds for a sturdy 3D crocheted stem.
  • Creating lively corkscrew tendrils using simple single crochet increases.
  • Cinching openings, stuffing smoothly, and sculpting plump segments using yarn tufting.

Materials and Tools

Below is the list of supplies used for the project shown in the tutorial:

  • Yarn: Medium worsted weight yarn (weight 4 / Aran / 10-ply). Acrylic or cotton-blend yarn works wonderfully. You will need rustic Orange for the pumpkin body, Olive Green for the curly vines, and Brown or Tan for the crocheted stem. (Approximately 40 to 60 grams total for a mini pumpkin).
  • Crochet Hook: Size H/8 (5.0 mm) crochet hook. This hook size keeps stitches tight enough that polyester stuffing will not peek through.
  • Stuffing: Polyester polyfill fiberfill stuffing.
  • Tapestry Needle: A blunt yarn needle with a large eye for seaming and sculpting.
  • Scissors: For cutting yarn tails.
  • Stitch Marker: Useful for marking end slip stitches or tracking spiral rounds on the stem.
  • Alternative Stem Supplies (Optional): Natural cinnamon sticks, hot glue gun, and natural jute twine.

Sizing and Adjusting Dimensions

The sample mini pumpkin in the tutorial measures approximately 8.5 cm to 10 cm (3.5 to 4 inches) across and 6 cm (2.5 inches) tall without the stem. It is an ideal palm-sized decorative piece.

You can easily customize the size to make pumpkins of varying dimensions. The formula is simple: chain any number of chains you like. Keep 2 to 3 slip stitches and 2 to 3 single crochets on each end to maintain tapered edges, and place your extra height in the middle section using half double crochets or double crochets. Then, repeat the pattern row until the piece is roughly twice as long as its height (a 1:2 height-to-length ratio) before seaming.

Pumpkin SizeApproximate Finished DiameterStarting Chain CountStitch Progression per RowTarget Panel Length
Mini Pumpkin (Sample)9 cm (3.5″)Chain 13 (12 sts)2 sl st, 2 sc, 4 hdc, 2 sc, 2 sl st20 cm (8″)
Medium Pumpkin14 cm (5.5″)Chain 21 (20 sts)3 sl st, 3 sc, 8 hdc, 3 sc, 3 sl st30 cm (12″)
Large Pumpkin20 cm (8″)Chain 29 (28 sts)3 sl st, 4 sc, 14 hdc, 4 sc, 3 sl st45 cm (18″)

Pattern Notes

  • Crochet Terms: Written using standard US crochet terminology.
  • Turning Chain: The chain 1 at the beginning of each row does not count as a stitch. The first stitch goes directly into the very first stitch of the row.
  • Back Loop Only (BLO): Starting in Row 2, all stitches are worked into the back loop only. The loop furthest from you is the back loop. Working into the back loop leaves the front loop exposed, creating the ridges.
  • Keep Slip Stitches Relaxed: Slip stitches tend to pull tighter than standard stitches. Keep your tension relaxed so your hook inserts smoothly on return rows.

Terms and Abbreviations

  • ch: chain
  • sl st: slip stitch
  • sc: single crochet
  • hdc: half double crochet
  • BLO: back loop only
  • st(s): stitch(es)
  • rep: repeat
  • yo: yarn over
  • inc: increase (work 2 stitches into the same stitch)

Crochet Pumpkin Body Pattern

Using your 5.0 mm crochet hook and Orange yarn, start with a slip knot on your hook.

Foundation Chain and Row 1

crochet-easy-pumpkin-row-1

Foundation Chain: Chain 13 loosely.

Row 1: Beginning in the second chain from your hook:

  1. Work 1 sl st into each of the next 2 chains.
  2. Work 1 sc into each of the next 2 chains.
  3. Work 1 hdc into each of the next 4 chains.
  4. Work 1 sc into each of the next 2 chains.
  5. Work 1 sl st into each of the last 2 chains. (12 sts total).
  6. Chain 1, turn your work.

Row 2 and Subsequent Pattern Rows

Row 2 (The Repeat Row): Chain 1, turn. Work every stitch into the Back Loop Only (BLO):

  1. Work 1 sl st in the back loop of each of the first 2 stitches.
  2. Work 1 sc in the back loop of each of the next 2 stitches.
  3. Work 1 hdc in the back loop of each of the next 4 stitches.
  4. Work 1 sc in the back loop of each of the next 2 stitches.
  5. Work 1 sl st in the back loop of each of the last 2 stitches. (12 sts). Chain 1, turn.

Rows 3 and Beyond: Repeat Row 2 continuously. Continue repeating Row 2 until your panel measures approximately 20 cm (8 inches) across at its widest point unstretched. Fasten off, leaving a tail about three times the length of the pumpkin body for seaming and cinching.

Crocheted Stem and Curly Vines

Crocheted Pumpkin Stem

Using your 5.0 mm hook and Brown yarn:

  1. Chain 2.
  2. Round 1: Work 6 sc into the second chain from your hook. Tug the starting tail to close the ring. (6 sc).
  3. Rounds 2 to 6: Work in a continuous spiral, placing 1 sc into each stitch around (6 sc per round).
  4. Continue until your stem measures approximately 4 cm (1.5 inches) long. Fasten off, leaving a tail for sewing.

Curly Vine Tendrils

Using your 5.0 mm hook and Green yarn:

  1. First Vine: Chain 20. Starting in the second chain from your hook, work 2 sc into each chain across. The increases will make the strip curl. Slip stitch into the base.
  2. Second Vine: Directly from that slip stitch, chain 16. In the second chain from your hook, work 2 sc into each chain back to the beginning. Slip stitch into the main base chain.
  3. Snip yarn, leaving a 20 cm tail for sewing.

Cinnamon Stick Stem Option

For a rustic farmhouse finish with a pleasant natural scent, you can substitute a cinnamon stick:

  • Select a cinnamon stick measuring about 5 cm to 7 cm (2 to 2.5 inches) long.
  • Complete the assembly, stuffing, and segment sculpting of your pumpkin first before attaching the stick.
  • Apply hot glue around the bottom half of the cinnamon stick, press it firmly down into the top center opening, and hold for 30 seconds until set.
  • Wrap natural jute twine around the base of the cinnamon stick and tie a neat bow.

Assembly, Stuffing, and Shaping

Step 1: Seaming the Tube

Thread the long starting tail onto your tapestry needle. Fold the ribbed panel in half so that the short side edges align. Whipstitch through both layers along the short edge to create a ribbed cylinder.

Step 2: Cinching the Base

Using the same yarn tail, weave your needle through the row ends around the bottom opening. Pull the yarn tail firmly like a drawstring. Because of the tapered slip stitches, the opening closes tightly. Take a few securing stitches across the center and knot off.

Step 3: Stuffing the Pumpkin

Turn the piece right side out. Insert polyester polyfill stuffing into the cylinder, pressing the fiberfill firmly against the ribbed walls so the pumpkin feels plump without lumps.

Step 4: Cinching the Top Opening

Thread a new strand of yarn around the row ends of the top opening. If using the crocheted stem, insert its base into the opening, pull the drawstring tight around the stem, and sew through both parts to secure it. If using a cinnamon stick, cinch the top opening almost completely shut and knot securely.

crochet-easy-pumpkin-crochet-stem-vines-edited

Step 5: Sculpting the Plump Segments

To give your pumpkin its classic plump, segmented shape, use a long strand of Orange yarn on your tapestry needle:

  1. Anchor the yarn near the top center beside the stem.
  2. Guide the yarn straight down the outside of the pumpkin inside one of the vertical grooves.
  3. Insert your needle into the bottom center and push it straight up through the middle to exit at the top center.
  4. Pull the yarn strand firmly to indent the side of the pumpkin.
  5. Repeat around the pumpkin to create 4, 6, or 8 segments. Pull with consistent tension so the segments are even.
  6. Knot the yarn securely at the base and hide the excess tail inside the stuffing.
  7. Sew your green curly vines beside the stem to complete your pumpkin.

Written Pattern Summary Table

ComponentHook & YarnInstructionsKey Notes
Body: Row 15.0 mm / OrangeCh 13; sl st 2, sc 2, hdc 4, sc 2, sl st 2 (12 sts)Worked into starting chain
Body: Row 2+5.0 mm / OrangeIn BLO: sl st 2, sc 2, hdc 4, sc 2, sl st 2 (12 sts)Rep until panel is 20 cm (8″) long
Stem (Rnd 1)5.0 mm / BrownCh 2, 6 sc in 2nd ch from hookSnug center ring
Stem (Rnds 2-6)5.0 mm / Brown1 sc in each st around in continuous spiralWork until 4 cm (1.5″) long
Vine 15.0 mm / GreenCh 20; 2 sc in 2nd ch from hook and each ch acrossSl st in base to finish
Vine 25.0 mm / GreenCh 16; 2 sc in 2nd ch from hook and each ch acrossSl st in base to finish

Video Tutorial

Watch the full video tutorial: How to Crochet a Cute Easy Pumpkin | Quick Beginner Friendly Amigurumi Tutorial by JMCrochet.

Tips and Common Mistakes

  • Keep End Slip Stitches Loose: Tight slip stitches make inserting your hook on subsequent rows difficult. Pull working loops slightly higher when making the first and last two stitches.
  • Locating the Back Loop: Slip stitches naturally rotate forward. Tilt your work slightly toward you to clearly view the “V”, and insert your hook into the strand furthest away.
  • Do Not Overstuff: Overstuffing will stretch the ribbed stitches apart and reveal the polyfill inside. Add stuffing until the pumpkin is comfortably firm.
  • Secure Stems Firmly: Anchor your crocheted stem with several passes of yarn through the pumpkin rim, or use ample hot glue for cinnamon sticks.

Expand your autumn handmade collection with these free seasonal patterns:

Frequently Asked Questions

How long does it take to make a crochet pumpkin?

Because the panel is worked flat with simple stitches, a complete mini pumpkin takes about 45 to 90 minutes from starting chain to final assembly.

Can I use blanket or chenille yarn for this pattern?

Yes, plush chenille yarn makes wonderfully soft pumpkins. When using bulky chenille yarn, upgrade to a 6.0 mm or 7.0 mm hook and work fewer rows until your desired size is reached.

How do I make the ribs more prominent?

Ensure that you are working strictly in the back loop only on every single row. The exposed front loop is what creates the deep accordion ridge on both sides of the fabric.

Why are my pumpkin segments pulling unevenly?

When sculpting segments with your needle, guide the yarn strand directly into the valley of a vertical rib rather than over a raised ridge. Pull each wrap with steady, moderate tension before anchoring.

I would love to see how your cozy autumn pumpkins turn out, so please share your finished makes and tag me in your photos. Happy crocheting, Meryem!

Categories
All Free Crochet Crochet Flowers Crochet for Beginners free crochet patterns

Crochet flower peony

Welcome to this step by step tutorial for my layered crochet peony flower, a lush floral design featuring a dimensional looped pistil center and four tiers of ruffled petals. By borrowing the structured technique of Tunisian crochet and working it directly onto a standard hook, each petal gains natural body and gentle curvature without needing stiff wires inside the flower head.

The beauty of this construction lies in its seamless circular foundation. Instead of stitching dozens of individual petals together at the end, each successive petal tier sprouts directly from the unworked back loops of the previous round. Below you will find the complete written pattern, detailed stitch guides, materials list, assembly advice, and the full video tutorial so you can craft your own botanical centerpiece with confidence.

This post is based on the video tutorial by LnM Crochet & Handmade, linked below.

Table of Contents

What Will I Learn?

In this project, you will practice using short-row Tunisian crochet stitches on a standard ergonomic hook to build firm, sculptured flower petals. You will also learn how front loop and back loop alternation allows multiple concentric tiers of petals to grow from a single expanding center.

Here are the specific techniques covered in this tutorial:

  • Making a tight magic ring foundation with clean stitch tension
  • Crocheting looped center stamens using chain clusters in the front loops
  • Expanding the base disc using back loop single crochet increases
  • Holding multiple active yarn loops on a standard crochet hook
  • Executing Tunisian forward passes and return passes for firm petal fabric
  • Staggering petal placement between rows so outer tiers nestle naturally
  • Shaping smooth curved outer edges with graduated stitch heights

Materials and Tools

  • Yarn: 4-ply combed cotton yarn (fingering or light sport weight, approximately 50 grams per ball). You will need small amounts of yellow yarn for the central pistil and stamen core, and 1 ball in your chosen petal shade such as soft pink, antique white, coral, or deep magenta.
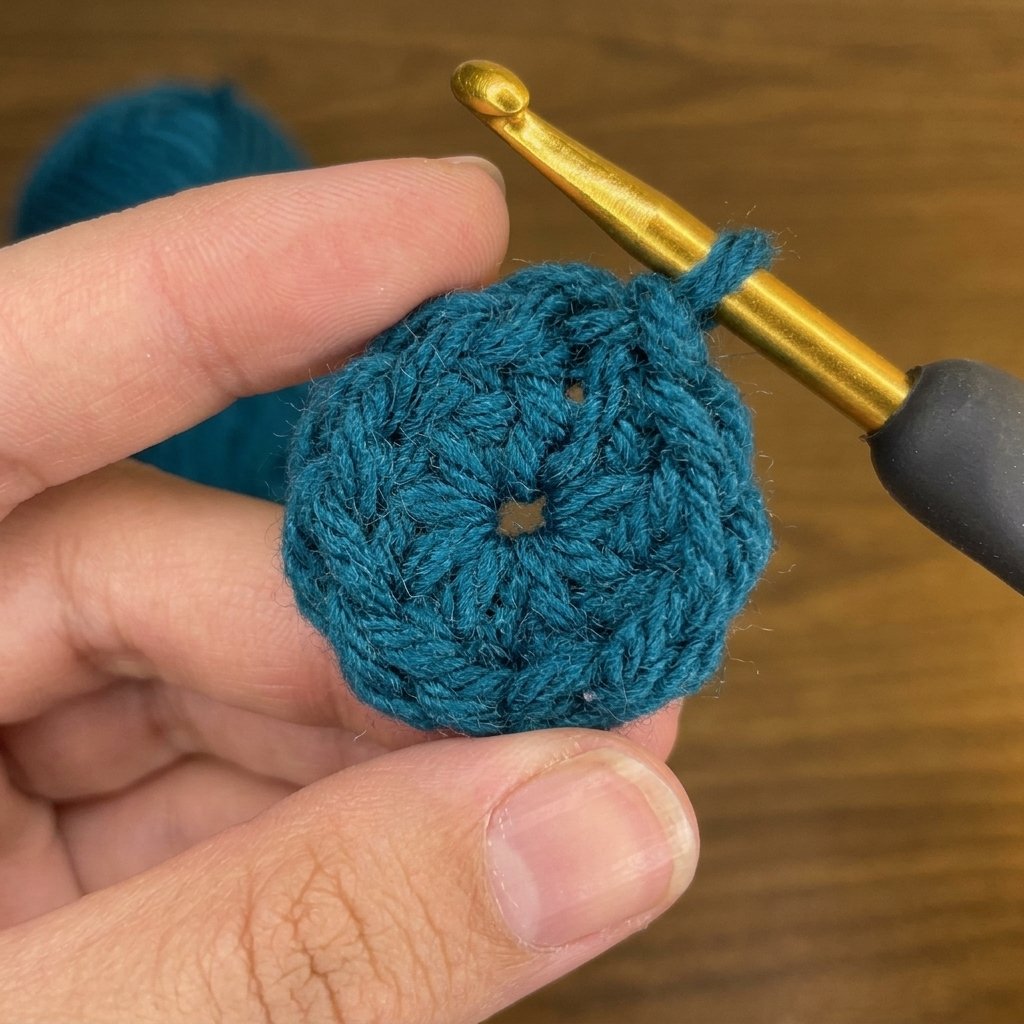
  • Crochet Hook: 2.5 mm (US size B/1 or C/2) crochet hook. A standard hook with an inline throat and a smooth shaft works best for holding short sets of loops.
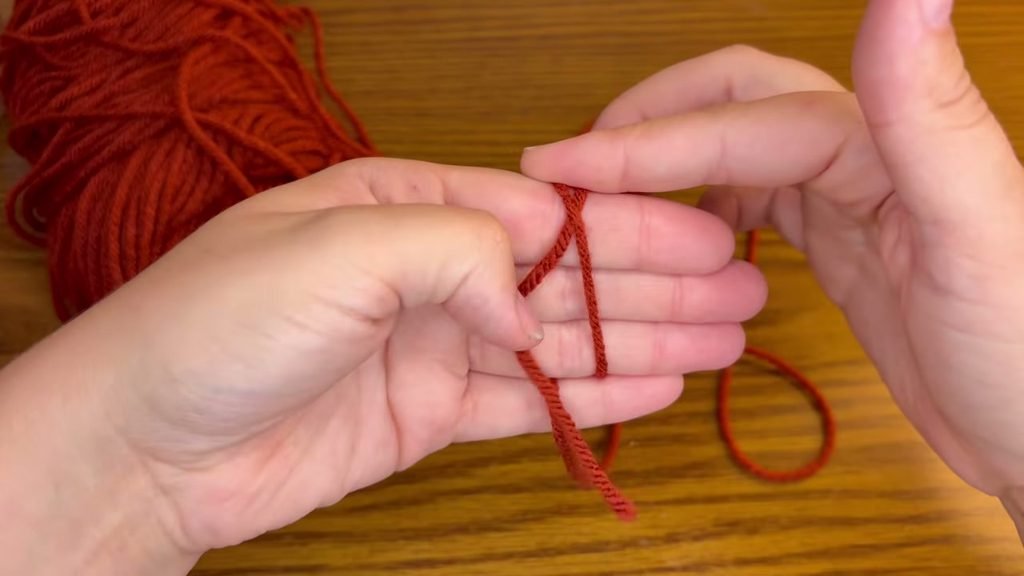
  • Locking Stitch Marker: At least one removable stitch marker to hold the unworked back loops while you crochet the front loop stamens and petals.
  • Tapestry Needle: A blunt metal yarn needle for weaving in tails neatly inside the flower base.
  • Scissors: A pair of sharp embroidery or craft scissors.
  • Optional Stemming Materials: 30 cm length of 18-gauge floral stem wire, 0.4 mm to 0.5 mm craft wire, green floral tape, and hot glue if you plan to arrange your peonies into a standing bouquet.

Yarn Substitution: If 4-ply combed cotton is unavailable, any smooth mercerized cotton, cotton-acrylic blend, or sport weight bamboo yarn will work well. Avoid loosely spun or novelty yarns, because you need crisp stitch definition to easily see the back bumps of chains and vertical bars during the Tunisian rows.

Sizing and Finished Measurements

  • Flower Head Diameter: Approximately 8.5 cm to 10 cm (3.3 to 4 inches) across when fully opened with all four petal layers.
  • Flower Head Depth: Approximately 5 cm (2 inches) from the base of the calyx to the top edge of the inner petals.
  • Customizing Size: You can stop after completing Layer 3 for a charming medium garden rose size, or work all 4 layers for a full-blown romantic peony bloom.

Pattern Notes

  • Crochet Terminology: All instructions use standard US crochet terms and US spellings.
  • Seamless Layering: This pattern works in a continuous expanding spiral base. The central stamens and petals are worked into the front loops only (FLO), while the base expansion rows are worked into the reserved back loops only (BLO).
  • Working Loops: You do not need a special long Tunisian hook for this pattern. The widest row holds only 11 loops on the hook, which fits easily onto any standard 2.5 mm crochet hook.
  • Staggered Placement: To give the peony its lifelike botanical appearance, you will work 3 slip stitches along the base before starting Layers 2, 3, and 4. This offsets the petals so they sit between the petals of the previous tier rather than stacking directly on top of each other.

Abbreviations and Special Stitches

  • MR: magic ring
  • ch: chain
  • st / sts: stitch / stitches
  • sl st: slip stitch
  • sc: single crochet
  • hdc: half double crochet
  • dc: double crochet
  • inc: single crochet increase (work 2 single crochets into the same stitch)
  • FLO: front loop only
  • BLO: back loop only
  • Afghan dc (Tunisian Double Crochet Forward Pass): Yarn over, insert hook into the back bump or vertical bar, yarn over and pull up a loop, yarn over and pull through 2 loops on hook. Leave the remaining loop on the hook.
  • Afghan sc (Tunisian Simple Stitch Forward Pass): Insert hook under the back bump or vertical bar, yarn over and pull up a loop. Leave the loop on the hook.
  • Return Pass: Yarn over and draw through 2 loops at a time across the hook until only 1 working loop remains.
  • ( … )* repeat: Repeat the sequence enclosed in brackets as specified.

The Written Pattern

Central Pistil Core (Yellow Yarn)

Begin with yellow yarn to create the inner pistil and stamen clusters.

Round 1: Start with a magic ring. Chain 1, then work 10 single crochets into the ring. Pull the tail firmly to close the center hole. Work a slip stitch into the front loop only (FLO) of the first single crochet. Insert your locking stitch marker into the unworked back loop of that same first stitch to save it for Round 3. (10 sts)

Round 2 (Inner Stamens – FLO): Working in the front loops only around Round 1:
(Chain 7, slip stitch into the same front loop, skip the next front loop, slip stitch into the following front loop) repeat 5 times total. You will have 5 delicate chain-7 stamen loops standing in the center.

Round 3 (Base Expansion – BLO): Locate the marked back loop from Round 1. Slip stitch into that back loop, chain 1, then work 1 single crochet increase into each of the 10 back loops around. Work a slip stitch into the front loop only of the first stitch, and place your stitch marker into its unworked back loop. (20 sts)

Round 4 (Outer Stamens – FLO): Working in the front loops only around Round 3:
(Chain 8, slip stitch into the same front loop, skip the next front loop, slip stitch into the following front loop) repeat 10 times total. This completes 10 taller stamen loops surrounding the inner cluster. Slip stitch to secure, cut yellow yarn leaving a 4-inch tail, and pull through.

crochet-peony-flower-pistil

Petal Layer 1 (5 Inner Petals)

Change to your main petal color yarn. Each petal in this layer is worked across 4 stitches of the base.

Base Round (Row 1): Remove the marker and join your petal yarn with a slip knot into the marked back loop from Round 3. Chain 1, then work 20 single crochets into the back loops around. Work a slip stitch into the front loop only of the first stitch, and place your stitch marker into its back loop for Layer 2. (20 sts)

Now crochet 5 petals directly onto the front loops:

  • Row 2 (Petal Setup): Chain 7. Working into the back bumps on the reverse of the chain, skip the first bump and work into the second bump: work 4 Afghan double crochets, work 1 Afghan single crochet, then work 1 single crochet into the next front loop on the base. You will now have 7 loops on your hook. Work a return pass: yarn over and pull through 2 loops at a time until 1 loop remains on your hook.
  • Row 3: Chain 2, work a slip stitch into the second vertical bar from the edge, chain 2. Work Afghan stitches into the vertical bars: 3 Afghan double crochets, 2 Afghan single crochets, then work 1 single crochet into the next front loop on the base. Work a return pass: pull through 2 loops at a time until 1 loop remains.
  • Row 4 (Edge Finishing): Chain 2, work a slip stitch into the second vertical bar, chain 2. Now work standard completed crochet stitches: 3 double crochets, 1 half double crochet, 1 single crochet, then work a slip stitch into the next front loop on the base.
  • Starting Next Petal: Work a slip stitch into the next front loop on the base. Repeat Rows 2 through 4 four more times.
  • When all 5 petals are finished, join with a slip stitch into the first front loop.

Petal Layer 2 (5 Staggered Petals)

Base Round (Row 1): Slip stitch into the marked back loop behind Layer 1. Chain 1, then work in back loops only: (3 single crochets, 1 single crochet increase) repeat 5 times around. Work a slip stitch into the front loop only of the first stitch, and place your stitch marker into its back loop. (25 sts)

Staggering the Petals: Before beginning the first petal, work 3 slip stitches into the front loops of the next 3 stitches. This offsets the petals so they sit neatly between the petals of Layer 1.

Now work 5 petals, each using 5 stitches of the base:

  • Row 2 (Petal Setup): Chain 8. Working into the back bumps starting in the second bump from the hook: work 5 Afghan double crochets, 1 Afghan single crochet, then 1 single crochet into the next front loop on the base. You will have 8 loops on your hook. Return pass: pull through 2 loops at a time until 1 loop remains.
  • Row 3: Chain 2, slip stitch into the second vertical bar, chain 2. Work Afghan stitches: 4 Afghan double crochets, 2 Afghan single crochets, then 1 single crochet into the next front loop on the base. Return pass: pull through 2 loops at a time.
  • Row 4: Repeat Row 3: Chain 2, slip stitch into the second vertical bar, chain 2. Work 4 Afghan double crochets, 2 Afghan single crochets, then 1 single crochet into the next front loop on the base. Return pass: pull through 2 loops at a time.
  • Row 5 (Edge Finishing): Chain 2, slip stitch into the second vertical bar, chain 2. Work standard completed stitches: 4 double crochets, 1 half double crochet, 1 single crochet, then slip stitch into the next front loop on the base.
  • Starting Next Petal: Slip stitch into the next front loop on the base. Repeat Rows 2 through 5 four more times.
  • After completing all 5 petals, slip stitch to the base to secure.
crochet-peony-flower-tunisian-petal

Petal Layer 3 (6 Staggered Petals)

Base Round (Row 1): Slip stitch into the marked back loop behind Layer 2. Chain 1, then work in back loops only: (4 single crochets, 1 single crochet increase) repeat 5 times around. Work a slip stitch into the front loop only of the first stitch, and place your stitch marker into its back loop. (30 sts)

Staggering the Petals: Work 3 slip stitches into the front loops of the next 3 stitches.

Now work 6 petals, each using 5 stitches of the base:

  • Row 2 (Petal Setup): Chain 10. Starting in the second back bump from the hook: work 6 Afghan double crochets, 2 Afghan single crochets, then 1 single crochet into the next front loop on the base. Return pass: pull through 2 loops at a time until 1 loop remains.
  • Row 3: Chain 2, slip stitch into the second vertical bar, chain 2. Work Afghan stitches: 5 Afghan double crochets, 3 Afghan single crochets, then 1 single crochet into the next front loop on the base. Return pass: pull through 2 loops at a time.
  • Row 4: Repeat Row 3: Chain 2, slip stitch into the second vertical bar, chain 2. Work 5 Afghan double crochets, 3 Afghan single crochets, then 1 single crochet into the next front loop on the base. Return pass: pull through 2 loops at a time.
  • Row 5 (Edge Finishing): Chain 2, slip stitch into the second vertical bar, chain 2. Work standard completed stitches: 5 double crochets, 1 half double crochet, 2 single crochets, then slip stitch into the next front loop on the base.
  • Starting Next Petal: Slip stitch into the next front loop on the base. Repeat Rows 2 through 5 five more times.
  • When all 6 petals are completed, slip stitch into the base.
crochet-peony-flower-third-layer

Petal Layer 4 (6 Outer Full-Bloom Petals)

Base Round (Row 1): Slip stitch into the marked back loop behind Layer 3. Chain 1, then work 30 single crochets in the back loops only without increasing. Work a slip stitch into the front loop only of the first stitch. (30 sts)

Staggering the Petals: Work 3 slip stitches into the front loops of the next 3 stitches.

Now work 6 large outer petals, each using 5 stitches of the base:

  • Row 2 (Petal Setup): Chain 11. Starting in the second back bump from the hook: work 7 Afghan double crochets, 2 Afghan single crochets, then 1 single crochet into the next front loop on the base. You will have 11 loops on your hook. Return pass: pull through 2 loops at a time until 1 loop remains.
  • Row 3: Chain 2, slip stitch into the second vertical bar, chain 2. Work Afghan stitches: 6 Afghan double crochets, 3 Afghan single crochets, then 1 single crochet into the next front loop on the base. Return pass: pull through 2 loops at a time.
  • Row 4: Repeat Row 3: Chain 2, slip stitch into the second vertical bar, chain 2. Work 6 Afghan double crochets, 3 Afghan single crochets, then 1 single crochet into the next front loop on the base. Return pass: pull through 2 loops at a time.
  • Row 5 (Edge Finishing): Chain 2, slip stitch into the second vertical bar, chain 2. Work standard completed stitches: 6 double crochets, 1 half double crochet, 2 single crochets, then slip stitch into the next front loop on the base.
  • Starting Next Petal: Slip stitch into the next front loop on the base. Repeat Rows 2 through 5 five more times.
  • After finishing the sixth petal, work a slip stitch into the front loop of the final stitch on the base. Cut yarn leaving a 6-inch tail and fasten off.
crochet-peony-flower-layered-bloom

Finishing and Shaping

Use your tapestry needle to weave all loose tails into the underside of the flower base. With your fingers, gently cup each petal inward starting from Layer 1 around the yellow pistil, then overlap Layer 2 and Layer 3 around them. Gently flare the outer ruffled tips of Layer 4 to give the peony its signature lush, blooming silhouette.

crochet-peony-flower-finished

Video Tutorial

Follow along with the complete step by step video walkthrough below to watch each Tunisian stitch pickup, loop count, and layered transition in detail:

Tips and Common Mistakes

  • Work into chain back bumps: On the initial chain of each petal, pick up your loops through the single ridge bump on the back of the chain. This leaves a clean, braided edge along the outer spine of every petal.
  • Mind your return pass tension: Keep an even, steady tension as you yarn over and pull through 2 loops during the return pass. If you pull too tightly, the petal will curl excessively; if too loose, the petal will lose its firm cupped posture.
  • Always mark your back loops: When you slip stitch into the front loop of the first stitch on any base round, place a stitch marker into that stitch’s unworked back loop right away. Once you crochet a full layer of petals over the top, finding that first back loop is much trickier without a marker.
  • Smooth hook choice: Use a crochet hook with a uniform cylindrical shaft up to the grip. Tapered ergonomic grips with very short metal shafts can make holding 8 to 11 loops awkward.

Frequently Asked Questions

Do I need a special Tunisian crochet hook for this peony?

No, you can easily make this entire flower with a standard 2.5 mm crochet hook. Because the petals are worked as short rows with at most 11 loops on the hook at one time, a standard aluminum or ergonomic hook has plenty of room.

Why do my petals look bunched up as I crochet?

Peony petals naturally cup and ruffle against each other to create the flower’s signature spherical volume. As you work successive layers, the petals overlap and support each other, creating the dense, fluffy appearance of a genuine garden peony.

Can I make this flower using worsted weight yarn?

Yes, you can use DK or worsted weight yarn with a 3.5 mm or 4.0 mm hook. This will yield an oversized statement flower measuring 12 cm to 15 cm across, perfect for hat trims, bag accents, or decorative pillow embellishments.

How do I mount this flower onto a stem?

Bend the tip of an 18-gauge floral wire into a small U-hook, apply a drop of hot glue, insert the wire up through the bottom base into the center pistil, and wrap the base with green floral tape.

I would love to see your finished peony blossoms arranged in your home, so please feel free to share your makes and questions in the comments below. Happy crocheting, Meryem!