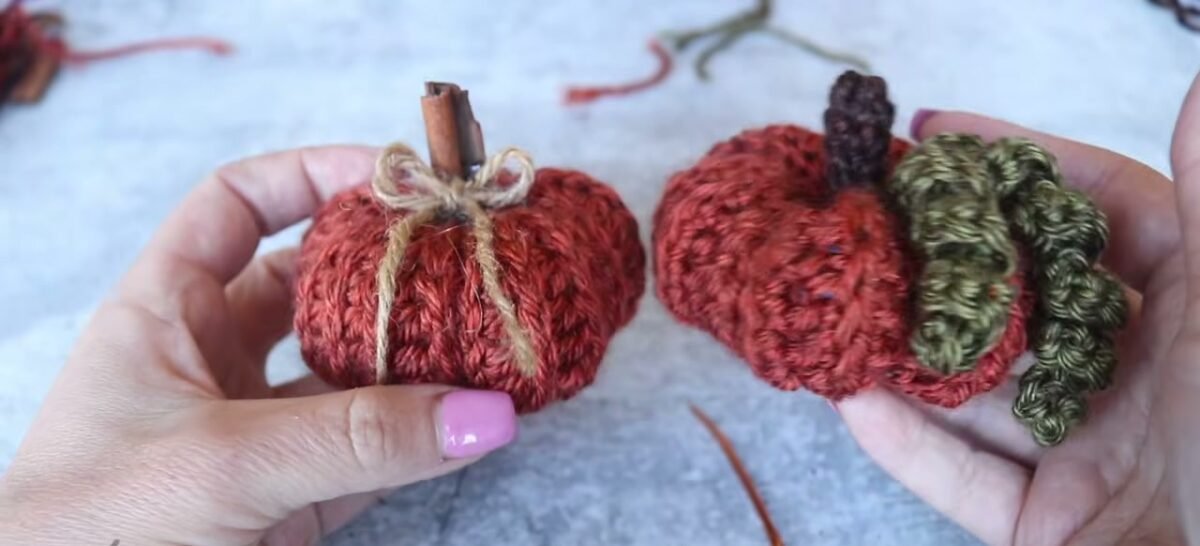
If you are looking for a quick autumn project that adds cozy handmade warmth to your home decor, this easy crochet pumpkin is one of the most rewarding patterns you can make. This beginner-friendly design uses a flat-ribbed construction that naturally tapers at both ends, completely eliminating the need for complicated amigurumi decreases or working in tight circular rounds. Once you master the simple one-row repeat, these sweet pumpkins work up in just an hour or two, making them wonderful for mantelpiece displays, Halloween centerpieces, Thanksgiving tables, or handmade gifts.
One of the best features of this design is its versatility. You can finish your pumpkin with a classic crocheted stem and twisting curly green vine tendrils, or insert a fragrant natural cinnamon stick tied with rustic jute twine for an authentic farmhouse touch. Below, you will find complete row-by-row instructions, size adjustment formulas, and step-by-step assembly guides to help you sculpt the perfect plump pumpkin. This post is based on the video tutorial by JMCrochet, linked below.
Table of Contents
What Will I Learn?
By following this tutorial, you will practice several practical crochet techniques:
- Graduating stitch heights from slip stitches up to half double crochets to create natural end tapers.
- Working in the back loop only (BLO) to produce deep, elastic accordion ridges that resemble pumpkin furrows.
- Seaming a flat rectangular ribbed piece into a seamless cylindrical tube.
- Working continuous spiral rounds for a sturdy 3D crocheted stem.
- Creating lively corkscrew tendrils using simple single crochet increases.
- Cinching openings, stuffing smoothly, and sculpting plump segments using yarn tufting.
Materials and Tools
Below is the list of supplies used for the project shown in the tutorial:
- Yarn: Medium worsted weight yarn (weight 4 / Aran / 10-ply). Acrylic or cotton-blend yarn works wonderfully. You will need rustic Orange for the pumpkin body, Olive Green for the curly vines, and Brown or Tan for the crocheted stem. (Approximately 40 to 60 grams total for a mini pumpkin).
- Crochet Hook: Size H/8 (5.0 mm) crochet hook. This hook size keeps stitches tight enough that polyester stuffing will not peek through.
- Stuffing: Polyester polyfill fiberfill stuffing.
- Tapestry Needle: A blunt yarn needle with a large eye for seaming and sculpting.
- Scissors: For cutting yarn tails.
- Stitch Marker: Useful for marking end slip stitches or tracking spiral rounds on the stem.
- Alternative Stem Supplies (Optional): Natural cinnamon sticks, hot glue gun, and natural jute twine.
Sizing and Adjusting Dimensions
The sample mini pumpkin in the tutorial measures approximately 8.5 cm to 10 cm (3.5 to 4 inches) across and 6 cm (2.5 inches) tall without the stem. It is an ideal palm-sized decorative piece.
You can easily customize the size to make pumpkins of varying dimensions. The formula is simple: chain any number of chains you like. Keep 2 to 3 slip stitches and 2 to 3 single crochets on each end to maintain tapered edges, and place your extra height in the middle section using half double crochets or double crochets. Then, repeat the pattern row until the piece is roughly twice as long as its height (a 1:2 height-to-length ratio) before seaming.
| Pumpkin Size | Approximate Finished Diameter | Starting Chain Count | Stitch Progression per Row | Target Panel Length |
|---|---|---|---|---|
| Mini Pumpkin (Sample) | 9 cm (3.5″) | Chain 13 (12 sts) | 2 sl st, 2 sc, 4 hdc, 2 sc, 2 sl st | 20 cm (8″) |
| Medium Pumpkin | 14 cm (5.5″) | Chain 21 (20 sts) | 3 sl st, 3 sc, 8 hdc, 3 sc, 3 sl st | 30 cm (12″) |
| Large Pumpkin | 20 cm (8″) | Chain 29 (28 sts) | 3 sl st, 4 sc, 14 hdc, 4 sc, 3 sl st | 45 cm (18″) |
Pattern Notes
- Crochet Terms: Written using standard US crochet terminology.
- Turning Chain: The chain 1 at the beginning of each row does not count as a stitch. The first stitch goes directly into the very first stitch of the row.
- Back Loop Only (BLO): Starting in Row 2, all stitches are worked into the back loop only. The loop furthest from you is the back loop. Working into the back loop leaves the front loop exposed, creating the ridges.
- Keep Slip Stitches Relaxed: Slip stitches tend to pull tighter than standard stitches. Keep your tension relaxed so your hook inserts smoothly on return rows.
Terms and Abbreviations
- ch: chain
- sl st: slip stitch
- sc: single crochet
- hdc: half double crochet
- BLO: back loop only
- st(s): stitch(es)
- rep: repeat
- yo: yarn over
- inc: increase (work 2 stitches into the same stitch)
Crochet Pumpkin Body Pattern
Using your 5.0 mm crochet hook and Orange yarn, start with a slip knot on your hook.
Foundation Chain and Row 1
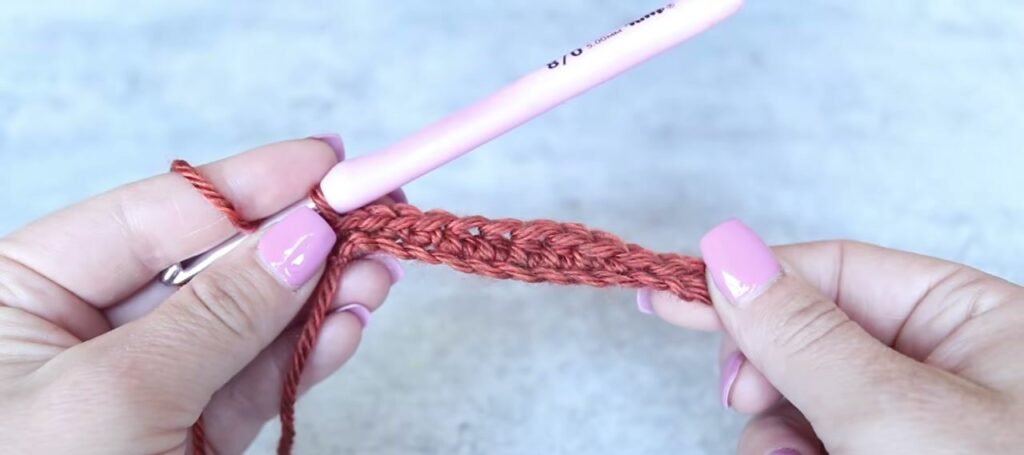
Foundation Chain: Chain 13 loosely.
Row 1: Beginning in the second chain from your hook:
- Work 1 sl st into each of the next 2 chains.
- Work 1 sc into each of the next 2 chains.
- Work 1 hdc into each of the next 4 chains.
- Work 1 sc into each of the next 2 chains.
- Work 1 sl st into each of the last 2 chains. (12 sts total).
- Chain 1, turn your work.
Row 2 and Subsequent Pattern Rows
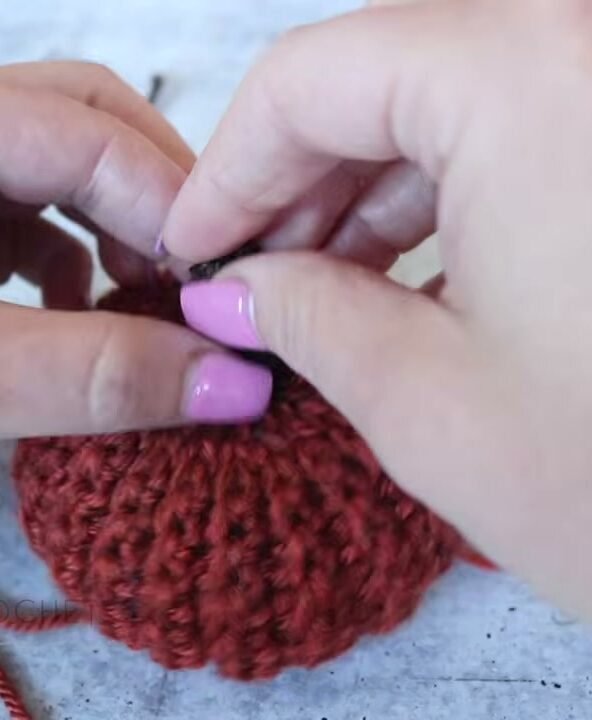
Row 2 (The Repeat Row): Chain 1, turn. Work every stitch into the Back Loop Only (BLO):
- Work 1 sl st in the back loop of each of the first 2 stitches.
- Work 1 sc in the back loop of each of the next 2 stitches.
- Work 1 hdc in the back loop of each of the next 4 stitches.
- Work 1 sc in the back loop of each of the next 2 stitches.
- Work 1 sl st in the back loop of each of the last 2 stitches. (12 sts). Chain 1, turn.
Rows 3 and Beyond: Repeat Row 2 continuously. Continue repeating Row 2 until your panel measures approximately 20 cm (8 inches) across at its widest point unstretched. Fasten off, leaving a tail about three times the length of the pumpkin body for seaming and cinching.
Crocheted Stem and Curly Vines
Crocheted Pumpkin Stem
Using your 5.0 mm hook and Brown yarn:
- Chain 2.
- Round 1: Work 6 sc into the second chain from your hook. Tug the starting tail to close the ring. (6 sc).
- Rounds 2 to 6: Work in a continuous spiral, placing 1 sc into each stitch around (6 sc per round).
- Continue until your stem measures approximately 4 cm (1.5 inches) long. Fasten off, leaving a tail for sewing.
Curly Vine Tendrils
Using your 5.0 mm hook and Green yarn:
- First Vine: Chain 20. Starting in the second chain from your hook, work 2 sc into each chain across. The increases will make the strip curl. Slip stitch into the base.
- Second Vine: Directly from that slip stitch, chain 16. In the second chain from your hook, work 2 sc into each chain back to the beginning. Slip stitch into the main base chain.
- Snip yarn, leaving a 20 cm tail for sewing.
Cinnamon Stick Stem Option
For a rustic farmhouse finish with a pleasant natural scent, you can substitute a cinnamon stick:
- Select a cinnamon stick measuring about 5 cm to 7 cm (2 to 2.5 inches) long.
- Complete the assembly, stuffing, and segment sculpting of your pumpkin first before attaching the stick.
- Apply hot glue around the bottom half of the cinnamon stick, press it firmly down into the top center opening, and hold for 30 seconds until set.
- Wrap natural jute twine around the base of the cinnamon stick and tie a neat bow.
Assembly, Stuffing, and Shaping
Step 1: Seaming the Tube
Thread the long starting tail onto your tapestry needle. Fold the ribbed panel in half so that the short side edges align. Whipstitch through both layers along the short edge to create a ribbed cylinder.
Step 2: Cinching the Base
Using the same yarn tail, weave your needle through the row ends around the bottom opening. Pull the yarn tail firmly like a drawstring. Because of the tapered slip stitches, the opening closes tightly. Take a few securing stitches across the center and knot off.
Step 3: Stuffing the Pumpkin
Turn the piece right side out. Insert polyester polyfill stuffing into the cylinder, pressing the fiberfill firmly against the ribbed walls so the pumpkin feels plump without lumps.
Step 4: Cinching the Top Opening
Thread a new strand of yarn around the row ends of the top opening. If using the crocheted stem, insert its base into the opening, pull the drawstring tight around the stem, and sew through both parts to secure it. If using a cinnamon stick, cinch the top opening almost completely shut and knot securely.
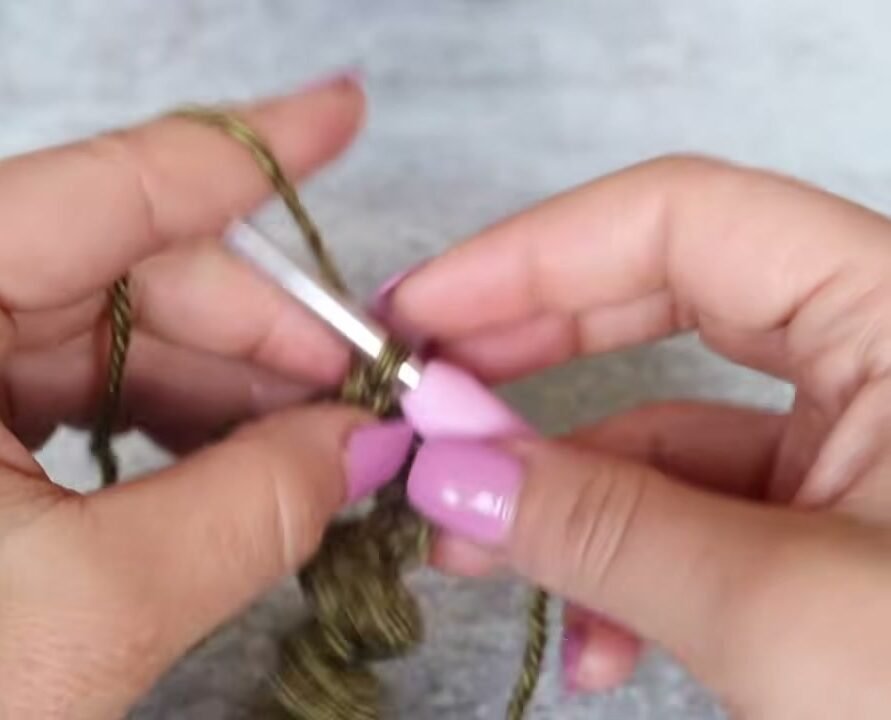
Step 5: Sculpting the Plump Segments
To give your pumpkin its classic plump, segmented shape, use a long strand of Orange yarn on your tapestry needle:
- Anchor the yarn near the top center beside the stem.
- Guide the yarn straight down the outside of the pumpkin inside one of the vertical grooves.
- Insert your needle into the bottom center and push it straight up through the middle to exit at the top center.
- Pull the yarn strand firmly to indent the side of the pumpkin.
- Repeat around the pumpkin to create 4, 6, or 8 segments. Pull with consistent tension so the segments are even.
- Knot the yarn securely at the base and hide the excess tail inside the stuffing.
- Sew your green curly vines beside the stem to complete your pumpkin.
Written Pattern Summary Table
| Component | Hook & Yarn | Instructions | Key Notes |
|---|---|---|---|
| Body: Row 1 | 5.0 mm / Orange | Ch 13; sl st 2, sc 2, hdc 4, sc 2, sl st 2 (12 sts) | Worked into starting chain |
| Body: Row 2+ | 5.0 mm / Orange | In BLO: sl st 2, sc 2, hdc 4, sc 2, sl st 2 (12 sts) | Rep until panel is 20 cm (8″) long |
| Stem (Rnd 1) | 5.0 mm / Brown | Ch 2, 6 sc in 2nd ch from hook | Snug center ring |
| Stem (Rnds 2-6) | 5.0 mm / Brown | 1 sc in each st around in continuous spiral | Work until 4 cm (1.5″) long |
| Vine 1 | 5.0 mm / Green | Ch 20; 2 sc in 2nd ch from hook and each ch across | Sl st in base to finish |
| Vine 2 | 5.0 mm / Green | Ch 16; 2 sc in 2nd ch from hook and each ch across | Sl st in base to finish |
Video Tutorial
Watch the full video tutorial: How to Crochet a Cute Easy Pumpkin | Quick Beginner Friendly Amigurumi Tutorial by JMCrochet.
Tips and Common Mistakes
- Keep End Slip Stitches Loose: Tight slip stitches make inserting your hook on subsequent rows difficult. Pull working loops slightly higher when making the first and last two stitches.
- Locating the Back Loop: Slip stitches naturally rotate forward. Tilt your work slightly toward you to clearly view the “V”, and insert your hook into the strand furthest away.
- Do Not Overstuff: Overstuffing will stretch the ribbed stitches apart and reveal the polyfill inside. Add stuffing until the pumpkin is comfortably firm.
- Secure Stems Firmly: Anchor your crocheted stem with several passes of yarn through the pumpkin rim, or use ample hot glue for cinnamon sticks.
Make More / Related Patterns
Expand your autumn handmade collection with these free seasonal patterns:
- Crochet Flowers –> https://cozyknotty.com/crochet-flower/
- Crochet Newborn Blanket —> https://cozyknotty.com/crochet-newborn-blanket/
Frequently Asked Questions
How long does it take to make a crochet pumpkin?
Because the panel is worked flat with simple stitches, a complete mini pumpkin takes about 45 to 90 minutes from starting chain to final assembly.
Can I use blanket or chenille yarn for this pattern?
Yes, plush chenille yarn makes wonderfully soft pumpkins. When using bulky chenille yarn, upgrade to a 6.0 mm or 7.0 mm hook and work fewer rows until your desired size is reached.
How do I make the ribs more prominent?
Ensure that you are working strictly in the back loop only on every single row. The exposed front loop is what creates the deep accordion ridge on both sides of the fabric.
Why are my pumpkin segments pulling unevenly?
When sculpting segments with your needle, guide the yarn strand directly into the valley of a vertical rib rather than over a raised ridge. Pull each wrap with steady, moderate tension before anchoring.
I would love to see how your cozy autumn pumpkins turn out, so please share your finished makes and tag me in your photos. Happy crocheting, Meryem!
One reply on “Crochet pumpkin”
[…] Crochet pumpkin –> https://cozyknotty.com/crochet-pumpkin/ […]