
If you have been looking for a cozy, modern crochet beanie pattern that looks far more intricate than it actually is to make, you are in the right place. In this tutorial, I will guide you through crafting a textured ripple hat featuring a wide folded brim and a neat, gathered crown. You will find both my step-by-step written pattern and the companion video tutorial right here on this page, so you can follow along in whatever way suits you best.
This post is based on the video tutorial by Crochet Bits, linked below. Because the hat is worked flat in rows and then seamed into a tube, this crochet beanie pattern is an enjoyable and relaxing project that works up quickly. The gentle wavy texture is created by pairing two very simple stitches, making it a wonderful crochet beanie pattern for anyone who wants to create a polished, boutique-style winter accessory.
What Will I Learn?
Working through this crochet beanie pattern will help you master several practical crochet techniques that you can carry over into blankets, cowls, and sweaters. In this tutorial, you will learn:
- Stretchy, elastic ribbing using single crochet worked through the back loop only.
- Sculpted wave texture created by alternating blocks of half double crochet and slip stitches.
- Crown shaping with short rows so the top gathers without bulky bunches of fabric.
- A clever bridging trick for picking up the horizontal bar of a turning chain to eliminate gaps between short rows.
- Invisible, flat slip-stitch seam to join the starting edge and final row cleanly.
- Gathered crown finish using a yarn needle for a smooth, puckering-free top.
Materials and Tools
Below is the list of materials needed for this crochet beanie pattern, which can be adapted to suit whatever yarn you have in your stash:
- Yarn: Medium weight yarn (Category 4, worsted or aran weight). Bernat Premium by Yarnspirations in the colour Baby Lilac was used for the sample. You will only need approximately half of one skein (about 100 grams, or roughly 180 to 200 metres) to complete the hat.
- Crochet Hook: 5.0 mm (US size H/8).
- Yarn Needle: A blunt-tipped tapestry needle for seaming and closing the crown.
- Measuring Tape: To check your starting chain and overall width.
- Scissors: For cutting your yarn and trimming ends.
Please note that you can easily substitute any worsted or aran weight acrylic, wool, or blended yarn. If you decide to crochet a matching cowl or scarf later, keep in mind that the remaining half skein will not be quite enough, so be sure to pick up an extra skein before you start.
Gauge and Finished Size
This crochet beanie pattern is designed to fit an average adult head (suitable for both women and men simply by choosing your preferred shade), with generous stretch thanks to the ribbed construction.
- Foundation Chain Length: Approximately 33 to 35 cm (13.5 inches) long when laid flat without stretching.
- Total Fabric Width: Approximately 46 cm (18 inches) wide before seaming, measured across the rows unstretched.
- Brim Depth: 24 stitches wide, designed to fold up into a cozy double-thick brim.
Note: Stitch gauge is not critical for this crochet beanie pattern because the design is completely customizable. If your yarn or tension produces a shorter foundation chain, you can simply adjust the starting chain in multiples of 12 plus 6 stitches (plus 1 turning chain), as explained in the notes below.
Pattern Notes and Abbreviations
This crochet beanie pattern is written in standard US crochet terms.
Stitch Abbreviations
- ch: chain
- sl st: slip stitch
- sc: single crochet
- hdc: half double crochet
- BLO: back loop only
- st(s): stitch(es)
- RS: right side
- WS: wrong side
Pattern Notes
- Stitch Multiple: The ripple pattern requires a multiple of 12 stitches plus 6 stitches (plus 1 turning chain). The starting chain of 55 consists of 24 stitches for the folded brim, 24 stitches for the two wave pattern repeats, 6 stitches for the crown short row, and 1 turning chain.
- First Chain Count: Do not tighten your initial slip knot. Count that slip knot as your very first chain. Keeping it loose makes it easy to work into at the end of Row 3.
- Back Loop Only (BLO): Starting in Row 2, all stitches across the brim and body are worked through the back loop only, which creates the distinctive ridges and elastic stretch.
- Edging Neatness: For the very last single crochet stitch at the outer edge of the brim, work underneath both top loops rather than just the back loop. This provides stability and stops the bottom hem from flaring out or over-stretching.
- Tension on Slip Stitches: When working the slip stitches across the ripple body, keep your tension relaxed. Pulling slip stitches too tightly will make it difficult to insert your hook into them on the subsequent row.
- Crown Short Rows: Rows 1 and 2 stop 6 stitches short of the crown end. Rows 3 and 4 work all the way across those remaining 6 stitches. Alternating these heights tapers the top of the hat naturally, preventing excess bulk when you gather the crown.
The Written Pattern
Starting the Foundation Chain
Start with a slip knot on your hook, leaving a standard tail. Remember not to pull the slip knot tight, as you will count it as chain number 1.
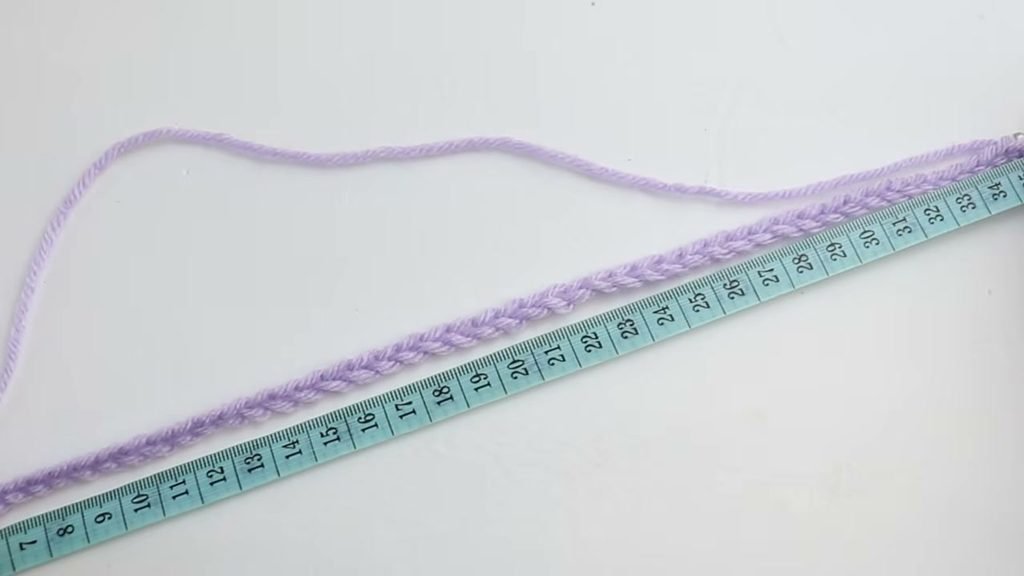
Foundation Chain: Ch 54. Measure your chain flat along your tape measure. For an adult fit, your chain should measure between 33 and 35 cm (13.5 inches). If you are happy with the length, chain 1 extra for your turning chain, bringing your total count to 55 chains.
Row 1 (Right Side)
Row 1 (RS): Starting in the 2nd ch from hook, sc 1 in each of next 24 ch (folded brim). [Hdc 1 in each of next 6 ch, sl st 1 in each of next 6 ch] twice. Leave the last 6 ch unworked to begin shaping the tapered crown. (48 sts worked, 6 ch left unworked). Ch 1, turn.
Row 2 (Wrong Side)
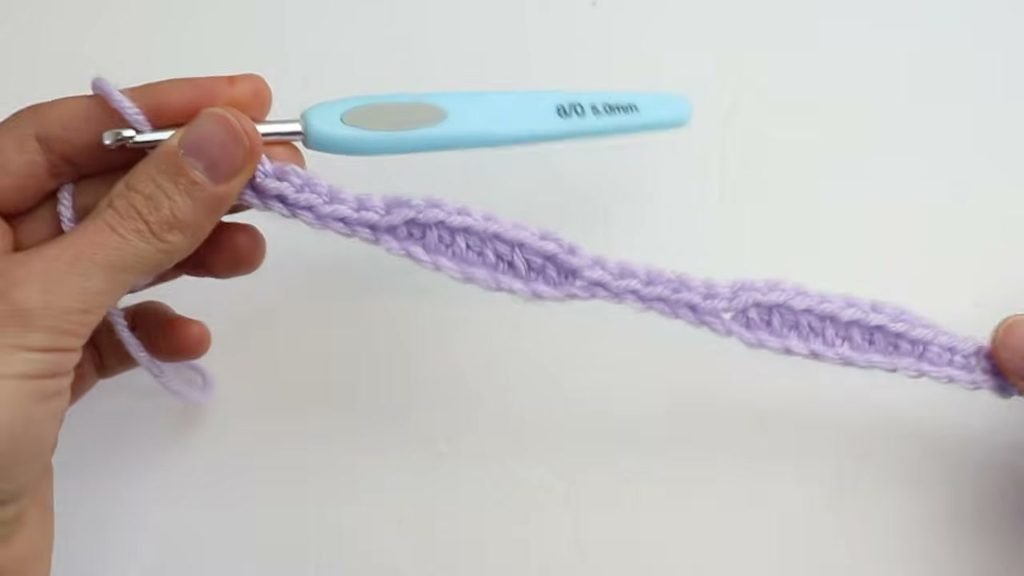
Row 2 (WS): Sl st BLO in each of next 6 sts, hdc BLO in each of next 6 sts, sl st BLO in each of next 6 sts, hdc BLO in each of next 6 sts. Sc BLO in each of next 23 sts, then work 1 sc underneath both loops of the 24th and final brim stitch for a clean edge. (48 sts). Ch 1, turn.
Row 3 (Right Side)
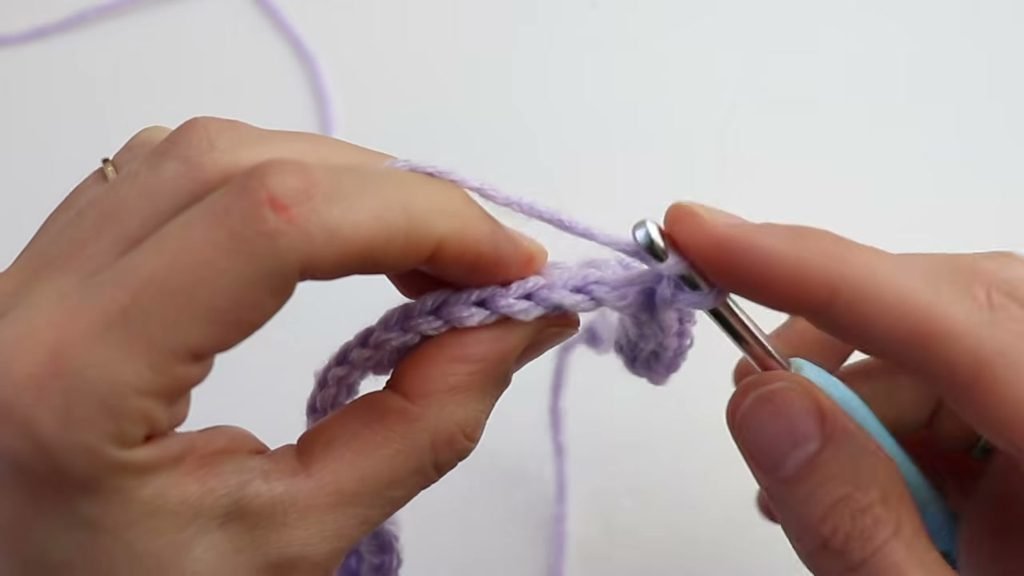
Row 3 (RS): Sc BLO in each of next 24 brim sts. [Sl st BLO in each of next 6 sts, hdc BLO in each of next 6 sts] twice. To bridge the short-row step without leaving a hole, insert hook under the horizontal bar of the previous turning chain and directly into the next unworked chain stitch. Yarn over and pull through all 3 loops on your hook to complete a seamless slip stitch. Work 1 sl st in each of the remaining 5 ch stitches across to the end, working into the loose slip knot on your last stitch. (54 sts). Ch 1, turn.
Row 4 (Wrong Side)
Row 4 (WS): [Sl st BLO in each of next 6 sts, hdc BLO in each of next 6 sts] twice, sl st BLO in each of next 6 sts. Sc BLO in each of next 23 sts, then work 1 sc through both loops of the final brim stitch. (54 sts). Ch 1, turn.
Repeating the Pattern
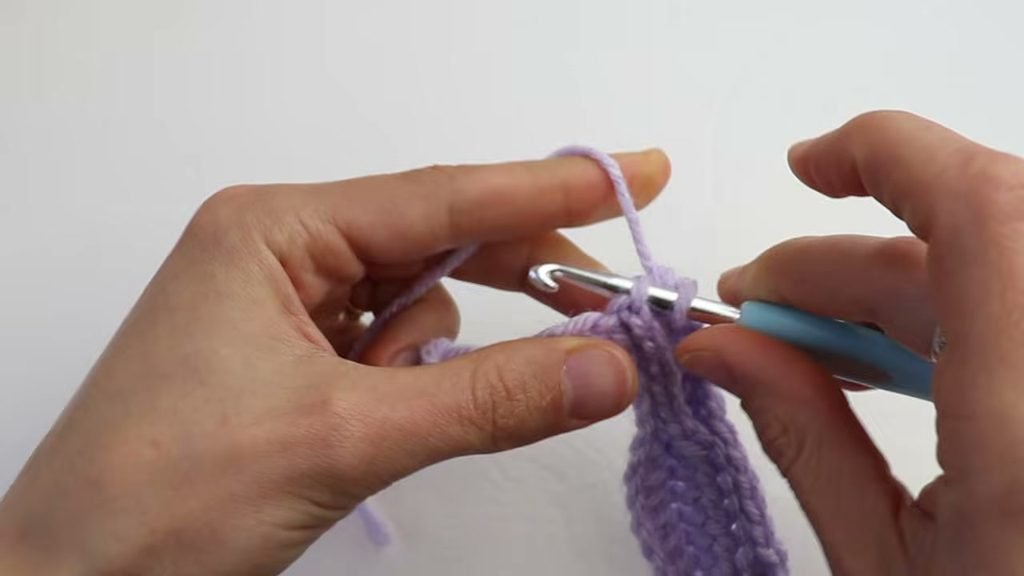
Rows 1 through 4 form the complete 4-row pattern repeat. Repeat these four rows in sequence until your hat reaches the desired width:
- Row 5 (Repeat Row 1): Sc BLO in each of next 24 sts. [Hdc BLO in next 6 sts, sl st BLO in next 6 sts] twice. Leave last 6 crown sts unworked. (48 sts). Ch 1, turn.
- Row 6 (Repeat Row 2): Sl st BLO in next 6 sts, hdc BLO in next 6 sts, sl st BLO in next 6 sts, hdc BLO in next 6 sts. Sc BLO in next 23 sts, sc 1 through both loops of the last st. (48 sts). Ch 1, turn.
- Row 7 (Repeat Row 3): Sc BLO in next 24 sts. [Sl st BLO in next 6 sts, hdc BLO in next 6 sts] twice. Pick up horizontal bar of turning chain and sl st into next st, sl st BLO in remaining 5 sts to end. (54 sts). Ch 1, turn.
- Row 8 (Repeat Row 4): [Sl st BLO in next 6 sts, hdc BLO in next 6 sts] twice, sl st BLO in next 6 sts. Sc BLO in next 23 sts, sc 1 through both loops of the last st. (54 sts). Ch 1, turn.
Continue repeating Rows 5 through 8 until your piece measures approximately 46 cm (18 inches) wide when laid flat unstretched, or until it fits comfortably around your head. Always finish on an even-numbered row (a complete Row 4 or Row 8) so that your working yarn ends up at the brim edge, ready for seaming.
Seaming the Hat
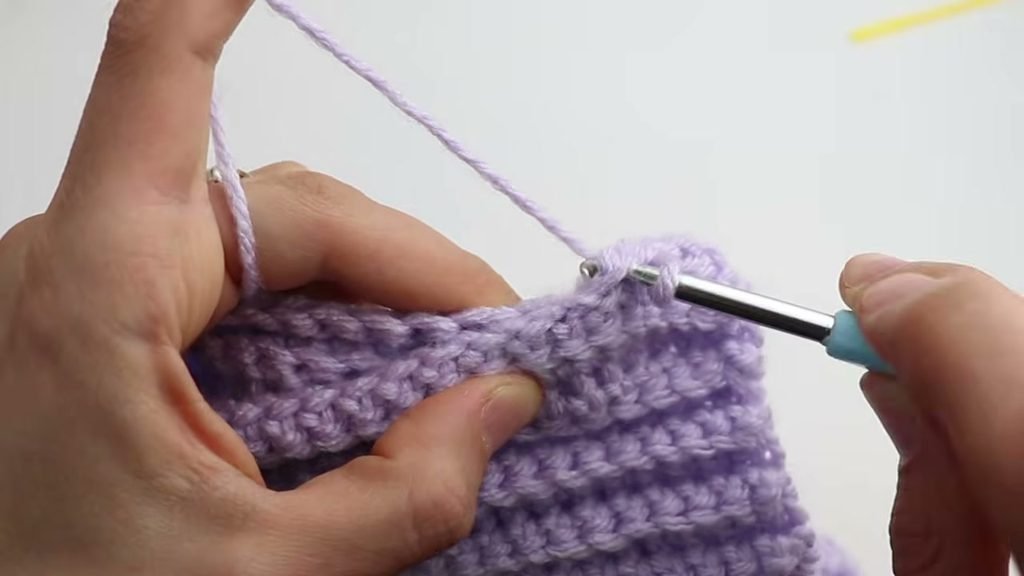
Lay your crocheted rectangle flat on your table. Fold the fabric in half with the wrong side facing outwards and the right side tucked inside, bringing the foundation chain edge directly against your final row of stitches.
Starting at the brim end, insert your crochet hook into the outer loop of the starting foundation chain on one edge, and through the corresponding back loop of the final row on the opposite edge. Yarn over and pull the yarn through all three loops on your hook to complete a slip stitch.
Repeat this process stitch for stitch all the way along the seam up to the crown edge. Keep your slip stitches evenly tensioned so the seam remains elastic and lies completely flat. When turned right side out, this seam will be invisible within the ribbed texture.
Closing the Crown
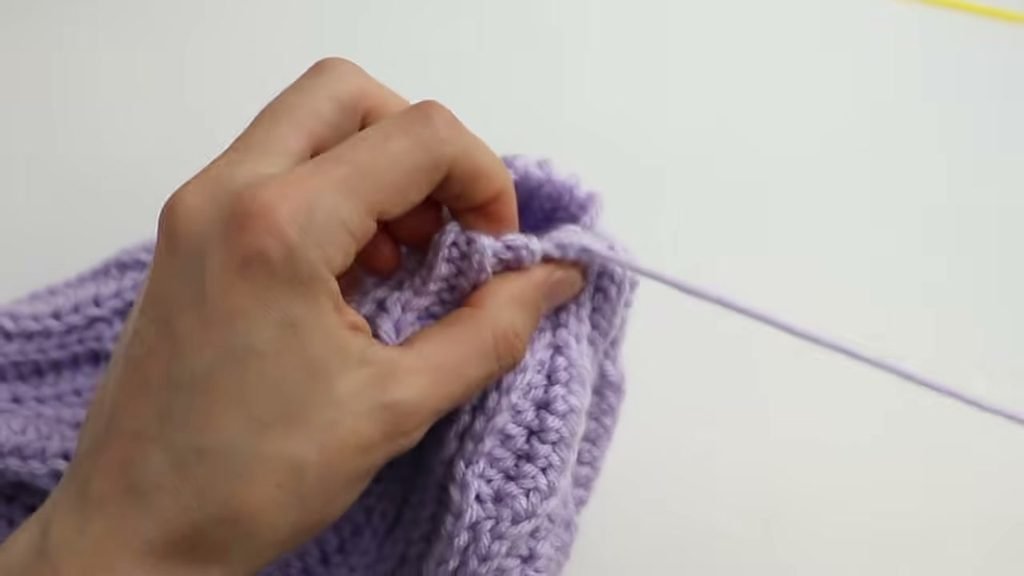
Once you reach the top of the seam, cut your yarn, leaving a generous tail of approximately 20 to 25 cm (8 to 10 inches). Pull the tail through your working loop and pull snug to secure it with a knot.
Thread the yarn tail onto your blunt tapestry needle. Look closely at the top edge of your hat. You will see the horizontal bars created by the turning chain-1 of the extended rows. Insert your needle under each of these horizontal bars around the entire top opening. Pull the yarn slowly and steadily to gather the crown closed. If you are using a woolen yarn, pull gently so the strand does not snap.
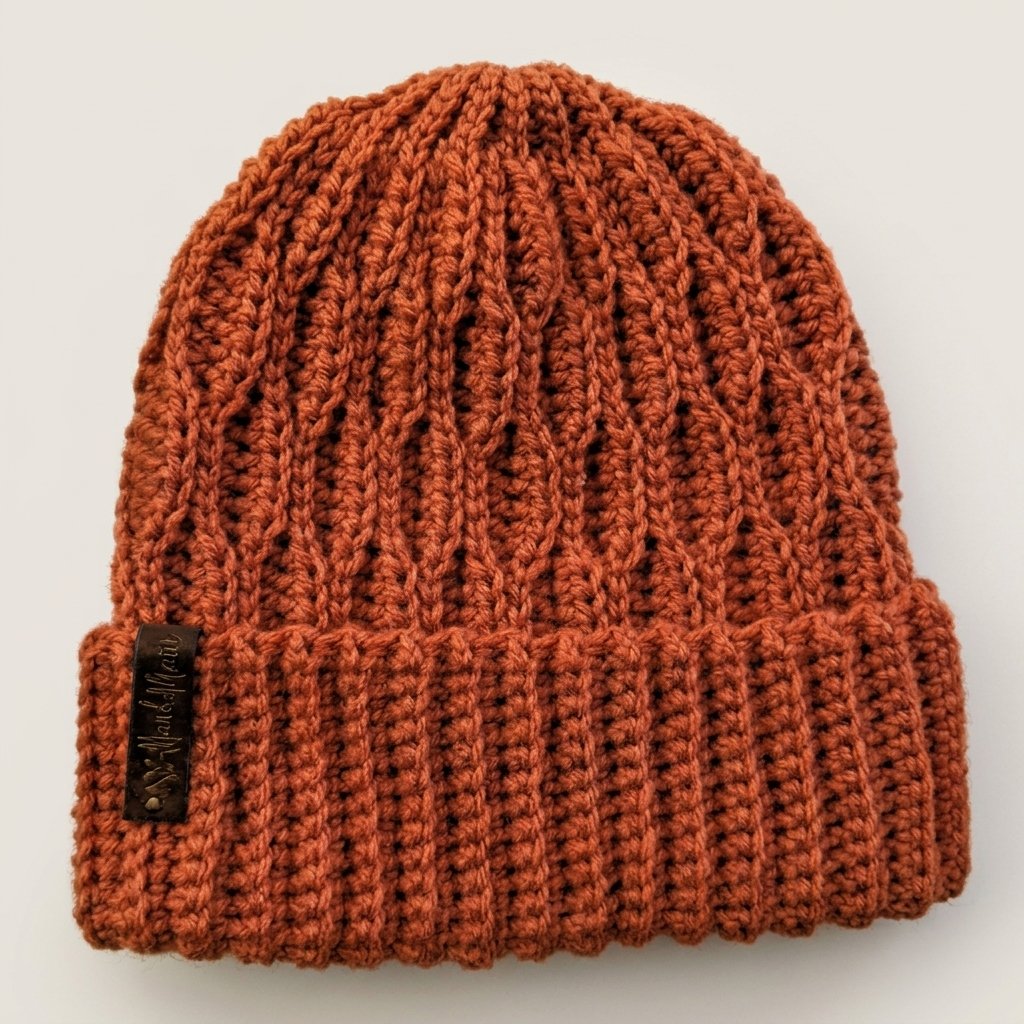
Once the opening is gathered, pass your needle through the same loops a second time to reinforce the closure. Pull tight, push your needle through to the inside (wrong side) of the hat, knot securely, and weave in all remaining loose ends. Turn your hat right side out, fold up the cozy ribbed brim, and your ripple beanie is ready to wear.
Video Tutorial
If you find visual demonstrations helpful, you can watch the entire step-by-step process in the tutorial below. Feel free to pause and rewatch any specific stitch technique as you crochet along.
Tips and Common Mistakes
- Keep your slip knot loose: Remember that the starting slip knot counts as your first chain stitch. If you pull it tight at the beginning, you will struggle to work the final slip stitch into it at the end of Row 3.
- Relax your slip stitch tension: Crocheters often pull slip stitches tighter than regular stitches. Consciously keep your hands relaxed during the 6 slip-stitch sections, otherwise inserting your hook on the return row will feel stiff and frustrating.
- Always anchor the last brim stitch: Working underneath both loops of the very last single crochet on the brim edge prevents the brim from rolling or developing a loose, wavy border.
- Pick up the horizontal bar at the crown step: When transitioning across the short row in Rows 3 and 7, always pick up the horizontal bar of the turning chain along with the next stitch. This bridging technique pulls the two levels together and eliminates unsightly holes at the top of the hat.
- Pull the gathering tail gently: When closing the crown, pull the yarn tail steadily and smoothly. If you are working with a roving or single-ply yarn, pulling too quickly or forcefully can cause the yarn to break.
Make More
If you enjoyed crafting this cozy hat, here are a few more crochet projects you might like to try next:
- Crochet Top –> https://cozyknotty.com/crochet-top/
- Daisy Granny Square –> https://cozyknotty.com/daisy-granny-square/
Frequently Asked Questions
Can I adjust the width of the folded brim?
Yes, absolutely. The brim in this crochet beanie pattern is set to 24 single crochet stitches, which creates a wide, warm cuff when folded up. If you prefer a narrower cuff or a slouchier fit with a smaller fold, you can reduce the brim stitch count to 16 or 18 stitches. Simply subtract that number from your total foundation chain, keeping the remaining ripple and crown counts identical.
Why are 6 stitches left unworked at the crown in Rows 1 and 2?
Leaving those 6 stitches unworked creates a short row. Because rows 1 and 2 do not travel all the way to the top while rows 3 and 4 do, fewer rows of fabric are built at the very crown than at the brim. This naturally tapers the circumference of the cylinder so that when you draw the crown shut, you have significantly less bulk to cinch together.
Can I adapt this crochet beanie pattern for children or larger head sizes?
Yes. To adjust the height of the hat, adjust your starting chain using the stitch multiple of 12 plus 6 stitches (plus 1 turning chain). To adjust the circumference around the head, simply crochet fewer or more 4-row pattern repeats before seaming. Try wrapping the unseamed piece around the wearer’s head to check the fit before you begin the joining seam.
Is this crochet beanie pattern suitable for men as well as women?
Yes, this design is completely unisex. The geometric ripple texture and clean vertical ribbing look wonderful in any colour palette, whether you choose soft pastels, rich jewel tones, or classic neutrals like charcoal, navy, and oatmeal.
I would love to see your finished ripple hat! Share your makes in the comments below or tag me on social media. Happy crocheting, Sara.
One reply on “Crochet Beanie Pattern: Step-by-Step Tutorial”
[…] Crochet Beanie Pattern —> https://cozyknotty.com/crochet-beanie-pattern/ […]