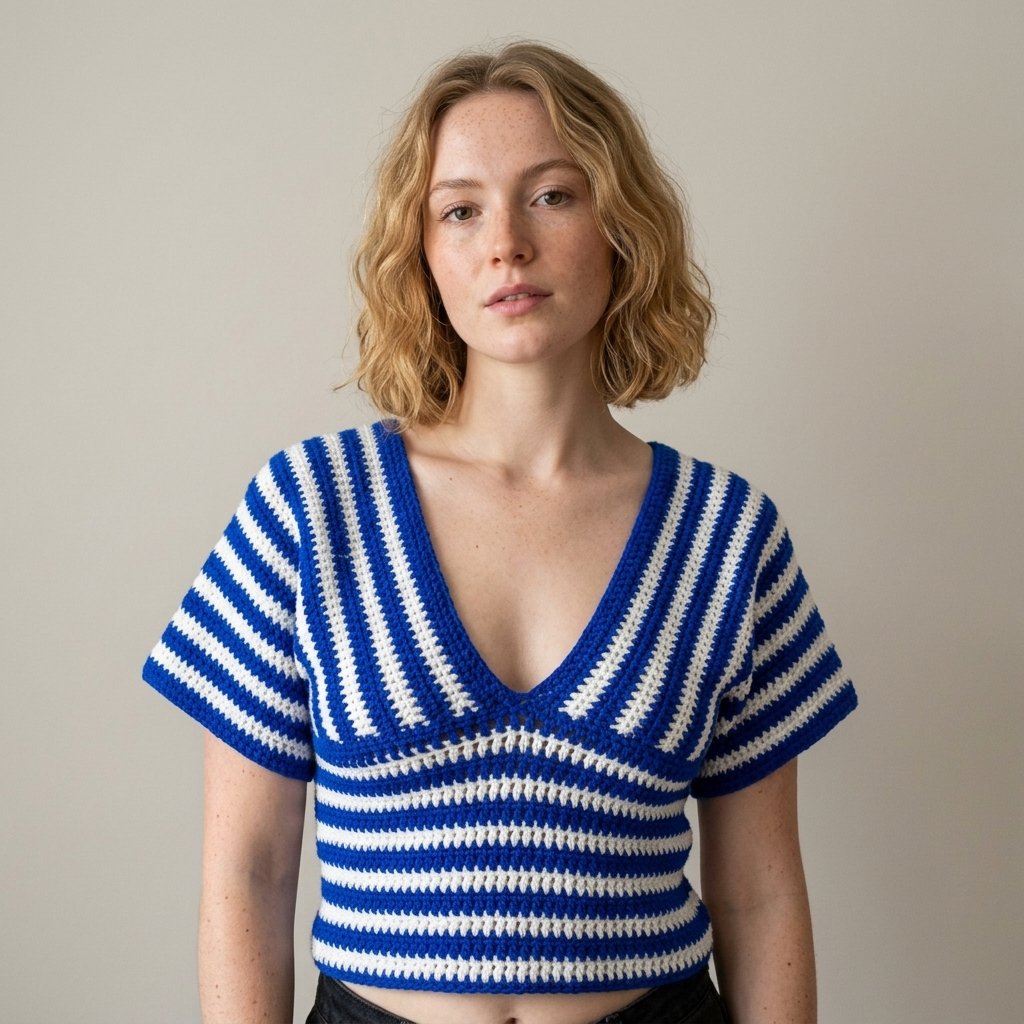
Crocheting your own clothes is one of the most rewarding milestones in maker life, and this trendy striped V-neck crochet top is the ideal garment to begin with. Featuring bold nautical stripes, an effortless drop-shoulder silhouette, and a flattering V-neckline, this crochet top looks chic while remaining wonderfully easy to construct. The entire piece comes together from three simple rectangular sections worked in basic double crochet stitches.
Because there is no complex shaping, increasing, or armhole decreasing, you can customize the measurements so your handmade crochet top fits your body perfectly. I will guide you through each step of the process, including taking your personal measurements, carrying your yarn neatly across rows to avoid weaving in dozens of tails, assembling the panels, and adding a crisp neckline border. Below, you will find the complete written pattern for this beginner-friendly crochet top, along with helpful tips and the full video tutorial.
This post is based on the video tutorial by Merlyncrochets, linked below.
Table of Contents
What Will I Learn?
Crocheting this wearable crochet top introduces you to practical garment construction techniques that build your confidence with handmade clothing. Following this tutorial will teach you:
- How to build a made-to-measure crochet top using body measurements rather than rigid sizing charts.
- How to work clean color changes on the final yarn over of double crochet stitches.
- How to carry inactive yarn beneath your working stitches so you never have to cut and join yarn after every single stripe.
- How to work both flat rows and circular rounds in matching two-tone stripes.
- How to assemble flat rectangular panels onto a lower body tube to create a flattering V-neck front and back.
- How to add a snug single crochet border along raw row edges to pull the neckline flat against your skin.
Materials and Tools
To crochet this crochet top, you need only two contrasting shades of yarn and a few basic notions. Choosing an easy-care acrylic or soft cotton yarn ensures your crochet top drapes comfortably and holds its shape through regular washings.
- Yarn: DK weight yarn (Light Category 3) in two contrasting colors:
- Color A (Primary): Navy blue (approximately 150 to 200 grams, depending on size).
- Color B (Secondary): Crisp white (approximately 100 to 150 grams).
- Total yarn requirement for this crochet top is roughly 250 to 300 grams for a size Small, with more yarn needed for larger sizes.
- Crochet Hook: 3.5 mm (US E/4) crochet hook. Although the yarn label suggests a 4.0 mm hook, dropping down to a 3.5 mm hook creates tighter, denser stitches that prevent the fabric from being see-through.
- Tapestry Needle: A blunt yarn needle for seaming and weaving in ends.
- Measuring Tape: To take accurate body measurements.
- Stitch Markers: Essential for marking center points during garment assembly.
- Scissors: For trimming yarn tails.
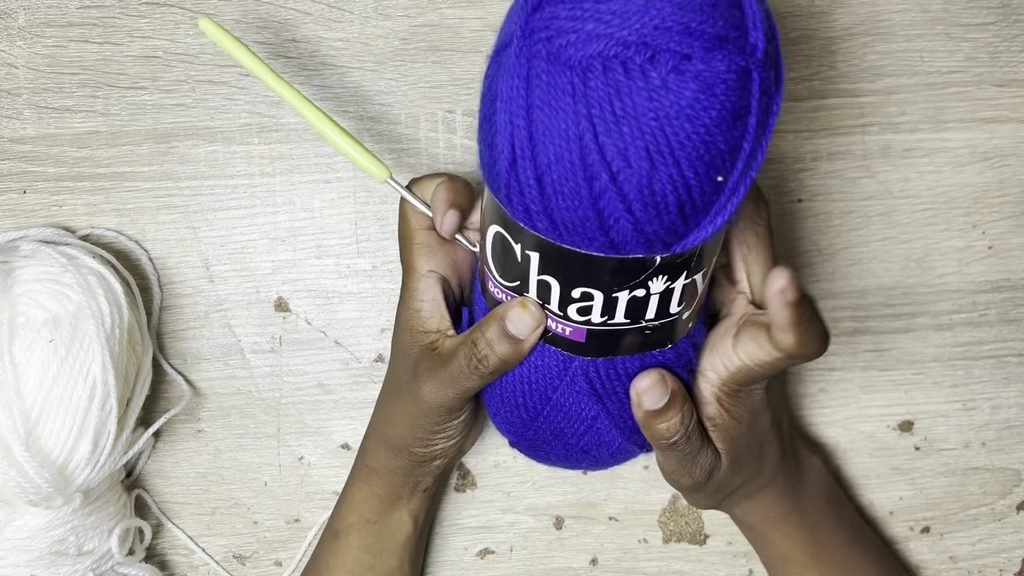
You can substitute any yarn weight you prefer for this crochet top, including sport weight linen or worsted weight cotton. If you choose a thicker yarn, swatch first and adjust your foundation chain count so the fabric reaches your personal body measurements.
Sizing and Measurements for Your Crochet Top
This garment uses a made-to-measure design approach. The sample shown in the demonstration is a size Small. [CHECK: exact finished dimensions were not measured with a ruler on screen in the video].
To tailor the crochet top to your unique body, take two simple tape measurements before beginning:
- Panel Length (Underbust to Back): Place the tape measure under your bust, run it up over your shoulder, and down to your back waistline where you want the top panel to sit. Make an un-stretched foundation chain that equals this length. In the sample, this was 100 chains (measuring approximately 98 double crochet stitches across).
- Waist Circumference (Lower Tube): Wrap the tape measure around your torso at the waistline or underbust where you want the bottom section to sit. Make a chain that circles your torso comfortably with a little breathing room. In the sample, this was 115 chains.
- Sleeve Width: You control the sleeve length by the number of rows worked on the two shoulder panels. Working 23 rows produces a modest cap or drop sleeve, while working more rows creates longer short sleeves for a relaxed-fit crochet top.
Pattern Notes
Please review these construction notes to ensure smooth stitching from start to finish:
- Crochet Terms: This pattern is written in standard US crochet terms with US spelling throughout.
- Skill Level: Beginner friendly. The garment requires only chain, slip stitch, single crochet, and double crochet stitches.
- Garment Architecture: The crochet top consists of three main components: two identical striped rectangular shoulder panels and one lower torso tube. The shoulder panels fold over your shoulders, meet in the center to form the V-neck, and attach to the circular waist section.
- Turning Chains: A chain 2 at the start of a row or round counts as the first double crochet stitch. Work your subsequent double crochet into the next stitch across.
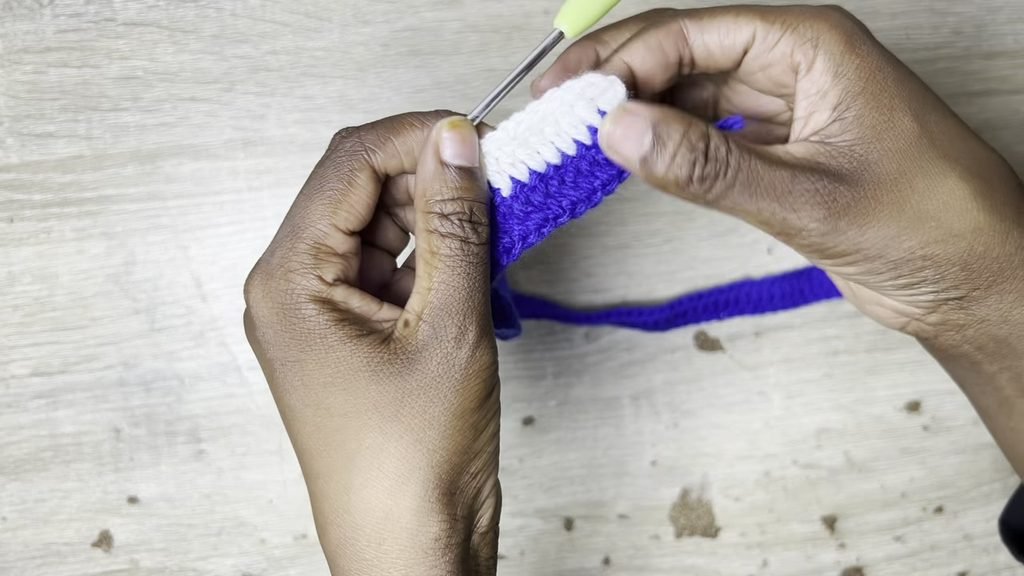
- Seamless Stripe Technique (Carrying Yarn): Do not cut your yarn after each stripe. When working the final double crochet of a row, pull through the new color on the last two loops to complete the stitch. When starting the next row, lay the inactive yarn along the top of the previous row and crochet right over it. Give the carried strand a gentle tug every few stitches to keep the edge neat and flat.
Terms and Abbreviations
| Abbreviation | US Term Definition |
| ch | Chain stitch |
| sl st | Slip stitch |
| sc | Single crochet |
| dc | Double crochet |
| st / sts | Stitch / stitches |
| ea | Each |
| yo | Yarn over |
Striped V-Neck Crochet Top Pattern
Follow along with the four distinct phases of this project: crocheting the shoulder panels, working the lower body tube, assembling the garment pieces, and adding the neckline trim.
Part 1: Shoulder Panels (Make 2 Identical)
The two shoulder panels form the upper bodice and drop sleeves of your crochet top. Begin with Color A (navy blue).
- Foundation: Make a chain of 100 (or the chain length matching your underbust-to-back measurement).
- Row 1 (Color A): Yarn over, insert your hook into the 3rd chain from the hook, and work 1 double crochet. Work 1 double crochet in each chain stitch across to the end of the row. On the final double crochet, complete the stitch normally until two loops remain on your hook. Introduce Color B (white) by pulling it through the final two loops to finish the stitch cleanly. (98 double crochet).
- Row 2 (Color B): Chain 2 and turn your work. Lay the inactive Color A yarn along the tops of the Row 1 stitches. Insert your hook into the next stitch, capturing the blue yarn underneath your stitch as you pull up a loop, and complete a double crochet. Work 1 double crochet in each stitch across while continuing to enclose the blue strand. Give the carried yarn a slight tug so it remains invisible. On the last double crochet, pull Color A through the final two loops.
- Row 3 (Color A): Chain 2 and turn your work. Lay the inactive Color B yarn along the top edge. Work 1 double crochet in each stitch across, enclosing the white yarn underneath. On the final stitch, pull Color B through the final two loops.
- Rows 4 through 23: Continue alternating between Color B and Color A for each row, carrying the non-working yarn inside the stitches. Complete a total of 23 rows (or your desired sleeve width).
- After finishing Row 23, fasten off both yarn strands, leaving an 8-inch tail for seaming.
- Repeat steps 1 through 6 to make a second identical striped rectangle.
Part 2: Lower Torso Tube
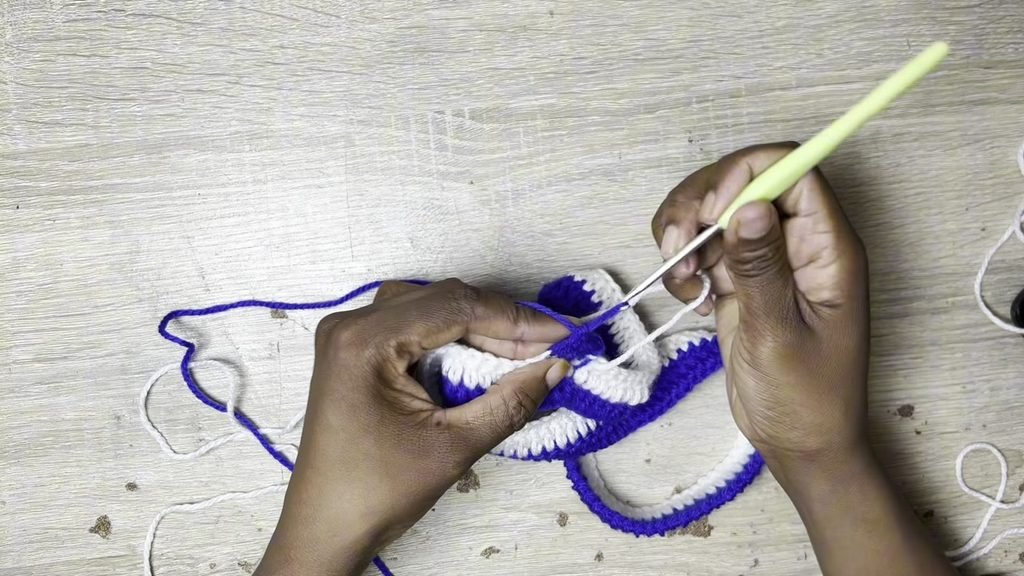
The bottom section forms the waistband and torso of the crochet top, worked in continuous joined rounds. Begin with Color A (navy blue).
- Foundation: Make a slip knot and chain 115 (or the chain length matching your waist circumference plus comfortable ease). Being careful not to twist the chain, join with a slip stitch into the very first chain to form a large ring.
- Round 1 (Color A): Chain 2 (counts as 1 double crochet). Work 1 double crochet in each chain stitch all the way around the ring. Join with a slip stitch into the top of the beginning chain 2. Attach Color B (white) with a small knot on the reverse side. (115 double crochet).
- Round 2 (Color B): Turn your work. Chain 2. Work 1 double crochet in each stitch around, enclosing the carried Color A yarn underneath the stitches just as you did on the flat panels. Join with a slip stitch to the top of the beginning chain 2. Switch back to Color A on the join.
- Round 3 (Color A): Turn your work. Chain 2. Work 1 double crochet in each stitch around while carrying Color B underneath. Join with a slip stitch into the top of the beginning chain 2, switching to Color B.
- Rounds 4 through 15: Alternate between Color B and Color A for each round, turning after every round to keep the seam vertical and tidy. Complete 15 rounds in total (or continue until the tube reaches your desired hemline).
- Fasten off both colors and weave in your lower foundation tail.
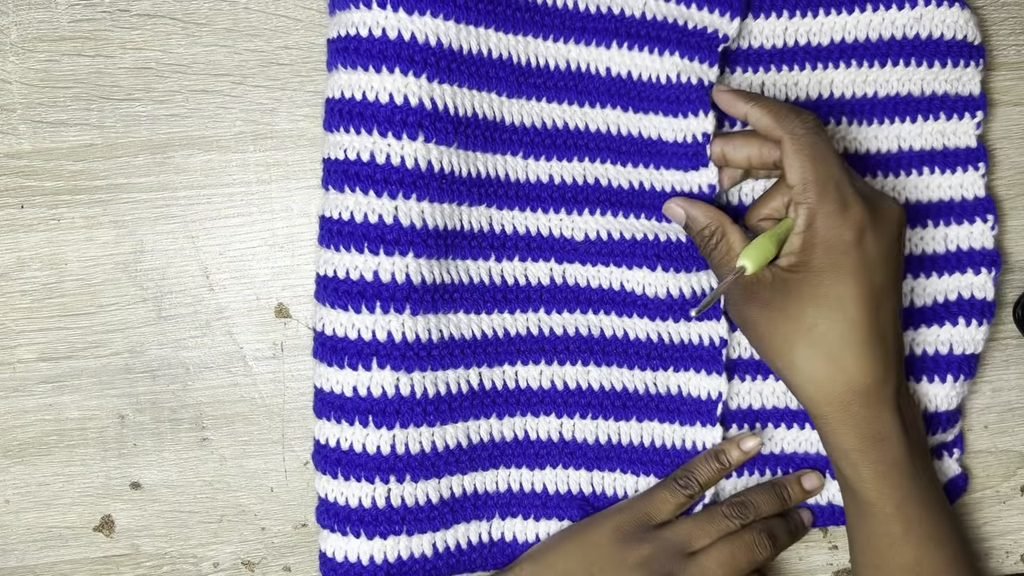
Part 3: Garment Assembly
Once your three components are finished, it is time to connect them into a wearable crochet top. Lay out the pieces on a clean, flat surface.
- Mark the Center Points: Fold the lower torso tube flat so the round joining seam sits at the back center. Place a stitch marker at the front exact center stitch, and another marker at the back exact center stitch.
- Position the Panels: Fold each shoulder panel in half lengthwise (so the 23 rows run horizontally across your chest and shoulders). The open folded ends will rest at the waistline, while the fold sits at the top of your shoulder.
- Align the Front V-Neck: Place the inner front corners of both panels directly next to each other at the front center stitch marker. This meeting point creates the base of your front V-neck.
- Align the Back: Match the inner back corners of both panels at the back center stitch marker to mirror the V-neckline on the reverse side.
- Seam Panels to Waist: Using Color A and your 3.5 mm hook, join yarn at the center front marker. Working through both the edge of the panel and the top round of the lower tube, work single crochet stitches evenly across to join the right panel to the waistband. Repeat for the left panel, and then across the back.
- Seam Underarm Sides: Try on the garment to decide how large you want your armhole openings to be. From the bottom of the armhole opening down to the waistline, join the front and back edges of each shoulder panel using single crochet stitches (or seam with a tapestry needle).
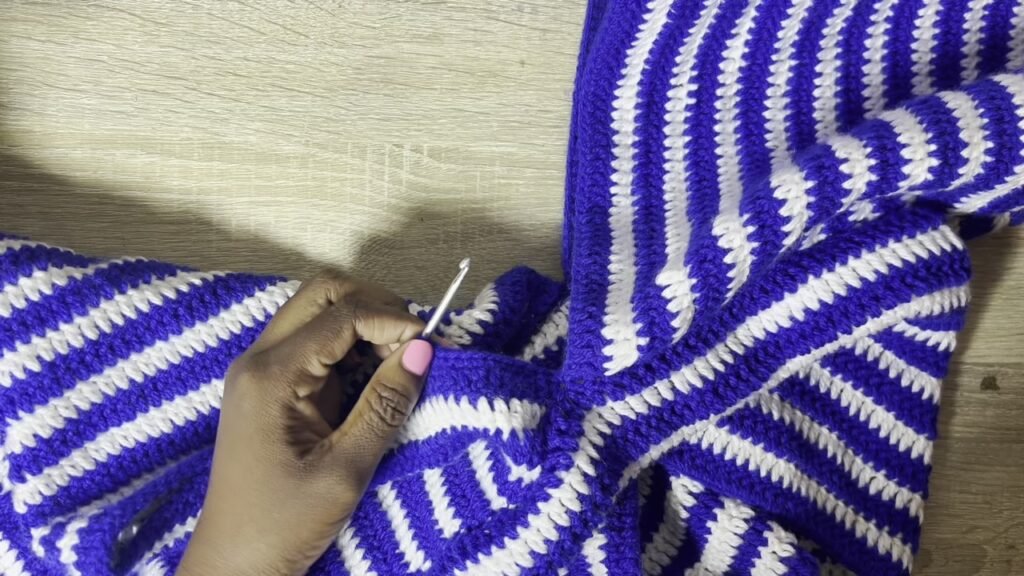
Part 4: V-Neck Border and Finishing
Adding a fitted border along the raw edges of the V-neck pulls the neckline flush against your chest and prevents your crochet top from sagging.
- Attach Color A with a slip stitch at the front center point of the V-neckline.
- Work single crochet stitches evenly up along the row ends of the right front panel, over the shoulder fold, down along the back V-neckline, up the other back side, over the left shoulder, and down to the front center.
- Place approximately 2 single crochet stitches around the post of each double crochet row end. Work these stitches with slightly firm tension so the border draws the neckline into a neat, tailored shape.
- Join with a slip stitch into the starting stitch at the V-neck point, fasten off, and leave a 6-inch tail.
- Weave in all remaining yarn tails on the inside of the garment using your tapestry needle.
Step-by-Step Garment Summary
| Garment Section | Piece Count | Key Measurements | Stitch Technique |
| Shoulder Panels | Make 2 | Ch 100, work 23 rows (98 dc per row), alternating Color A & B | Flat double crochet rows, carrying unused color underneath |
| Lower Torso Tube | Make 1 | Ch 115, join in ring, work 15 rounds (115 dc per round) | Joined double crochet rounds, turning after each round |
| Assembly | All Pieces | Fold panels over shoulders, match front/back centers to tube | Single crochet seam along waistline and lower underarms |
| Neckline Border | Trim | Work 1 round of snug single crochet along row ends | Firm single crochet border around entire front and back V-neck |
Video Tutorial
If you enjoy visual guidance alongside your written pattern, watch the complete video walkthrough below. You can see the yarn-carrying technique in action and observe how Madeline pins and seams the crochet top pieces together.
Tips and Common Mistakes
Keep these helpful tips in mind to achieve a clean, professional finish on your handmade crochet top:
- Gently Tug Carried Yarn: When carrying your non-working yarn inside the double crochet stitches, remember to pull the strand slightly every 10 to 15 stitches. This prevents the carried color from peeking through on the front side, but be careful not to pull too hard or your fabric will bunch up.
- Turn After Every Round on the Waist Tube: Turning your work after each joined round on the lower torso keeps the seam straight. If you work in continuous un-turned rounds, your seam will spiral diagonally across your back.
- Test the Waist Fit Before Proceeding: After joining your foundation chain into a circle and working Round 1, slip the ring over your head and shoulders down to your waist. It should fit comfortably with ease. If it feels restrictive, rip back and add 8 to 12 chains before continuing.
- Keep the Neckline Border Snug: Raw row edges can stretch out easily during handling. When working the single crochet border around the V-neck, maintain firm tension so the border draws the neckline neatly inward against your chest.
- Check Sleeve Length as You Go: Because the shoulder panels are simple rectangles, you can drape a panel over your shoulder at Row 18 or 20 to preview how far down your upper arm the sleeve will drape before deciding whether to stop or add more rows.
How to Style Your Crochet Top
This lightweight striped crochet top pairs effortlessly with your favorite warm-weather pieces. Wear it tucked into high-waisted denim cutoffs for a classic summer look, layer it over a swimsuit at the beach, or pair it with wide-leg linen trousers for an easy weekend outfit.
If you love making wearable garments, explore these other fun crochet patterns on the blog:
- Daisy Granny Square —> https://cozyknotty.com/daisy-granny-square/
- Crochet magic ring –> https://cozyknotty.com/crochet-magic-ring/
Frequently Asked Questions
Can I make this crochet top in one solid color instead of stripes?
Yes, this pattern works beautifully in a solid shade or with an ombre yarn. If you make a solid crochet top, you can skip the yarn-carrying steps entirely, which makes the project even faster to finish.
How do I adjust this pattern for larger or plus sizes?
To scale up this crochet top, increase the foundation chain on the shoulder panels so they measure from your underbust up over your shoulder to your back waistline with plenty of drape. Increase the waist foundation chain in multiples that circle your waist comfortably. You can also work 27 to 35 rows on the shoulder panels for wider, more relaxed sleeves.
Why is my carried yarn showing through my stitches?
If the carried yarn peeks out visibly, your working stitches may be slightly too loose, or the carried yarn may be drooping between stitches. Use a 3.5 mm hook to keep your fabric tight and remember to give the inactive yarn a gentle smoothing pull every few stitches.
Is this crochet top comfortable for hot summer weather?
Yes, especially when made with a cotton, bamboo, or linen blend yarn. The natural drape of the rectangular drop sleeves and the open V-neck allow plenty of airflow, keeping you cool on warm days.
I would love to see how your own custom-fit striped crochet top turns out, so please share your finished makes in the comments below. Happy crocheting, Sara !
One reply on “How to Crochet a Trendy Striped V-Neck Crochet Top: Easy Beginner Pattern”
[…] Crochet Top –> https://cozyknotty.com/crochet-top/ […]