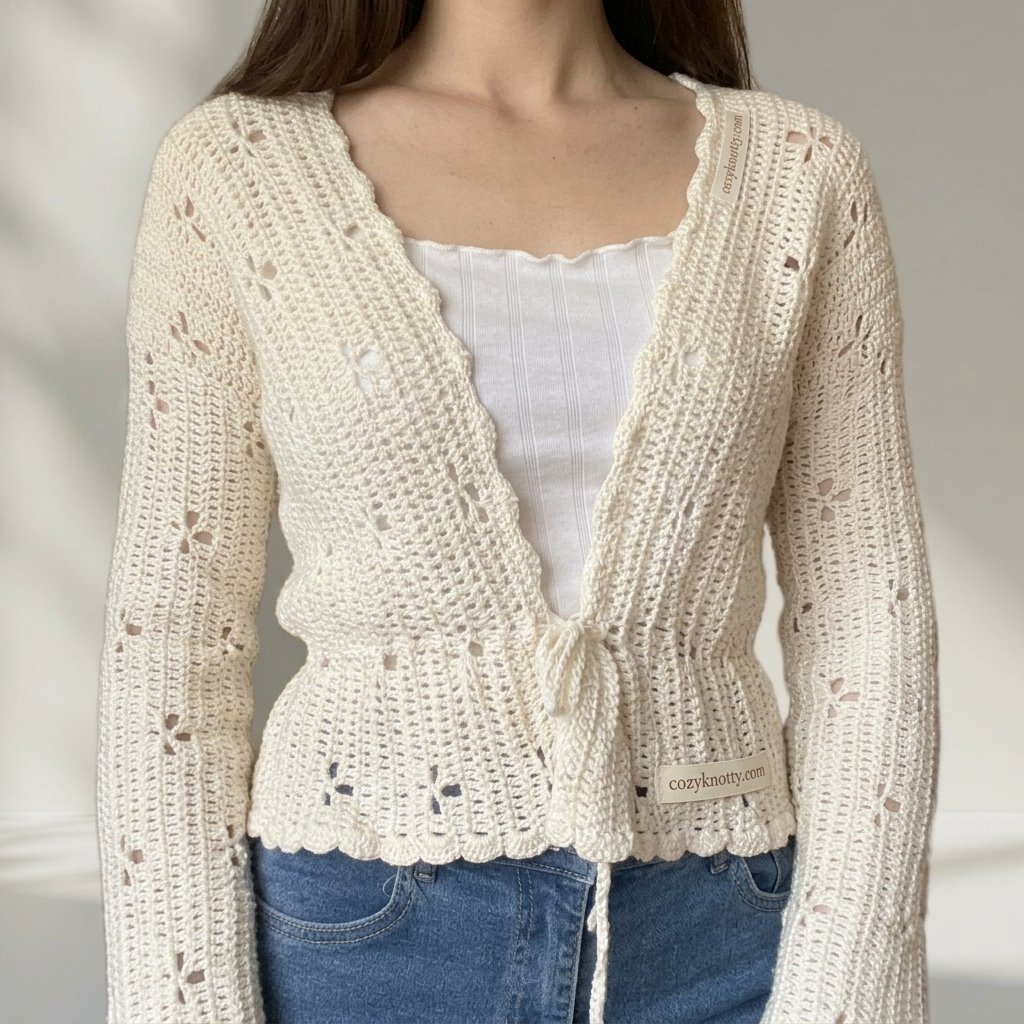
Lightweight crochet cardigans are timeless staples for any handmade wardrobe, and this floral lace crochet cardigan pattern is especially enchanting. With its staggered openwork flower motifs, delicate scalloped shell borders, and flattering waist tie cord, this cardigan brings romantic elegance to any warm-weather outfit. Because it is worked sideways with zero complex shaping, this design is both approachable and wonderfully adaptable to any body size.
There are no armhole curves, waist decreases, or complicated sewing steps required. Every single piece is joined using your crochet hook, keeping assembly smooth and enjoyable. I will guide you through each stage of the project, from working the foundation row and mastering the 6-row floral repeat to seaming the shoulders, attaching the sleeves, and adding the scalloped trim. Below, you will find the complete written pattern, helpful tips, and the full video tutorial.
This post is based on the video tutorial by Alona crochets, linked below.
Table of Contents
What Will I Learn?
Crocheting this lace garment is a fantastic way to develop your intermediate garment-making skills. By working through this pattern, you will learn:
- How to work a foundation double crochet row for stretchy, comfortable garment edges.
- How to crochet open lace floral motifs using simple chain spaces and single crochet petal anchors.
- How to stagger lace motifs across alternating row sets for a balanced, flowing pattern.
- How sideways garment construction works, using foundation length to set height and row count to set width.
- How to join garment shoulders, sleeves, and side seams cleanly with single crochet stitches.
- How to add a decorative 5-double crochet scalloped shell border around hems and neckline edges.
- How to make an adjustable textured cord tie to cinch the waistline.
Materials and Tools
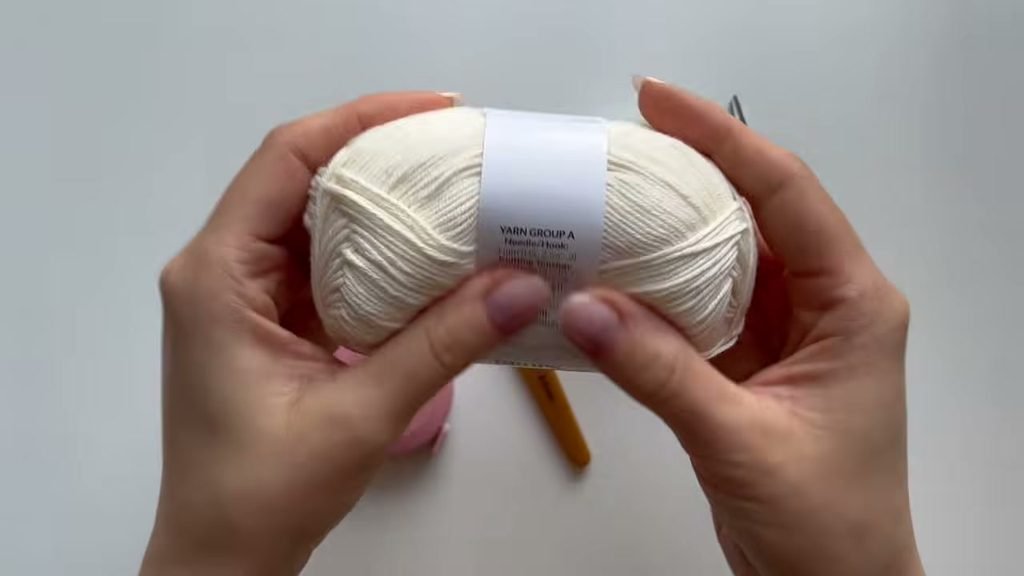
To crochet this floral cardigan, you will need a lightweight, breathable cotton or linen blend yarn that holds stitch definition and drapes gracefully.
- Yarn: Drops Safran (100% cotton, 160 meters / 175 yards per 50g ball) or any comparable sport weight yarn (Weight 2 / 5-ply). For a size Small to Medium, you will need approximately 350 to 450 grams of yarn, with additional yardage for larger sizes or longer tunic lengths.
- Crochet Hook: 3.0 mm crochet hook (or the hook size that gives you the recommended drape and fabric tension).
- Measuring Tape: Essential for checking your vertical foundation length and panel widths.
- Stitch Markers: Useful for marking armhole openings and tracking pattern repeats.
- Scissors & Tapestry Needle: For cutting yarn and weaving in ends.
You can substitute any lightweight fiber you prefer, such as bamboo, linen blend, or light fingering/DK yarn. Be sure to swatch your stitch repeat first, as fiber elasticity will affect how much the lace opens up during blocking.
Sizing and Customization
This cardigan follows a completely made-to-measure approach. Instead of following rigid size charts, you build the garment around your own body measurements.
In this pattern, the foundation row establishes the vertical length of the cardigan (from shoulder to bottom hem), while the number of rows worked establishes the horizontal width across your body.
- Cardigan Length (Foundation Stitches):
- The demonstration sample uses an 83-stitch foundation, measuring approximately 44 cm (17.5 inches) laid flat and stretching to about 50 cm (20 inches) in wear.
- To adjust the length, add or subtract stitches in multiples of 24 stitches to keep the floral lace repeat aligned.
- Cropped length: 59 stitches (83 minus 24).
- Standard length: 83 stitches.
- Longer or tunic length: 107 stitches (83 plus 24).
- Panel Widths (Row Counts):
- Back Panel: Work rows until the panel width equals half of your bust circumference plus 4 to 6 cm of comfortable ease. In the sample (84 cm bust), the back panel consists of 49 rows, measuring about 47 cm flat and stretching to 60 cm.
- Front Panels (Make 2): Work rows until each front panel covers approximately one quarter of your front torso, leaving a 10 to 13 cm opening in the center for the neckline. In the sample, each front panel has 19 rows (about 18 cm flat width).
- Sleeves (Make 2): The sleeve foundation matches the length from your shoulder down to your wrist (83 stitches in the sample). Work rows until the rectangle wraps comfortably around the widest part of your upper arm (28 rows in the sample).
Pattern Notes
Please keep these helpful pointers in mind before beginning your stitches:
- Crochet Terms: This pattern is written in standard US crochet terms with US spelling throughout.
- Skill Level: Advanced beginner to intermediate. Familiarity with basic stitches and counting pattern repeats is helpful.
- Turning Chains: A chain 3 at the start of a double crochet row counts as the first stitch. Always skip the first base stitch and begin your double crochets in the second stitch. At the end of each row, remember to place your final stitch into the top of the turning chain 3.
- Flower Stitch Mechanics: Each floral motif is built across three consecutive rows:
- First lace row: establishes the flower base with a chain-2 window (chain 2, skip 1 stitch, 1 double crochet).
- Second lace row: creates the flower center and petals (chain 2, 1 single crochet in the chain-2 space, chain 2, skip 2 stitches, 1 double crochet).
- Third row: seals the flower with solid double crochets (2 double crochet in the first chain-2 space, 1 double crochet in the single crochet, 2 double crochet in the next chain-2 space).
- Staggered Motif Layout: The cardigan alternates between two flower arrangements. Set 1 features 4 flowers along the row, while Set 2 features 3 flowers positioned directly between the flowers of Set 1.
Terms and Abbreviations
| Abbreviation | US Term Definition |
|---|---|
| ch | Chain stitch |
| sl st | Slip stitch |
| sc | Single crochet |
| dc | Double crochet |
| fdc | Foundation double crochet |
| st / sts | Stitch / stitches |
| sp / sps | Space / spaces |
| sk | Skip |
| yo | Yarn over |
Floral Crochet Cardigan Pattern
Follow along through each section: crocheting the back panel, making the two front panels, seaming the shoulders, working and attaching the sleeves, adding the scalloped border, and crafting the optional waist cord.
Part 1: The Back Panel
The back panel is worked sideways from one edge across to the other.
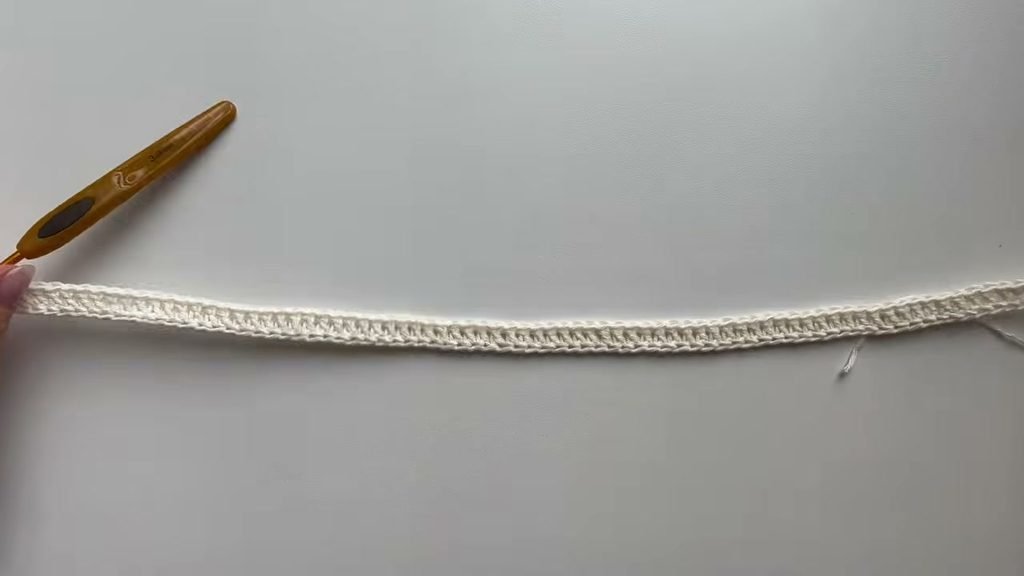
- Foundation Row: Work 83 foundation double crochet (fdc). Alternatively, chain 85, insert hook into the 4th chain from hook, and work 1 double crochet in each chain across (83 stitches total, counting the skipped 3 chains as stitch 1).
- Row 2 (Flower Set 1 Base): Chain 3, turn. Skip the first stitch, work 1 double crochet in each of the next 4 stitches (5 stitches total counting chain 3). *Chain 2, skip 1 stitch, double crochet in next stitch, work 22 more double crochet (23 double crochet total after the chain space)*. Repeat from * to * across the row until 6 stitches remain. Chain 2, skip 1 stitch, double crochet in each of the last 5 stitches. (You will have 4 chain-2 window spaces across the row).
- Row 3 (Flower Set 1 Petals): Chain 3, turn. Skip first stitch, work 1 double crochet in each of the next 2 stitches (3 stitches total, leaving 2 stitches unworked before the chain-2 space). *Chain 2, single crochet directly into the chain-2 space, chain 2, skip 2 stitches, double crochet in the 3rd stitch. Work double crochets across until 2 stitches remain before the next chain space*. Repeat from * to * across to the final flower, finish with chain 2, single crochet in space, chain 2, skip 2 stitches, and double crochet in each of the last 3 stitches.
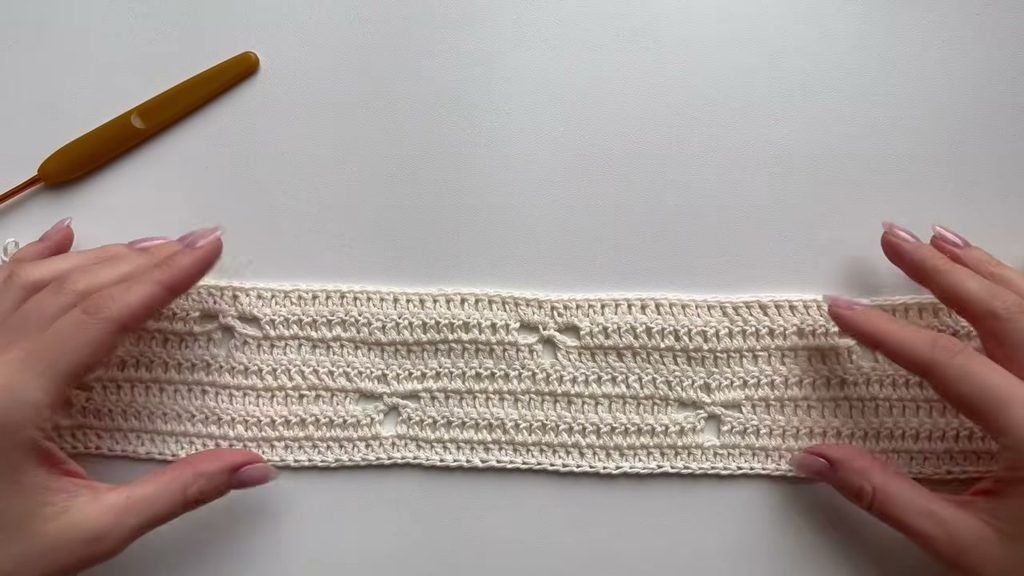
- Row 4 (Solid Row): Chain 3, turn. Work 1 double crochet in each stitch across, placing 2 double crochets in each chain-2 space, 1 double crochet in each single crochet, and 2 double crochets in the next chain-2 space. (83 double crochet total).
- Row 5 (Flower Set 2 Base – Staggered): Chain 3, turn. Work 1 double crochet in each of the next 16 stitches (17 stitches total counting chain 3). *Chain 2, skip 1 stitch, double crochet in next stitch, work 22 more double crochet (23 double crochet total)*. Repeat across to place 3 staggered flower windows, finishing with 17 double crochets to balance the row.
- Row 6 (Flower Set 2 Petals – Staggered): Chain 3, turn. Work double crochets across until 2 stitches remain before the first chain space. *Chain 2, single crochet in space, chain 2, skip 2 stitches, double crochet in next stitch. Work double crochets across to 2 stitches before the next space*. Repeat across, finishing with double crochets to the end.
- Row 7 (Solid Row): Chain 3, turn. Work a solid row of double crochets, placing 2 double crochets in each chain-2 space, 1 double crochet in each single crochet, and 2 double crochets in the next chain-2 space. (83 double crochet).
- Rows 8 through 49: Repeat Rows 2 through 7, alternating between the 4-flower set and the 3-flower set, until you complete 49 rows (or your desired back panel width). Fasten off.
Part 2: The Front Panels (Make 2)
Each front panel is worked using the exact same stitch pattern as the back panel, but with fewer total rows.
- Work the foundation row with 83 stitches, exactly matching your back panel length.
- Work Rows 2 through 7 following the floral lace pattern.
- Continue the repeat until you have completed 19 rows in total (or your desired front chest coverage).
- Fasten off, leaving an 8-inch yarn tail for shoulder joining.
- Repeat steps 1 through 4 to produce a second identical front panel.
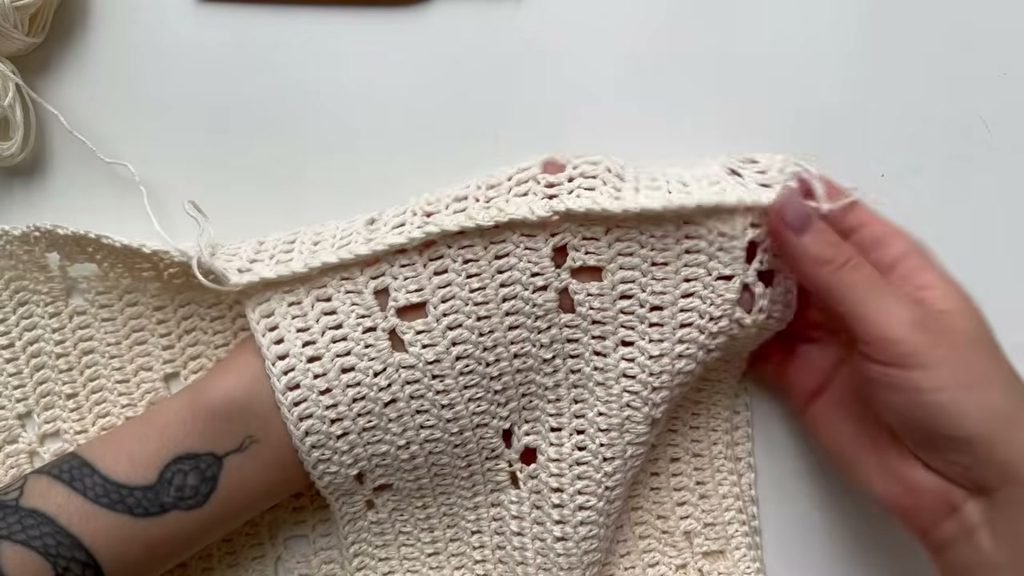
Part 3: Joining the Shoulders
Lay the back panel flat with the right side facing up. Place the two front panels on top with their wrong sides facing you, aligning the outer edges and bottom hem.
- Align the top edge of each front panel with the outer top edge of the back panel. The 10 to 13 cm open gap in the center forms the back neck opening.
- Join yarn at the outer shoulder corner. Working through both thicknesses at the same time, place 2 single crochet stitches into the side edge of each double crochet row end.
- Work single crochet stitches evenly across the top shoulder edge until the front panel row ends are joined to the back panel. Chain 1, cut yarn, and pull through.
- Repeat on the opposite shoulder, ensuring your seams are worked from the same orientation.
Part 4: Sleeves and Armhole Assembly
Try on the cardigan to check the armhole depth. Place stitch markers below your armpit on both sides (in the sample, 28 stitches down from the shoulder seam on both front and back).
- Sleeve Foundation: Work 83 foundation stitches (matching your shoulder-to-wrist arm length).
- Sleeve Rows: Work in the 6-row floral repeat for 28 rows (or the number of rows needed to circle your upper arm comfortably). Fasten off.
- Sleeve Seaming: Fold the sleeve rectangle in half lengthwise. Working through both long edges with your hook, join the seam from wrist to shoulder using single crochet stitches, stretching the fabric gently so the seam does not pull tight.
- Sleeve Cuff Border: Work around the wrist opening. Chain 1, work 1 single crochet in the first row end. In the next row end, work 5 double crochet (shell). In the following row end, work 1 single crochet. Continue alternating 5 double crochet shells and single crochet anchors around the cuff edge. Join with a slip stitch into the starting single crochet and fasten off.
- Make a second identical sleeve.
- Attaching Sleeves: Seam the cardigan side edges from the bottom hem up to the armhole marker using single crochet. Then pin the open sleeve top into the armhole opening and seam all the way around with single crochet stitches.
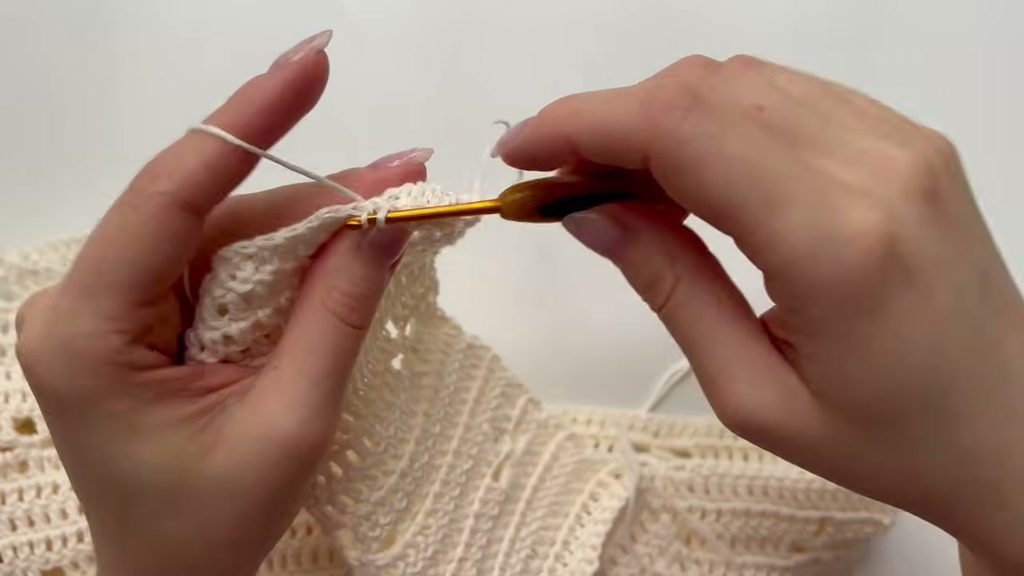
Part 5: Scalloped Shell Borders
The scalloped shell border adds a sweet vintage finish along the front opening, neckline, and bottom hem.
- With the reverse side of your garment facing you, join yarn at the lower edge of one front panel.
- Chain 1, work 1 single crochet in that corner space. Skip 2 stitches, work 5 double crochet into the third stitch. Skip 2 stitches, work 1 single crochet into the next stitch.
- Continue working this shell pattern up the vertical front edge. When you reach the side row ends along the neckline, work 5 double crochet into one row end, then 1 single crochet into the next row end.
- Continue the scalloped pattern around the back neck, down the second front panel, and continuously along the entire lower hem.
- Join with a slip stitch to the first single crochet, fasten off, and weave in all loose yarn ends.
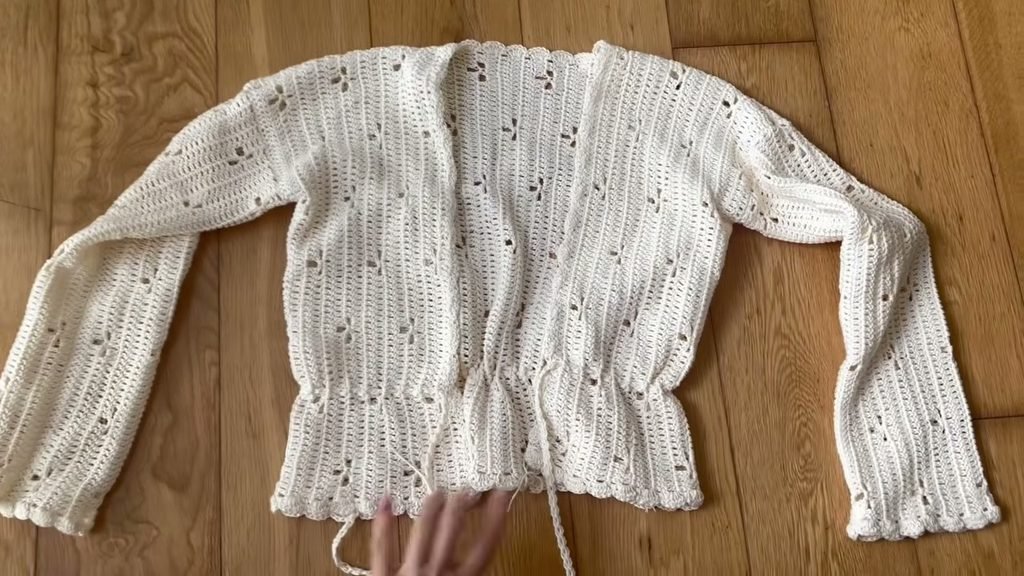
Part 6: Optional Waist Cord Tie
If you wish to cinch your cardigan at the waist, make this simple textured cord:
- Make a slip knot and chain 2. Yarn over, insert hook into the first chain, yarn over and pull up a loop (3 loops on hook). Yarn over, pull through 1 loop, then yarn over and pull through all 3 loops.
- Chain 2. Insert hook into the middle space between the turning chain and the stitch. Yarn over, pull up a loop, yarn over, pull through 1 loop, yarn over and pull through all 3 loops.
- Repeat step 2 until the cord reaches approximately 140 cm (55 inches) in total length. Fasten off.
- Try on your cardigan, locate your natural waistline, and weave the cord in and out through the lace eyelets around your torso.
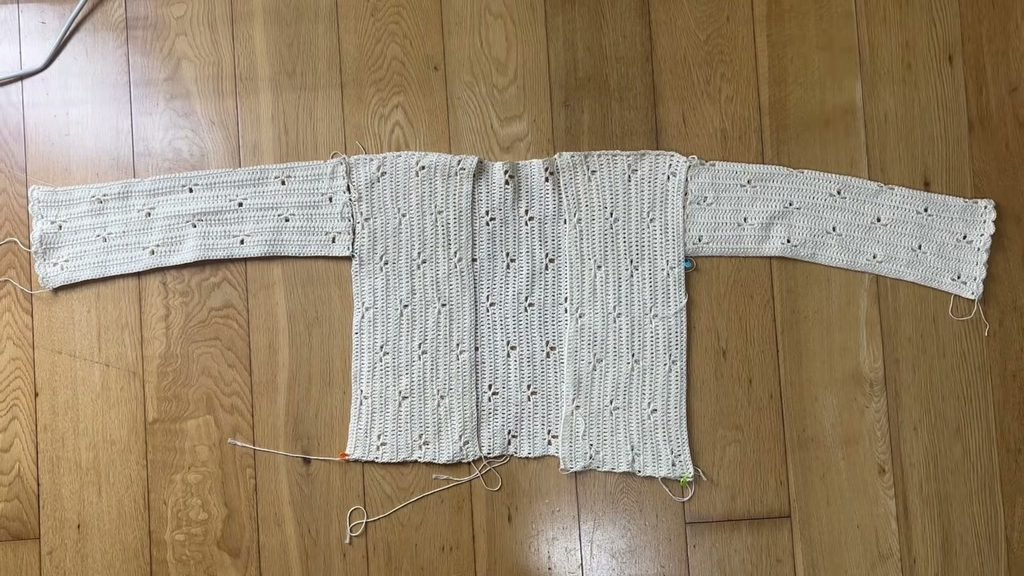
Step-by-Step Garment Summary
| Garment Piece | Foundation Stitches | Rows Worked | Finished Dimensions (Sample) |
|---|---|---|---|
| Back Panel | 83 fdc (vertical length) | 49 rows | 44 cm long, 47 cm wide flat (stretches to 60 cm) |
| Front Panels (Make 2) | 83 fdc (vertical length) | 19 rows each | 44 cm long, 18 cm wide flat each |
| Sleeve Panels (Make 2) | 83 fdc (wrist to shoulder) | 28 rows each | 44 cm long, 16-18 cm folded width |
| Borders & Cuffs | N/A | 1 round per edge | 5-dc shells and single crochet anchors |
| Waist Cord Tie | Chain 2 start | Repeated to length | 140 cm total cord length (70 cm folded) |
Video Tutorial
If you prefer watching each step worked in real time, follow along with the complete step-by-step video demonstration below. You can pause or rewind whenever you need a closer look at the floral lace repeat or assembly technique.
Tips and Common Mistakes
Keep these practical suggestions in mind for the neatest finished cardigan:
- Use Foundation Double Crochet for Flexible Hems: Starting with standard chains can create a tight edge that pulls or puckers. If you use chains instead of foundation double crochet, go up one full hook size for the chain to preserve elasticity.
- Count Your Stitches on Every Solid Row: Every solid double crochet row (Rows 1, 4, and 7) must maintain your original count of 83 stitches. Remember that each chain-2 space receives 2 double crochets and each single crochet receives 1 double crochet.
- Watch Your Turning Chain Placement: The final double crochet of each row must be worked into the top of the turning chain 3 from the row below. Skipping this stitch causes your panel edges to taper inward.
- Keep Single Crochet Seams Relaxed: When joining panels with single crochet, give your fabric a gentle stretch every 10 stitches. A tight crochet seam will cause puckering along the shoulders and sides.
- Block Before Final Wear: Because cotton yarn relaxes when washed, pin your finished cardigan flat and steam or mist lightly with water to open up the delicate flower petals.
How to Style and Make More
This floral lace cardigan pairs beautifully over sun dresses, camisoles, and high-waisted jeans. Wear it open for a breezy bohemian look or cinched with the waist tie for a defined silhouette.
If you enjoyed this crochet cardigan pattern, explore these other garment tutorials on the blog:
- Crochet flower peony —> https://cozyknotty.com/crochet-flower/
- crochet baby blanket –> https://cozyknotty.com/crochet-baby-blanket/
- Daisy Granny Square –> https://cozyknotty.com/daisy-granny-square/
Frequently Asked Questions
Can I make this cardigan longer or shorter?
Yes, you can easily customize the length by adding or subtracting stitches from your foundation row. Because each floral repeat occupies 24 stitches, adjust your foundation count by multiples of 24 (such as 59 stitches for a cropped fit or 107 stitches for tunic length).
Can I use acrylic yarn instead of cotton?
Yes, you can use any yarn fiber you prefer. Keep in mind that cotton provides crisp stitch definition and cool breathability for summer, while acrylic yarn will produce a softer, warmer drape suitable for autumn layering.
How do I know how many rows to make for my size?
Measure your bust circumference and divide by two. Work rows on your back panel until the flat width equals that half-bust measurement plus 4 to 6 cm of ease. For the front panels, work rows until each side covers about half of your chest, leaving a comfortable 10 to 13 cm opening for the neck.
Do I have to add the waist cord?
Adding a waist tie is entirely up to your personal style preference. The design wears beautifully as a relaxed open-front duster without any cord, or you can add small buttons along the vertical opening instead.
I would love to see your finished floral cardigan, so please share your color choices and completed makes in the comments below. Happy crocheting, Sara!