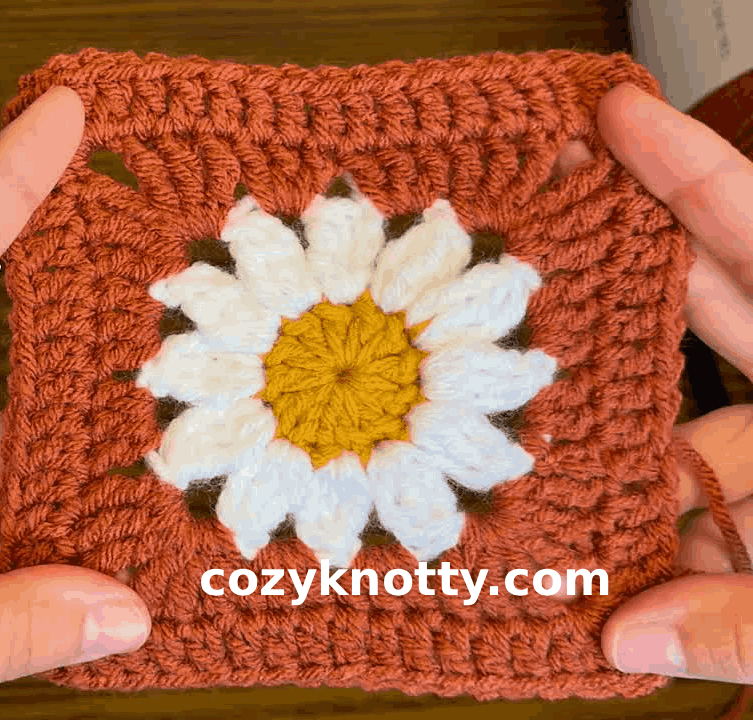
The daisy granny square is one of the most cheerful, classic motifs in crochet. With its sunny yellow center, textured dimensional petals, and neat square frame, this motif turns simple stitches into a miniature work of art. You can join several squares together to create vibrant summer blankets, market tote bags, cushion covers, or lightweight cardigans.
Although the floral center looks intricate, this pattern is completely accessible for confident beginners. I will guide you through every stage of the process, including starting with a magic ring, working treble crochet cluster petals, cleanly joining new yarn colors, and turning a circular flower into a crisp four-sided square. Below, you will find the complete written pattern, helpful tips, and the full video tutorial.
This post is based on the video tutorial by Heritage Charm Crochet, linked below.
Table of Contents
What Will I Learn?
Working this floral square helps you practice several core crochet skills that apply to many other projects. By following this guide, you will master the following techniques:
- Creating a tight, adjustable foundation using the magic ring.
- Crocheting 12 double crochet stitches into a ring to build a circular flower center.
- Working treble crochet cluster stitches (3 treble crochet together) to form raised, textured daisy petals.
- Attaching new yarn colors seamlessly with a simple slip knot and slip stitch join.
- Squaring a round circle using a combination of double crochet groups and treble crochet corner clusters.
- Adding a clean, solid double crochet border that makes joining finished squares simple and uniform.
Materials and Tools
To crochet this daisy granny square, you need only a few basic supplies and three contrasting yarn shades. Choosing smooth acrylic or cotton blend yarn helps the individual petals pop clearly.
- Yarn: Medium worsted weight yarn (Category 4) in three colors:
- Color A (Middle): Yellow or mustard for the flower center.
- Color B (Petals): Crisp white or cream for the daisy petals.
- Color C (Outer Border): Rust orange, sage green, navy blue, or any contrasting background color.
- Crochet Hook: 5.0 mm (US H/8) crochet hook (or 5.5 mm US I/9 depending on your personal tension).
- Tapestry Needle: A blunt yarn needle for weaving in ends.
- Scissors: For cutting yarn tails between color changes.
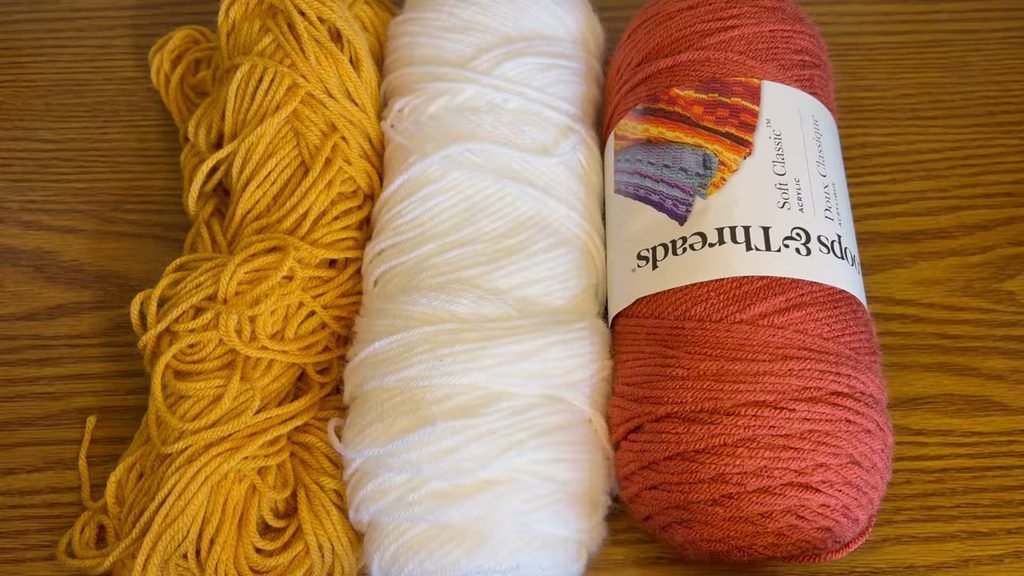
You can substitute any yarn weight you prefer, including DK weight cotton or chunky yarn. When altering the yarn thickness, pair your yarn with the hook size recommended on the ball band so your stitches remain neat without pulling too tight.
Sizing and Gauge
Using medium worsted weight yarn and a 5.0 mm crochet hook, each finished daisy granny square measures approximately 4.5 inches by 4.5 inches (11.5 cm by 11.5 cm). [CHECK: exact finished dimensions were not measured on screen in the video].
Exact gauge is not critical when crocheting individual motifs for decorative projects. However, maintaining consistent hand tension across all your squares ensures that every block turns out the same size, which makes assembling blankets or bags much easier. If your square curls tightly into a bowl, try relaxing your tension or moving up half a hook size. If your square ripples along the edges, switch to a slightly smaller hook.
Pattern Notes
Please read through these helpful notes before picking up your hook:
- Crochet Terms: This pattern is written in standard US crochet terms with US spelling throughout.
- Skill Level: Confident beginner. The pattern uses basic stitches along with treble crochet clusters.
- Color Sequence: Work Round 1 in yellow (Color A), Round 2 in white (Color B), and Rounds 3 and 4 in your chosen background color (Color C).
- Fastening Off: Cut your yarn and fasten off at the end of Round 1 and Round 2. Do not cut your yarn after Round 3, because Round 4 continues directly with the same background yarn.
- Chain Counts: In Round 1, the starting chain 3 counts as the first double crochet. In Round 2, the starting chain 3 forms the first leg of the initial petal cluster. In Round 3, the starting chain 3 counts as the first double crochet of the side cluster. In Round 4, the starting chain 2 counts as the first double crochet.
- Treble Cluster Technique: Each petal in Round 2 consists of 3 treble crochet stitches worked together in the same stitch. Yarn over twice, insert hook into the stitch, yarn over, pull up a loop, [yarn over, pull through two loops] twice, leaving two loops on the hook. Repeat this twice more in the same stitch until you have four loops on the hook, then yarn over and pull through all four loops at once.
Terms and Abbreviations
| Abbreviation | US Term Definition |
| ch | Chain stitch |
| sl st | Slip stitch |
| dc | Double crochet |
| tr | Treble crochet (triple crochet) |
| st / sts | Stitch / stitches |
| sp / sps | Space / spaces |
| yo | Yarn over |
| 3 tr tog | 3 treble crochet together (petal cluster stitch) |
Daisy Granny Square Pattern
Follow along round by round to make your daisy granny square. Take your time on the petal round to ensure each cluster is plump and even.
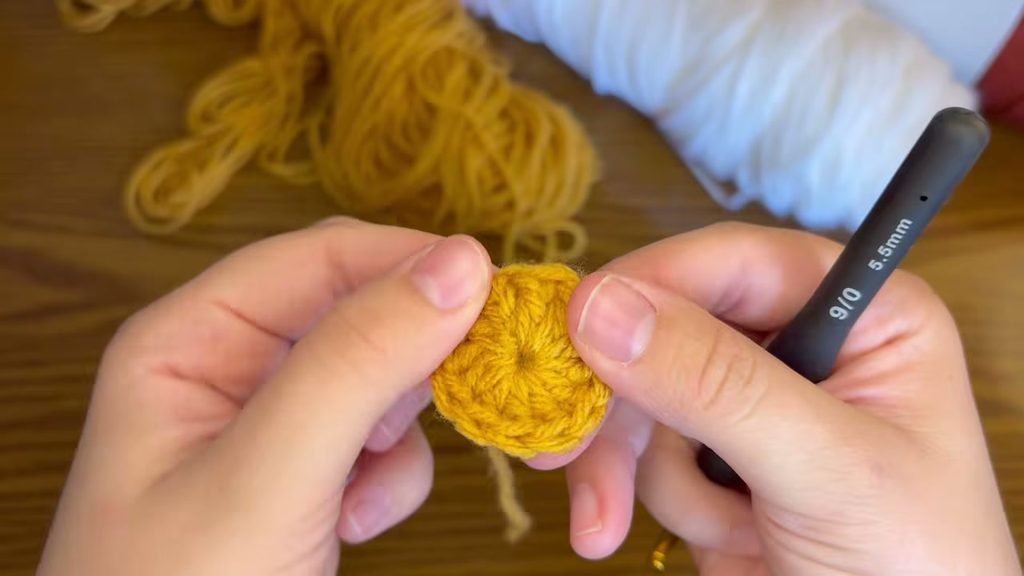
Round 1: Yellow Daisy Center
With Color A (yellow), begin by creating a magic ring.
- Chain 3. This starting chain counts as your first double crochet stitch.
- Work 11 double crochet into the center of the magic ring.
- Count your stitches carefully around the ring. Including the starting chain 3, you should have 12 double crochet stitches in total.
- Gently pull the yarn tail to close the center hole firmly.
- Join the round with a slip stitch into the top of the beginning chain 3.
- Cut the yellow yarn, fasten off, and pull the working loop through. Pull the foundation tail once more to ensure the center ring is cinched completely shut.
Stitch count: 12 double crochet stitches.
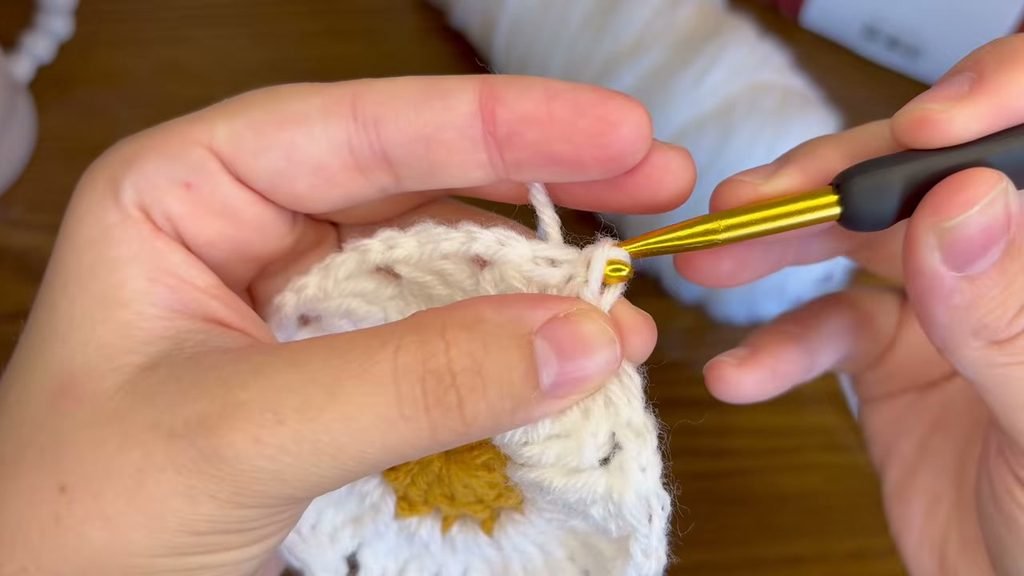
Round 2: White Petals
Take Color B (white) to build the daisy petals. You will work into each of the 12 stitches from Round 1 without skipping any stitches.
- Place a slip knot on your hook. Insert your hook under both top loops of any double crochet from Round 1, and make a slip stitch to join the white yarn securely.
- First Petal: Chain 3 (counts as the first partial treble). Yarn over twice, insert hook into the exact same stitch, yarn over and pull up a loop. Yarn over and pull through two loops, yarn over and pull through two loops (2 loops remain on hook). Yarn over twice, insert hook into the same stitch again, yarn over and pull up a loop, yarn over and pull through two loops, yarn over and pull through two loops (3 loops remain on hook). Yarn over and pull through all 3 loops on your hook. Chain 2 to complete the petal spacing.
- Petals 2 through 12: In the very next stitch, work a 3 treble crochet together cluster (3 tr tog). Yarn over twice, insert hook into the stitch, yarn over, pull up a loop, [yarn over, pull through two loops] twice (2 loops on hook). Yarn over twice, insert into the same stitch, [yarn over, pull through two loops] twice (3 loops on hook). Yarn over twice, insert into the same stitch once more, [yarn over, pull through two loops] twice (4 loops on hook). Yarn over and pull through all 4 loops on your hook. Chain 2.
- Repeat step 3 in every remaining stitch around the circle. Do not skip any stitches. You must complete 12 distinct petals separated by chain-2 spaces.
- After working the 12th petal, chain 2. Join the round by working a slip stitch into the top of the initial chain-3 petal cluster.
- Cut the white yarn and fasten off.
Stitch count: 12 petal clusters, 12 chain-2 spaces.
Round 3: Squaring the Circle
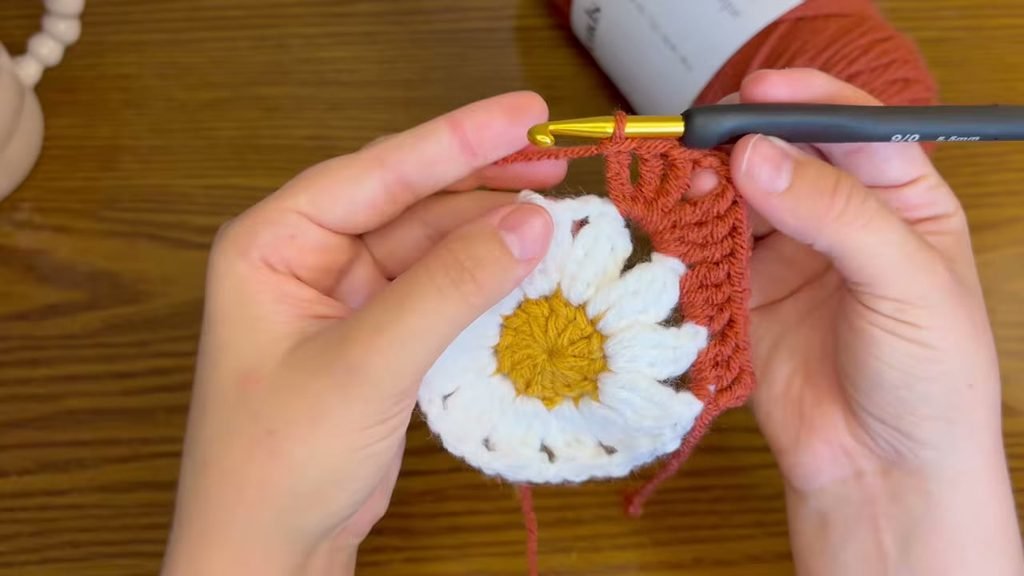
Now take Color C (rust orange or your preferred background color). In this round, you work solely into the chain-2 spaces between the petals to transform the circular daisy into a flat four-corner square.
- Place a slip knot on your hook. Join Color C with a slip stitch into any chain-2 space around the flower.
- First Side Group: Chain 3 (counts as 1 double crochet). Work 2 double crochet into the same chain-2 space.
- Second Side Group: In the next chain-2 space, work 3 double crochet. You now have two consecutive groups of 3 double crochet along the first side.
- Corner 1: In the next chain-2 space, work the first corner: 3 treble crochet, chain 2, and 3 treble crochet, all into that single space. The taller treble stitches build the corner point.
- Side 2: In the next chain-2 space, work 3 double crochet. In the following chain-2 space, work 3 double crochet.
- Corner 2: In the next chain-2 space, work [3 treble crochet, chain 2, 3 treble crochet].
- Side 3: In the next chain-2 space, work 3 double crochet. In the following chain-2 space, work 3 double crochet.
- Corner 3: In the next chain-2 space, work [3 treble crochet, chain 2, 3 treble crochet].
- Side 4: In the next chain-2 space, work 3 double crochet. In the following chain-2 space, work 3 double crochet.
- Corner 4: In the final chain-2 space, work [3 treble crochet, chain 2, 3 treble crochet].
- Join the round with a slip stitch into the top of the beginning chain 3. Do not cut your yarn.
Stitch count: 4 corners of [3 tr, ch 2, 3 tr] and 8 side groups of 3 dc (totaling 24 treble crochet, 24 double crochet, and 4 corner chain-2 spaces).
Round 4: Solid Double Crochet Border
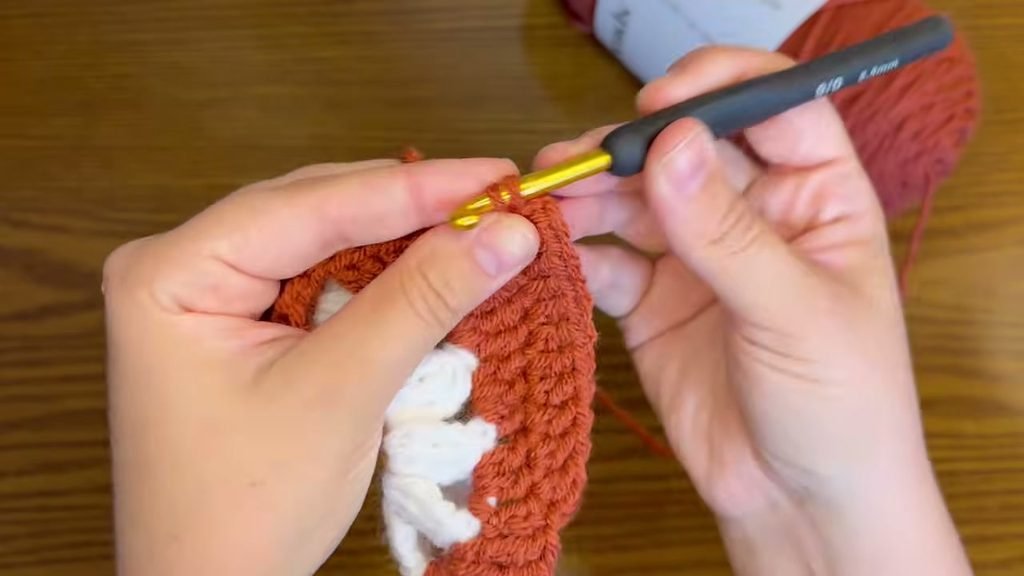
Continuing with Color C, this final round adds structural stability and creates smooth, solid edges that make joining squares clean and hassle-free.
- Chain 2. This starting chain counts as your first double crochet stitch.
- Work 1 double crochet into each stitch across the side until you reach the corner chain-2 space. Be sure to work into the top of every treble and double crochet stitch.
- Corner: In the corner chain-2 space, work 2 double crochet, chain 2, and 2 double crochet.
- Work 1 double crochet in every stitch along the next side (12 stitches in total across the side).
- Work [2 double crochet, chain 2, 2 double crochet] into the corner chain-2 space.
- Repeat working 1 double crochet in each stitch along the remaining sides and [2 double crochet, chain 2, 2 double crochet] in each corner space.
- After working the final corner, work 1 double crochet into any remaining stitches before the start of the round, then join with a slip stitch into the top of the beginning chain 2.
- Cut your yarn leaving a 6-inch tail for weaving, and pull the loop through to fasten off.
Stitch count: 16 double crochet per side (64 double crochet total) plus 4 corner chain-2 spaces.
Finishing and Blocking
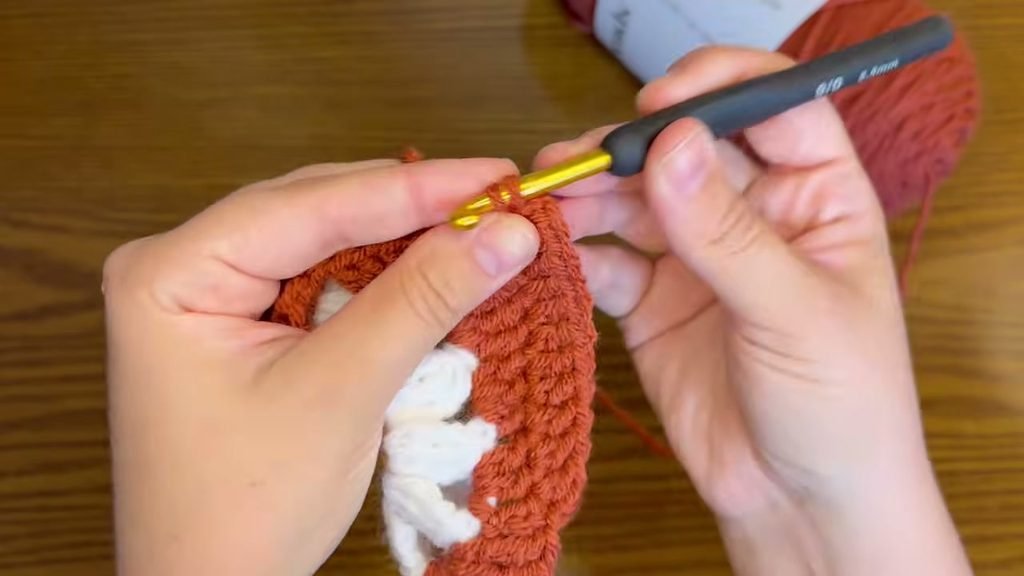
Thread your tapestry needle with each yarn tail on the back of the work. Weave each tail securely through several stitches in one direction, then turn and weave back in the opposite direction before trimming the excess. Pay extra attention to the yellow center tail: weave it around the base of the Round 1 stitches in a tight circle so the magic ring will never pull loose during washing.
For the crispest presentation, pin your finished squares to a blocking board with rust-proof pins, spritz lightly with cold water, and allow them to dry completely. Blocking opens up the petals and produces sharp, straight square edges.
Step-by-Step Round Summary
| Round | Yarn Color | Key Stitches and Placement | Total Stitches |
| Round 1 | Color A (Yellow) | Magic ring, ch 3 (counts as dc), 11 dc into ring, sl st to join | 12 dc |
| Round 2 | Color B (White) | Join with sl st, 12 petals of [3 tr tog, ch 2] worked in each st around, sl st to join | 12 petals, 12 ch-2 sps |
| Round 3 | Color C (Orange) | Join in ch-2 sp, work [3 dc] in side sps and [3 tr, ch 2, 3 tr] in corner sps, sl st to join | 24 dc, 24 tr, 4 corner ch-2 sps |
| Round 4 | Color C (Orange) | Ch 2 (counts as dc), 1 dc in every st across sides, [2 dc, ch 2, 2 dc] in each corner sp, sl st to join | 64 dc (16 per side), 4 corner ch-2 sps |
Video Tutorial
If you prefer watching the stitches worked in real time, follow along with the complete step-by-step video demonstration below. You can pause or rewind any section whenever you need a closer look at stitch placement.
Tips and Common Mistakes
Keep these practical troubleshooting tips in mind as you crochet your squares:
- Count Your Stitches on Round 1: You must have exactly 12 double crochet stitches (including the chain 3) at the end of Round 1. If you end up with 11 or 13 stitches, your petals will not divide evenly into four corners during Round 3.
- Do Not Forget the Chain 2 Between Petals: In Round 2, always work a chain 2 after every single 3-treble cluster. Those chain-2 spaces provide the foundation openings where all of Round 3 will be worked.
- Secure the Magic Ring Firmly: Pull the magic ring tail firmly after completing Round 1. Weave the tail in securely with a tapestry needle, passing back and forth through the base stitches at least three times so it will never unspool.
- Maintain Consistent Treble Height: Keep your yarn tension relaxed when pulling through the two loops of each treble crochet in Round 3. If your trebles are worked too tightly, the corners will pull inward and make the square cup.
- Catch the First Stitch After Each Corner: In Round 4, the very first stitch right after a corner can hide slightly under the corner cluster. Make sure your hook goes into that first stitch so your side count remains at 16 double crochet.
What to Make With Daisy Granny Squares
Because this square has a sturdy solid border, joining several motifs together is quick and enjoyable. Here are a few creative ideas for using your daisy squares:
- Summer Daisy Tote Bag: Join 13 or 15 squares together to create a charming retro tote bag.
- Cozy Floral Baby Blanket: Combine 30 to 48 pastel daisy squares with a wide scalloped border for a treasured nursery gift.
- Daisy Patchwork Pillow: Sew a 3 by 3 grid of 9 squares for the front of a decorative accent cushion.
- Explore More Free Patterns :
- Crochet Newborn Blanket –> https://cozyknotty.com/crochet-newborn-blanket/
Frequently Asked Questions
Can I use different yarn weights for this daisy granny square?
Yes, you can make this motif with sport weight, DK, worsted, or bulky yarn. Simply adjust your crochet hook to match your chosen yarn weight. Thinner yarns create delicate, small motifs perfect for garments, while thicker yarns make large, plush squares ideal for floor pillows and heavy throws.
Why is my daisy granny square curling or not lying flat?
Curling usually happens when your chain-2 spaces in Round 2 or Round 3 are worked too tightly. If your square curls up into a bowl, try loosening your hand tension slightly or adding an extra chain to the corner spaces. Blocking your finished square with damp blocking pins will also flatten minor curling.
How do I join daisy granny squares together smoothly?
Because Round 4 produces a clean, solid double crochet border with 16 stitches per side, you can easily join squares using a slip stitch join through the back loops only, a whipstitch with a yarn needle, or a continuous join-as-you-go method.
Do I have to use a magic ring to start the square?
While the magic ring gives the tightest, cleanest center hole, you can also start by chaining 4 and working a slip stitch into the first chain to form a small ring. Then work your Round 1 chain 3 and 11 double crochet into the center of that chain ring.
I would love to see the cheerful color combinations you choose for your daisy granny squares, so please share your finished makes in the comments below. Happy crocheting, Sara!
4 replies on “How to Crochet a Daisy Granny Square: Easy Beginner Pattern”
[…] Daisy Granny Square —> https://cozyknotty.com/daisy-granny-square/ […]
[…] Daisy Granny Square –> https://cozyknotty.com/daisy-granny-square/ […]
[…] Daisy Granny Square –> https://cozyknotty.com/daisy-granny-square/ […]
[…] Daisy Granny Square –> https://cozyknotty.com/daisy-granny-square/ […]